We’re going to go over creating an anonymous shared folder and a shared folder available only to certain users. This will work relatively for most linux distributions, distros like CentOS will require some SELinux changes. In this tutorial I will be using openSUSE as my distribution but the commands will be rather the same.
Configure SAMBA Shares
1. Install the SAMBA service.
openSUSE
sudo zypper in samba -y
Debian/Ubuntu:
sudo apt install samba -y
CentOS:
sudo yum install samba -y
NOTE: Some distributions might require to install the package
samba-serverinstead of justsamba.
2. Create the folder you want to share.
The location can technically be anywhere you want, some admins place them under /opt, some in the root (/) or even inside a home folder. Im going to place my shared folder under /srv.
					sudo mkdir /srv/anonymous
sudo mkdir /srv/accounting
3. Lets create the user group accounting.
sudo groupadd accounting
4. Now create a set of users for the group accounting and we will add them to the group.
					sudo useradd chris -G accounting -m
sudo useradd angela -G accounting -m
sudo useradd taylor -G accounting -m
If you wish to later add the users’ to a group, you can do so with the usermod command.
					sudo usermod -aG accounting chris
sudo usermod -aG accounting angela
sudo usermod -aG accounting taylor
Parameters:
- -G: Adds a supplementary group when creating the user
- -m: Creates the user’s home directory during creation
Lets verify the users’ are part of the group accounting by running the following command.
					linuxman@linux-m4u5:/srv> groups chris angela taylor
chris : users accounting
angela : users accounting
taylor : users accounting
NOTE: Notice that the users' are also part of the group
users, in some distributions like Ubuntu, upon user creation they will be assigned to a group with the same name as their username.
Here we see that all users’ have been added to the accounting group. Now lets check if the home directory of the users’ exist with the following command.
					linuxman@linux-m4u5:/srv> ls /home
angela chris linuxman taylor
And as we can see, the home directory has also been successfully created.
5. Lets set the password for each user created using the passwd command and the smbpasswd command. The passwd command is for PAM authentication to the system and smbpasswd is for authenticating with SAMBA shares.
					sudo passwd chris
sudo smbpasswd -a chris

sudo passwd angela
sudo smbpasswd -a angela

sudo passwd taylor
sudo smbpasswd -a taylor
NOTE: The password I'm going to assign each user will be the same as their username, the command will alert that the password is BAD. In production, you will want to create secure passwords.
6. Lets set the appropriate permissions for our shares.
Anonymous permissions will be simple, we will give full access to all.
sudo chmod 0777 /srv/anonymous -R
For the users’ Chris, Angela and Taylor, we will give them permissions via ACL’s using the setfacl command. Remember we added them to the accounting group, so we will give the group accounting permissions to the accounting folder.
					sudo setfacl -R -m g:accounting:rwx accounting/
sudo setfacl -R -m d:group:accounting:rwx accounting/
7. Now that users are created and the permissions are set, lets add our shares to our samba configuration. Using your favorite text editor, edit the file /etc/samba/smb.conf.
sudo vim /etc/samba/smb.conf
NOTE: On some distributions that require the
samba-serverpackage, the configuration file would be namedsmbd.conf.
At the bottom of the config, add the accounting share and the anonymous share in the following format.
					[accounting]
    comment = Accounting share for group 'accounting'
    path = /srv/accounting
    writeable = yes
    browseable = yes
    create mask = 0777
    directory mask = 0777
    force group = accounting
[anonymous]
    comment = Public Anonymous share for anyone to use
    path = /srv/anonymous
    writeable = yes
    browseable = yes
    create mask = 0777
    directory mask = 0777
    guest ok = yes
    force user = nobody
Parameters:
- comment: Adds a comment to the share folder.
- path: Sets the path of the folder that will be shared.
- writeable: Indicates whether users of a service can modify files in this directory.
- browsable: Indicates whether this share will be listed as a share in net view.
- create mask: This is the default permissions that will be set to newly created files of the share.
- directory mask: This is the default permissions that will be set to newly created directories of the share.
- force group: Specifies the group as the default group to have access to the share.
- force user: Specifies the user as the default user to have access to the share.
- guest ok: Indicates that connecting to this share will require no password for authentication.
8. Lets enable the service and start SAMBA then verify the shares are active.
					sudo systemctl enable smb.service
sudo systemctl start smb.service
Check the status to make sure there were no errors starting the service.
sudo systemctl status smb.service
NOTE: On some distributions the service may be masked as
smbdinstead ofsmb.Verify the shares are active using the
smbclientcommand. On some distributions you may have to install this separately.
					linuxman@linux-m4u5:/srv> smbclient -L localhost
Enter WORKGROUP\linuxman's password:

  Sharename    Type   Comment
  ---------    ----   -------
  profiles     Disk   Network Profiles Service
  users        Disk   All users
  groups       Disk   All groups
  print$       Disk   Printer Drivers
  accounting   Disk   Accounting share for group 'accounting'
  anonymous    Disk   Public Anonymous share for anyone to use
  IPC$         IPC    IPC Service (Samba 4.7.11-git.153.b36ceaf2235lp150.3.14.1-SUSE-oS15.0-x86_64)
Reconnecting with SMB1 for workgroup listing.

  Server         Comment
  ---------      -------

  Workgroup      Master
  ---------      -------
9. On some distributions you may need to allow access from the firewall. Lets allow access to ports 445 and 139 on the firewall.
If your firewall is FIREWALLD, add the ports as permanent and restart FIREWALLD.
					sudo firewall-cmd --zone public --add-port 445/tcp --add-port 139/tcp --permanent
sudo systemctl restart firewalld.service
If your firewall is UFW, add the ports and a restart is usually not needed.
sudo ufw allow 445,139/tcp
Testing Access
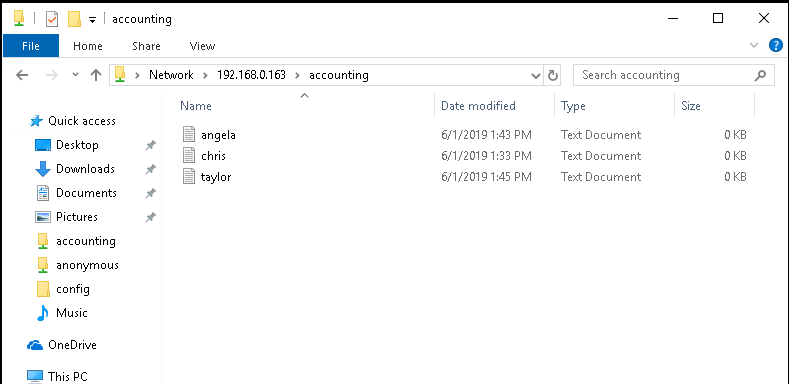
1. I will test access from a Windows 10 VM. I logged in as each user and created a txt file with their name as the file name.
2. From our server, if we browse to the accounting folder and run the below command, we see that the txt file for each user has the appropriate permissions and we can see who is the owner.
					linuxman@linux-m4u5:> cd /srv/accounting/
linuxman@linux-m4u5:/srv/accounting> ls -l
total 0
-rwxrwxrw-+ 1 angela accounting 0 Jun 1 13:43 angela.txt
-rwxrwxrw-+ 1 chris  accounting 0 Jun 1 13:33 chris.txt
-rwxrwxrw-+ 1 taylor accounting 0 Jun 1 13:45 taylor.txt
linuxman@linux-m4u5:/srv/accounting>
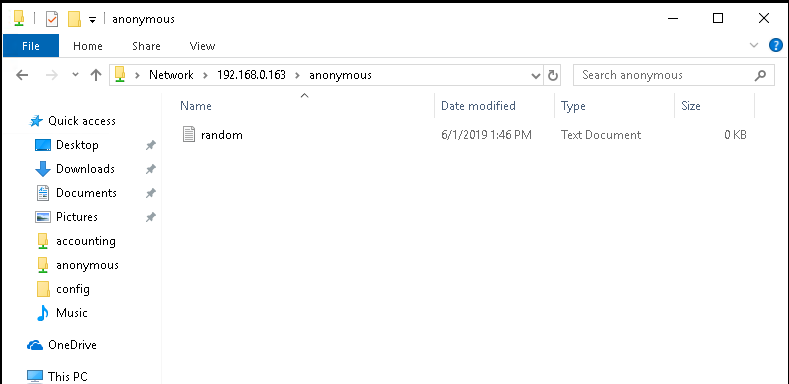
3. Now i created a file in the anonymous folder called random.txt.
4. Now if we browse to the anonymous folder from our server and run the commands below, we see that the appropriate permissions are applied.
					linuxman@linux-m4u5:> cd /srv/anonymous/
linuxman@linux-m4u5:/srv/anonymous> ls -l
total 0
-rwxrw-rw- 1 nobody nobody 0 Jun 1 13:46 random.txt
linuxman@linux-m4u5:/srv/anonymous>
This concludes creating a shared folder for anonymous users and users with permissions.


