It’s 2022 and you don’t have a blog yet? It’s time to get to it! WordPress is an easy and great blogging ecosystem to jump into as you can have something that looks pretty decent up and running quickly. WordPress is very extensible and has pretty much a plugin for everything. It doesn’t power 40% of websites for no reason. So let’s get this site out there!
Pre-installation (or the L in the room)
Before we install WordPress, we’ll need to setup a web stack on our target machine. A web stack is typically a set of software that works together to allow a server to host websites and apps. The most commonly used stack to serve WordPress is a LAMP stack that consists of Linux, Apache, MySQL, and PHP. In our case, the Linux we’ve chosen for our web server is Ubuntu. I’m going to assume you have a target machine with Ubuntu installed either locally, in the cloud, or virtually and have terminal access to it. Otherwise you’ll need to take care of that first, the easiest place to start is using a virtual machine, as I’ll be doing here as its practically identical to what you would do on a VPS/cloud provider, minus an extra step or two. I’ll be using the latest Ubuntu LTS, which at the time of this writing is 22.04.
A note on server Security
If you are already on a VPS, here’s a handy list of basic security tasks you’ll want to cross out before you install WordPress:
- Enable SSH key login
- Harden your SSH
- Change the default SSH port
- Disable root SSH
- Setup a Firewall (UFW or other)
- Setup Fail2ban
Luckily for you, we’ve covered these topics already on Linuxman: Check out this article for help hardening your SSH login, this article to beef up your server security, these two articles for setting up UFW (Part 1, Part 2), and finally this article to setup fail2ban. Your web server will thank you.
Installing Apache
With the L taken care of let’s install our web server, Apache. Apache will serve up our WordPress instance but can also host a variety of other web pages, but more on that in another article. For now, just make sure you’ve updated your system before you install anything for the most up-to-date and secure version of your OS.
					# all in one command on Ubuntu/Debian:
sudo apt update && sudo apt upgrade -y

# install apache
sudo apt install apache2
Once that’s installed, you’ll want to allow Apache through your firewall. The default ports for web traffic are 80 for HTTP, and 443 for HTTPS, instead of adding them separately we can just use UFW’s profile and we’ll be able to add both under one rule.
					#to see available profiles
sudo ufw app list

# allows web traffic through ports 80 & 443
sudo ufw allow "Apache Full"

#to check whats being allowed/denied
sudo ufw status
http://server_ip.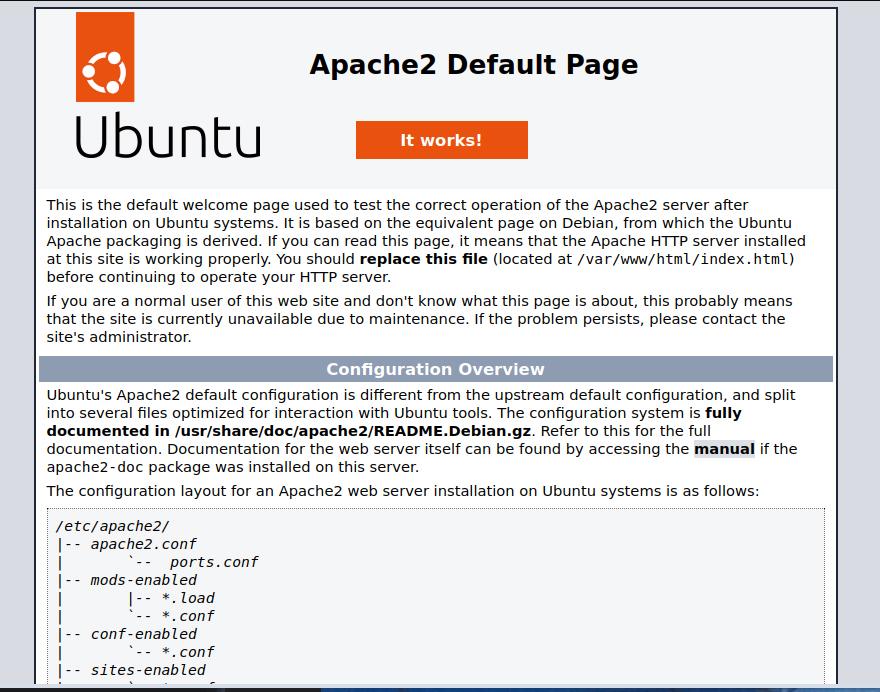
Setting up a virtual host in Apache
The default Apache page is cool and all but we need to see our blog! In order to do that, we need to create a virtual host file, which is just Apache talk for configuration file. By default, Apache will serve files out of /var/www/html. Personally I opt for serving out of /var/www/ instead, with the name of the domain as a sub directory. I find that this keeps things neat and compartmentalized. Lets do that for our WordPress site now:
sudo mkdir /var/www/my_wordpress.com
Apache stores its virtual hosts in this directory /etc/apache2/sites-available/. Let’s go ahead and create a virtual host for our WordPress site now.
					sudo vim /etc/apache2/sites-available/my_wordpress.conf

#/etc/apache2/sites-available/my_wordpress.conf
<VirtualHost *:80>
    ServerAdmin webmaster@localhost
    ServerName my_wordpress.com
    ServerAlias www.my_wordpress.com
    DocumentRoot /var/www/my_wordpress.com
    ErrorLog ${APACHE_LOG_DIR}/error.log
    CustomLog ${APACHE_LOG_DIR}/access.log combined
</VirtualHost>

<Directory /var/www/my_wordpress.com.com/>
        AllowOverride All
</Directory>
ServerName and ServerAlias define the base domain and matching aliases, DocumentRoot tells Apache where to look for the files. The <Directory> section at the bottom enables the use of .htaccess files with are heavily used by WordPress and its plugins so we are preemptively enabling use of that here. Save and exit as we’ll come back to this later.
Installing MySQL
Next up is MySQL, if you need a refresher on MySQL, you may read my article here for a good start, but the short version goes like this: MySQL is a SQL database server and WordPress will store settings, blog posts, comments, accounts, etc, in it. Here’s what you’ll need to run to install it:
					# install mysql
sudo apt install mysql-server

# start the service
sudo systemctl start mysql.service
Next you’ll want to run the post installation script that will configure MySQL:
sudo mysql_secure_installation
Take note of the VALIDATE PASSWORD PLUGIN which will enforce strict password requirements on your MySQL passwords and not allow you to use weak passwords. I’d say enable it for production but it is not required if you already use strong passwords.
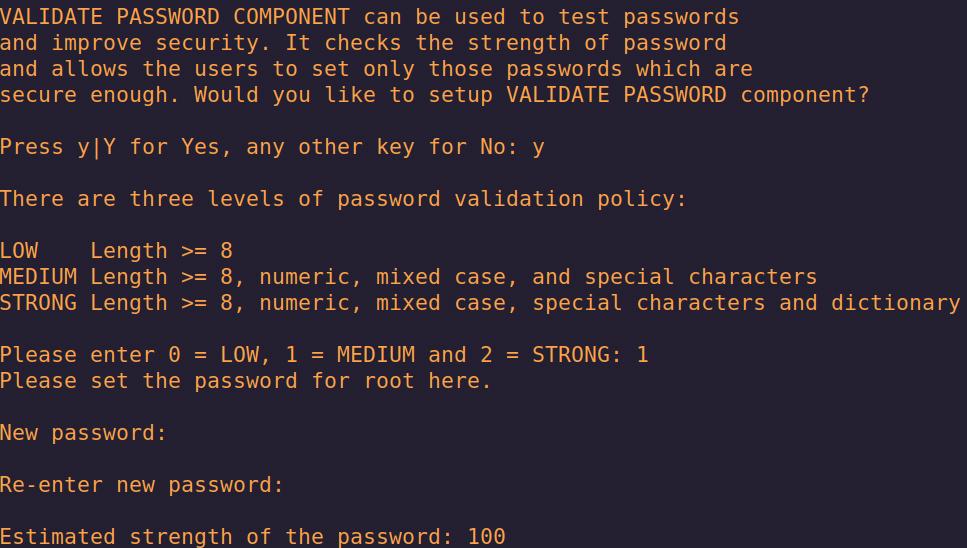
Other than that the post install script goes over some security settings that are self explanatory, you’ll be asked to set a root password, remove anonymous users, disallow remote root login, remove test databases, and finally ask you to reload MySQL’s privileges table to reflect the changes, I recommend answering yes to all of these.
Setting up MySQL
Once you’ve installed MySQL you’ll want to set up a user that your WordPress instance will use. With the next series of commands you’ll be logging into the MySQL shell as root and create a user, create a db, then grant all privileges to the user on that newly created database, before exiting.
					sudo mysql -u root -p
#in mysql shell
mysql> CREATE USER 'lm-user'@'localhost' IDENTIFIED BY 'somecrazypassword';
mysql> CREATE DATABASE lmdb;
mysql> GRANT ALL on lmdb.* TO 'lm-user'@'localhost';
mysql> FLUSH PRIVILEGES;
mysql> EXIT
Take note of the database name, user, and password because you’ll need it for the WordPress configuration file.
Installing PHP
By default, Ubuntu Server 22.04 has PHP version 8 in its repository; using the following command we will install php , libapache2-mod-php for Apache integration, and the php-mysql package to allow PHP to talk to MySQL, as well as some additional packages that WordPress and its plugins will make use of.
sudo apt install php libapache2-mod-php php-mysql php-curl php-gd php-mbstring php-xml php-xmlrpc php-soap php-intl php-zip
To load these extensions we’ll need to restart Apache.
sudo systemctl restart apache2
Congrats on your newly minted LAMP server.
Installing WordPress
With all of that out of the way, we are ready to install WordPress. Download the latest version of WordPress from their site using wget. Then navigate into the newly created wordpress/ directory and make a copy of the wp-config.sample.php file.
					#download the latest version of WordPress
wget <https://wordpress.org/latest.tar.gz>

#extract using tar
tar -xzvf latest.tar.gz

#enter the wp dir
cd wordpress/

#copy the wp-config
cp wp-config-sample.php wp-config.php
Following that, use your text editor of choice to paste your MySQL details from earlier into wp-config.php , located around line 23.
					vim wp-config.php

#wp-config.php line 23
...
define( 'DB_NAME', 'lmdb' );

/** Database username */
define( 'DB_USER', 'lm-user' );

/** Database password */
define( 'DB_PASSWORD', 'somecrazypassword' );

/** Database hostname */
define( 'DB_HOST', 'localhost' );
...
One more section that you’ll need to edit will be the salt section around line 51. This section deals with WordPress’s salts and security keys which secure your login and cookies.

The comment in this section will tell you to visit a WordPress API URL that will generate unique salts you can use, but you can also just use curl to get some values you can copy from your terminal.
curl <https://api.wordpress.org/secret-key/1.1/salt>
Copy and paste those into your wp-config.php file replacing the default ones and you’ll be that much closer to installing WordPress.
If you are using vim you can press
vto enter visual mode and select the lines and simply paste the values you got fromcurlbefore exiting using:wq.

One last thing you might want to append to the end of your wp-config.php file is this line:
define( 'FS_METHOD', 'direct' );
This specifies what file system method WordPress should use, typically this is the advised option to add if you get permissions errors while updating plugins.
Setting up .htacess
Some extra things you’ll want to do at this time is create a dummy .htaccess file and an upgrade directory so that you don’t run into any post install permissions blues. The .htaccess file allows WordPress to preform in-directory edits and tweaks, we are creating file now so we don’t get any weird permissions issues if we try to make it after the fact.
					touch .htaccess
mkdir wp-content/upgrade
Now is the time for the big file move. Copy the contents of the WordPress directory and then copy it to the /var/www/my_wordpress.com/ path. This is where you will usually host websites from. We will then need to grant ownership of these files over to the www-data user and group. This is done in order to create a layer of security between us and our web server. See, if your web server were to be compromised it would suck significantly more if it were run under your admin account because then your entire system would be forfeit as attackers would have elevated privileges and that is no good.
					# copy wordpress to the host dir, recursively
sudo cp -a . /var/www/my_wordpress.com/ -r

# give ownership to www-data
sudo chown -R www-data:www-data /var/www/my_wordpress.com
The hard part is almost over as all that is left to do is enable the virtual host file we created earlier.
Enabling our site in Apache.
Before we enable our virtual host let’s disable the default page, we can use a2dissite to disable it and a2ensite to enable our WordPress conf file.
					sudo a2dissite 000-default.conf
sudo a2ensite my_wordpress.conf
Before we restart Apache lets check for errors using apache2ctl.
sudo apache2ctl configtest
You should see the following:
					Output
Syntax OK
But if you get output that looks like the below, worry not, as it’s all cool so long as you get the ‘Syntax OK’ message, if you don’t get that, then you really messed up! Double check your work and try again.
					AH00558: apache2: Could not reliably determine the server's fully qualified domain name, using 127.0.1.1. Set the 'ServerName' directive globally to suppress this message
Syntax OK
If you want to clear this line you may add a ServerName directive in the global Apache config file located here: /etc/apache2/apache2.conf. This can be the server’s domain or IP, One suitable place I found to place this in was around line 57 and it cleared the error.

Restart Apache and reload the page and your should be greeted by WordPress’s installer page!
sudo systemctl restart apache2

Conclusion
From here all you will need to do is plug in your desired details, hit install and you’ll redirected to WordPress’s dashboard. With that, you are well on your way to blogging with WordPress and a whole lot more. Obviously you’ll want to put a SSL on this bad boy but that is a story for another blog. Until then, happy blogging!