Have you ever needed a solution to work with a group of people remotely? Nothing fills the void like open-source software. We will explain what a NFS (Network File System) share is, not to mention what it can do for you. This is such a useful technology to any development team, study group, or perhaps it can be a family repository. NFS shares are great to be used as a backup. Maybe you have a ton of media, like images and videos. You can set up a NFS to keep your family seeing your new additions more privately. Without starting your child’s internet profile for them. Leaving their public life to them when they make their own social choices.
Today we will go over how to create a NFS and how to mount it using RHEL distributions, Fedora for today’s testing. Meaning, you could set up a NFS for your business partner across the country. Bringing professionalism and IT to your startup. So let’s see what NFS shares are all about.
Install NFS Server
To use a NFS on Linux you will need to install some packages first, both server side and locally. To start, let us configure our Network File System on a server. Below we will install the needed packages.
sudo dnf -y install nfs-utils
Next we will want to create a directory to serve as the NFS mount point.
sudo mkdir /var/NFS
Now let’s go ahead and configure our settings in a few places.
sudo vim /etc/idmapd.conf

To edit type a. In this configuration file, you will want to uncomment the fifth line down, then add your domain.
Domain = local.domain
Now you can hit Esc to stop editing, then type :wq to write and quit the file. Now let’s add some more information to another configuration file. This one will be brand new. So don’t worry if your editor tells you that it is a new file. Also make sure to replace “0.0.0.0” with your server’s IP that will access the share.
sudo vim /etc/exports

To edit type a. Now we can go ahead and add the following information.
/var/NFS 0.0.0.0/24(rw,no_root_squash)
If you need to look up your client’s IP, try this out.
ip addr
Now you can hit Esc to stop editing, then type :wq to write and quit the file. Next thing we need to do is tell systemctl to enable the NFS server.
sudo systemctl enable --now rpcbind nfs-server

Configure Firewall for NFS
Now if this is public facing you will have Firewalld enabled. If not, you can skip this section if you are just running this inside your home network. To configure our new NFS share to get through our firewall we will need to add the service.
sudo firewall-cmd --add-service=nfs
Now you should not have any issues getting past Firewalld. Next we will allow only a connecting client with a particular IP to connect. Make sure to add the public facing IP you want access from in place of “0.0.0.0”.
sudo firewall-cmd --service=nfs-access --add-source=0.0.0.0 --permanent
Now you will want to reload Firewalld to make sure the changes are observed.
sudo firewall-cmd --reload
Install NFS Client
We are going to just keep it in the RHEL family and go with Fedora workstation for the client installation. To access our NFS from our workstation we will need the appropriate packages. Notice they are the same as we installed on the server. Good thinking Fedora, KISS (Keep It Simple Stupid) at its best.
sudo dnf -y install nfs-utils
Now like before let’s go ahead and configure our settings.
sudo vim /etc/idmapd.conf
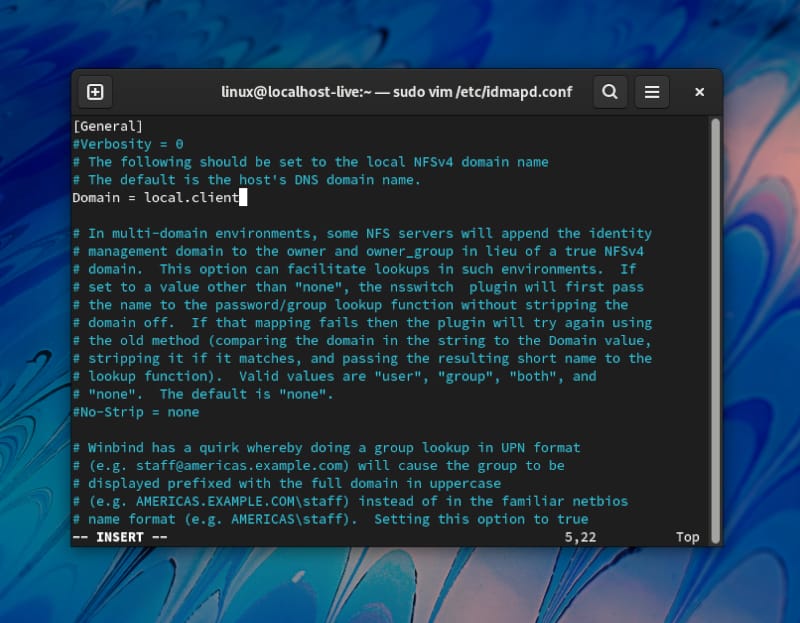
To edit type a. In this configuration file, you will want to uncomment the fifth line down, then add the domain similar to how we chose before.
Domain = local.client
Now you can hit Esc to stop editing, then type :wq to write and quit the file. We can now proceed to mount the system.
sudo mount -t nfs local.domain:/var/NFS /mnt
Now let’s see if we mounted everything how we wanted assuming we didn’t get any error messages. Be sure to take note of the output. You will need it in the next step.
df -hT
Mount NFS Persistent
Now you may not want to have to connect your system manually every time just to get connected. In fact, for productivity you would want an auto-mounted system. So, we are going to mount your system in fstab.
sudo vim /etc/fstab

Now with a few pieces of information we kept note of, we can now add the system with the following line.
local.domain:/var/NFS /mnt nfs defaults 0 0

Now you should have access from boot on this workstation as long as the server is available and running. This is when you might want to take advantage of some really cool technologies. We have a Blog all about something that would go great with this. Check out Best Rsync Crash Course of 2022. These technologies combined will give you the ability to have that remote backup file system. Making sure your work is backup to the server, can really give you that peace-of-mind you are looking for. You just don’t know what might happen to your computer. Sometimes you might face losing data over file corruption. The best thing you can do is have backups.
Knowing the challenges we are facing today with recent uptick in hacks. You can now protect yourself against loosing data if your system were to get ransomed. This way you can save the money for your techs to restore your systems, perhaps to an upgraded state, and restore your important data. The other uses for this are endless. I use NFS to share files with other computers in my home lab setup. That way I can share my images or blog pre-drafts with my laptop for portability. Another great low-impact way to view media on an NFS is to use MPV. You can open it per directory to view an entire season of your legally obtained media. MPV will cache the media, making your steaming seamless, with an easy interface. Thanks for reading.