MySQL is a popular cross-platform, open-source database server, developed by Michael Widenius, now owned by Oracle. If you are a web developer you’ll encounter it sooner or later, as it often provides the “M” in LEMP/LAMP web stacks, and fulfills the database requirement (or its fork, MariaDB) for WordPress, Drupal and other CMS. Skeptical? It’s a great database server for powering your web projects and the command syntax is pretty straight forward to boot! Here are some commands to quickly familiarize yourself with MySQL!
Installation
I’ll briefly cover installation, but before installing anything make sure your system is properly updated to ensure a smooth process.
For Debian\Ubuntu LTS
sudo apt install mysql-server
For Arch
MySQL can be installed on a Arch system but it requires being compiled from source, so for our own sake, we'll instead install MariaDB (the fork of MySQL) which functions as a drop-in alternative for MySQL.
					sudo pacman -S mariadb
#Important! Configure mariadb first before you run it!
sudo mysql_install_db --user=mysql --basedir=/usr --datadir=/var/lib/mysql
For CentOS\Rocky
sudo dnf install mysql-server
Starting\Stopping MySQL
After installation, the service should be enabled by default, but if for any reason you need to start or stop the database server, run one of the following commands:
Using Systemd (Arch, Centos\Rocky)
For modern linux distros we’ll be using systemd to start/stop/enable software at boot. The commands are pretty much the same across distros using systemd, but I’ll include a legacy set of commands that use initd too.
					 #enable at boot
sudo systemctl enable mysqld
#start
sudo systemctl start mysqld
#stop
sudo systemctl stop mysqld
#status
sudo systemctl status mysql
Using initd for Debian\Ubuntu (Legacy)
					#start the mysql service
sudo service mysql start
#stop the service
sudo service mysql stop
#check status
sudo service mysql status
Post Installation
After installation I recommend running MySQL’s post-installation script, as it covers a lot of important security settings. This exact command works the same for MariaDB.
sudo mysql_secure_installation
It will immediately ask if you want to enable and configure the VALIDATE PASSWORD PLUGIN .
					VALIDATE PASSWORD PLUGIN can be used to test passwords and improve security.
It checks the strength of password and allows the users to set only those
passwords which are secure enough. Would you like to setup
VALIDATE PASSWORD plugin? Press y|Y for Yes, any other key for No:
If you are creating a local development environment its OK to leave it disabled, but for production, you’ll want to enable this and go through the setup for this plugin. After that you’ll be asked to set a root password (this is important, so remember it!) and few other yes/no questions that will remove anonymous users, disallow remote root login, remove test databases, and finally ask you to reload MySQL’s privileges table to reflect the changes, I recommend answering yes to these.
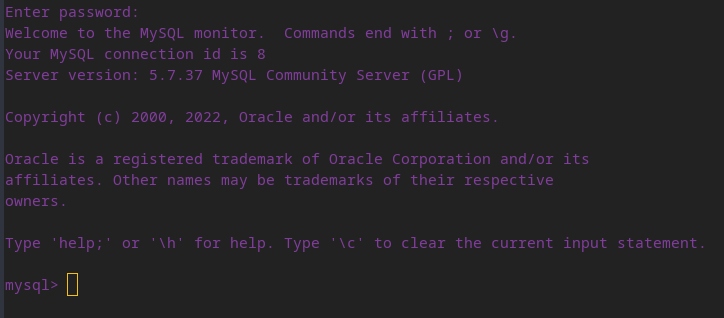
After you’ve enabled and started the service, to access your database, you’ll need to run the following command, which will prompt you for the root password that was set during the post installation script.
sudo mysql -u root -p
You should see some output like the below, and with that you’ll be inside the MySQL shell. From here you’ll want to create a non root user to run your projects, as having the root user running the show is a huge security risk.
A note on syntax.
The thing with SQL is that these commands aren’t case-sensitive so ‘create user’ would work just the same as CREATE USER, but it just looks more visually distinct and easier to work when you use uppercase. MySQL statements end with a semi colon ; so don’t forget it otherwise you’ll be trapped inside of the shell forever! Not really, you can exit out of any erroneous command by hitting CTRL+C on your keyboard.
Creating a User
To create our first user, run the following command inside of the MySQL shell:
CREATE USER 'linuxman'@'localhost' IDENTIFIED BY 'password';
This will create a user named ‘linuxman’ on our host machine ‘localhost’ and sets the password to ‘password’. If you need to change your password, you can run an ALTER statement.
ALTER USER 'linuxman'@'localhost' IDENTIFIED BY 'new-password';
Before we do anything else with this user, we must give it the right set of privileges. I recommend creating one user per project that only has access to what it needs to function. The following GRANT option will give our user privileges on par with the root account across the server. That means that this user can create and manage any database and table on the server. We can revoke these or limit their scope later on, But for our purposes right now, this works. These are not all the available options for privileges and a full table exists in the MySQL docs.
GRANT CREATE, ALTER, DROP, INSERT, UPDATE, DELETE, SELECT, REFERENCES, RELOAD on *.* TO 'linuxman'@'localhost';
Once you’ve set up your user, best practice dictates running FLUSH PRIVILEGES in the MySQL shell in order to free up memory, get into this habit now, especially after running CREATE statements.
FLUSH PRIVILEGES;
Then we can exit the shell, and then log back in again, but this time as the user we just created.
exit;
When you are back in your regular Linux terminal run this command to get back into MySQL
sudo mysql -u linuxman -p
You’ll be prompted for your password and you should be greeted with the good old MySQL shell.
Creating a database
Now that our user is set up, we can create a database, using CREATE inside of MySQL:
CREATE DATABASE Music;
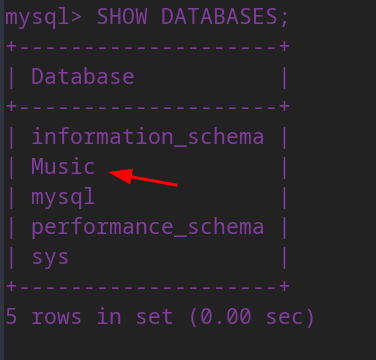
This creates a database called Music that will hold our data. You can verify success by running a SHOW statement. This will show all the databases that are currently stored on your server.
SHOW DATABASES;
If you’ve been following along you should see something like this:
Selecting a database with USE
Now we’ll need to run a USE statement on our database in order to select it. USE allows us to select a database to work in. MySQL should return with a ‘Database changed’ message to confirm success.
USE Music;
Now when we run a CREATE TABLE statement it will generate that table inside of albums.
Creating a Table
Now let’s make a table. which follows the following syntax:
					CREATE TABLE name (
    col1 datatype,
    col2 datatype,
    col3 datatype,
);
To put it into more readable terms you’ll need to give some meaning to the data. The column parameters on the left are just the reference key for the datatype that you specify on the right of it. You can find a comprehensive list of data-types here. We’ll just create a simple table to help illustrate the point.
					CREATE TABLE albums (
    Released int,
    Album varchar(255),
    Artist varchar(255)
);
You can verify that it was created by using SHOW. Our table should show up in that list and we can now add data to it!
SHOW TABLES;
INSERT
In order to get data into our table, we’ll need to run an INSERT INTO statement, Let’s look at what that would look like here:
					INSERT INTO name (col1, col2, col3)
		VALUES (val1, val2, val3);
This is an alternate version of INSERT , that works best if you are adding data to every cell, as you don’t have to type out the column name, you will however have to take that mental note of what your columns are, lest you insert the wrong data into the wrong column, and that wouldn’t be any good. A more detailed version of this just adds the column names in again, that would look like this:
INSERT INTO albums (Released, Album, Artist) VALUES (1995, "(What's the Story) Morning Glory?", "Oasis");
Notice the usage of double quotes because there is a single quote inside the album name string. if you entered it all in single quotes, MySQL would interpret the single quote in the album name as the end of the string and break the command. So keep that in mind when you work with strings. Let’s bulk add some more albums so that we can have more data to filter through, note that records are separated with commas:
					INSERT INTO albums
     VALUES
     (1982, 'Kissing to Be Clever', 'Culture Club'),
     (1991, 'Nevermind', 'Nirvana'),
     (1984, 'Diamond Life', 'Sade'),
     (2017, 'Dedicated to Bobby Jameson', 'Ariel Pink'),
     (1994, 'Dummy', 'Portishead'),
     (1991, 'Sailing the Seas of Cheese', 'Primus');
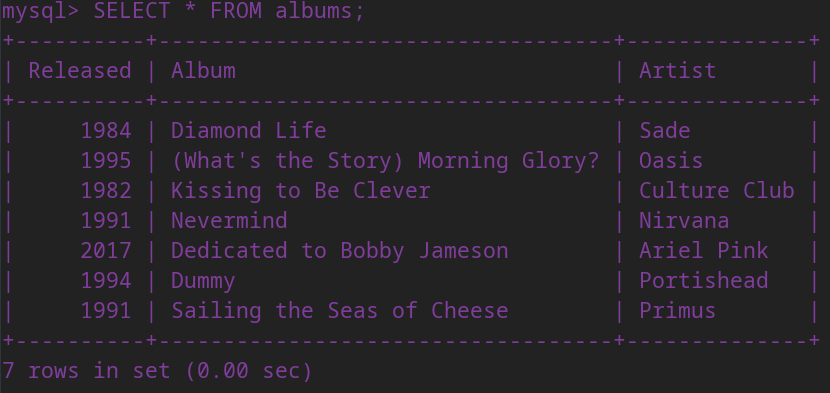
To see our data in the table, we use the SELECT statement. This command will show everything in albums to us. The FROM keyword specifies to use albums.
SELECT * FROM albums;
You should see something like this, or whatever data you populated the table with:
Now let’s add one more record.
					INSERT INTO albums (Released, Album, Artist)
    VALUES (2000, "De Stijils", "The White Stropes");
Oh No! We’ve added a horribly misspelled entry into our table!, in order to fix that, you’ll need to run a UPDATE statement on our table.
UPDATE & WHERE
Update works a little like INSERT, you specify your columns to change on the first line and what data you are changing in the 2nd line. They differ however with the addition of the 3rd line, which uses a WHERE statement.
					UPDATE albums
SET Album = 'De Stijl', Artist = 'The White Stripes'
WHERE Released = 2000;
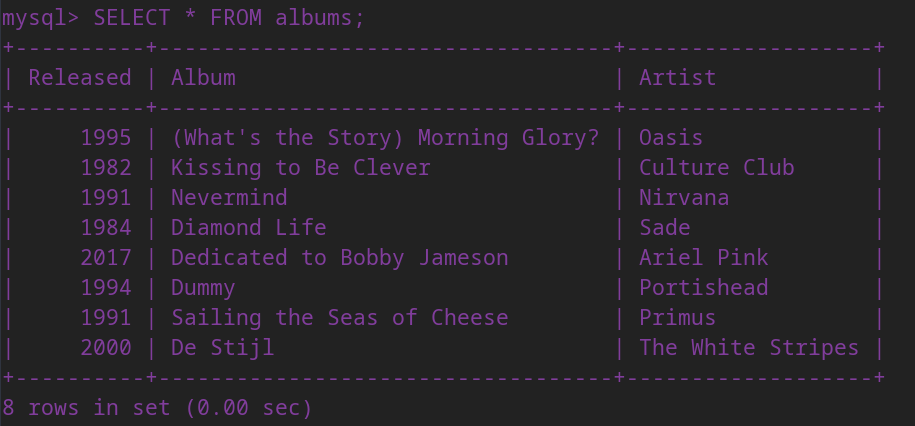
If we omitted the WHERE option it would change ALL the records in the table to what you SET them to. WHERE is a option that allows us to narrow our queries by only applying our changes to records that meet a certain condition. In this case, only one record meets the condition of being released in the year 2000, so this UPDATE will only change 1 record. Run another SELECT statement on the table to make sure that the entry was updated correctly.
Our table is looking a little messy, so let’s order the data using a ORDER command. That syntax will look like so:
					SELECT col1, col2, col3
FROM usertable
ORDER BY col1, col2, ASC|DESC;
Now to tailor it to our needs, we want to order our albums by release year in descending order.
					SELECT Released, Album, Artist
FROM albums
ORDER BY Released DESC;
Note that is ordering isn’t applied permanently to your table, if you run a SELECT * FROM albums; your table will default to being ordered by record creation date. Also if you omit a column in the initial SELECT, it will be omitted in the output.
LIKE
Now let’s suppose our table was much larger than this, and we needed to find a specific set of records. Here’s what a search would look like:
SELECT col1, col2, ... FROM usertable WHERE colX LIKE search-pat;
Again we are going to use SELECT, FROM, and WHERE, to achieve this. The first line specifies which columns to display, and FROM, what table to look in, and finally the WHERE will ask what we are looking for and in what column. MySQL provides two ways of making search patterns based on wildcards; the percent % which represents zero or multiple characters and underscore _ which represents a single character. Here’s an example query that looks for all albums that start with the letter ‘d’.
SELECT Released, Album, Artist FROM albums WHERE Album LIKE 'd%';
Here’s some more brief example searches we could run on our database with a more comprehensive list available on MySQL’s docs.
Using LIKE
If we wanted to see any albums that have “to” in their title.
SELECT Released, Album, Artist FROM albums WHERE Album LIKE '%to%';
Or this one that looks for band names that are exactly four characters:
SELECT Released, Album, Artist FROM albums WHERE Artist LIKE '____';
You can also specify by ranges; using BETWEEN and AND operators we can narrow our results to albums released in a certain time period. Like so:
SELECT Released, Album, Artist FROM albums WHERE Released BETWEEN 1990 AND 2000;
Again, if you’ve been following along the output should return 5 records.
DELETE
What if we wanted to delete a record? Looking over this table I’d say one of these records is a little too far apart in time from the other records in this table so let’s get rid of it using DELETE. Bye Ariel, maybe next time!
DELETE FROM albums WHERE Released = 2017;
DROP
There is a lot more out there so I recommend checking out your friendly neighborhood search engine and keeping a tab with MySQL’s documentation open. To cap this off, let’s say, we wanted to clean up shop and just start over, you can delete the entire database with the following command:
Be forewarned though, as using DROP obviously results in data loss, so make sure you know what you are doing before you run it. There’s nothing in this database that we need so we can safety get rid of it.
DROP DATABASE Music;
If you wanted to get rid of the user we created too, logout and then log back in as root and you can find that DROP works here as well:
DROP USER 'linuxman'@'localhost';
I only covered a handful of topics, and MySQL has a bevy of other operators, keywords, and functions that give you a lot of control over how you can interact with your data. If this interested you I recommend building a project using it as the best teacher is always experience. Until next time, happy building!