Now it is time to get into more with KVM and QEMU. We will be working with the best laptop or PC Virt-manager I have worked with to date, running using KVM (kernel-based Virtual Machine) with great performance. This is a professional tool, so it comes with a high level of control, compatibility, and portability. Virt-manager is built in Python. Allowing you to create VM’s with ease, yet giving you the pass through functionality you may need. You will need to have some terminal skills to get the group of applications installed that Virt-manager needs to function, as it depends on KVM, QEMU and libvirtd to name a few. One of the best parts is the portability to a KVM hypervisor enabled server. Multiplying your hardware capabilities. We will only be covering Virt-manager in this blog while following up with a KVM server install. This way we can transfer a VM at a later date.
So today we will install Virt-manager on Arch and its descendants like Manjaro. We will cover how to adjust the configuration files. We will show you the “secret” menu so that we can reliably use Virt-manager after booting. Furthermore, we will cover making an alternative storage source rather than using the default location. Finally, we will then cover VM installation. Get ready for your brain to go boom, then ask yourself, “What have I been using for virtualization all these years?” Let’s get right into it!
Installation
This part can be a little complicated but remember to take your time and just enjoy the experience. We will need to install the packages and all the needed applications to run Virt-manager. So let’s not waste any time.
sudo pacman -S archlinux-keyring qemu virt-manager virt-viewer dnsmasq vde2 bridge-utils openbsd-netcat ebtables iptables libguestfs
Now that is a lot of commands. We made sure to install the Arch key ring in case you are using Manjaro or another Arch descendant. Then we installed the needed applications and packages. This is also possible on many other distributions, though the packages are all named differently. Check out our blog on Gnome Boxes to see some of those package and application names for a few other distributions. Next we need to enable and start the service that allows us to run our Virt-manager libvirtd.
sudo systemctl enable libvirtd.service && sudo systemctl start libvirtd.service
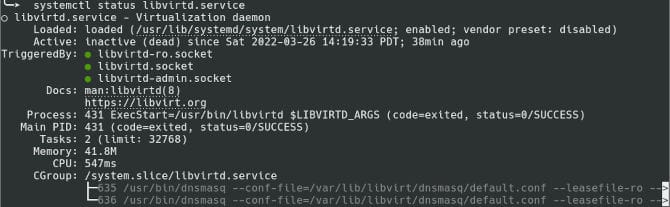
Now we need to check the status, to make sure libvirtd is running.
systemctl status libvirtd.service
Now we can enable our user to be able to use libvirt. We will need to get into the configuration file to enable this. We will go ahead and use Vim as usual.
sudo vim /etc/libvirt/libvirtd.conf
Now we are looking for two setting in particular. We will need to give libvirt control over the socket and also add read/write permissions. These settings may move around some, and they also look similar to other settings. So check spellings and numbers are identical. Go ahead and type a to edit the file.
					unix_sock_group = "libvirt"
unix_sock_rw_perms = "0770"
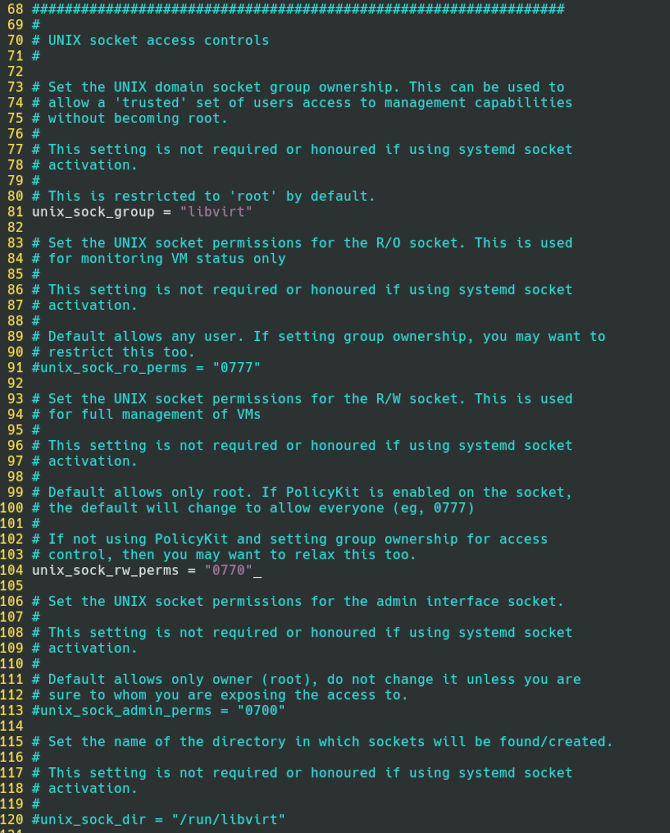
They are about 30 lines apart about 80 lines into the configuration. You just need to uncomment them. Then go ahead and hit Esc, then type :wq to write and quit the file. The next thing to do is add our user to the libvirt group. This way we can run things from our own account. Make sure you change “yourUserName” to your actual username.
sudo usermod -a -G libvirt yourUserName && newgrp libvirt
Now we will want to restart libvirtd.
sudo systemctl restart libvirtd.service
Secret Menu
Now this menu is not a secret for real, but it will feel like a video game hack. You will need to know this for two reasons. You will need this menu to access the panel that controls whether the Virt-manager QEMU connection will start on boot or not. There are some great advantages to this, as you will not have to manually start it in the command line.
The second reason is you can change your storage location. This can be a good thing if you have a root and home partition setup. The default location will be in your root. So if you have a limited size root, this will be a lifesaver. All you need to do is start Virt-manager, right-click on the QEMU/KVM and select details. This panel will have three tabs. We are looking for virtual networks. Then you check the box to start the network on boot.
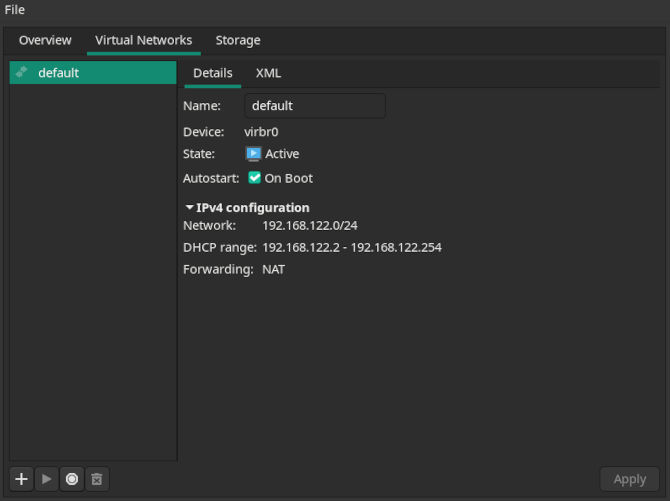
To the right of this tab, you will see storage. You can create storage on your home partition, drive or otherwise.

The following command will make a hidden dot file in your home directory. You can adjust the path as long as you know where you need it to be.
mkdir ~/.virt-manager-storage
Now inside this panel we will click the plus symbol in the bottom-left corner. This will help you create a storage pool. This is where you give Virt-manager the path for the directory we just made. Now we will select the storage, then you will see another plus symbol in there. This is where you create your VM drive. You can then choose the name, format, size and if you want the space to be allocated from the start.
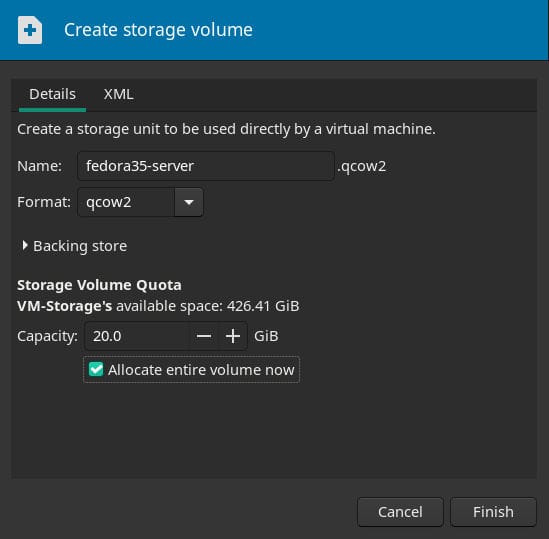
You can name it whatever you wish. You can use the default format type qcow2. Next, you don’t want your VM to run out of space, So give them 20 to 25 gigabytes. It is up to you if you want to give it more space depending on what OS you plan to install. They all have different requirements, so make sure to find that out. You can allocate the space if you’d like. It depends on you and the space on the partition or drive you’re using.
VM Installation
Now we can install a VM. We will need to have downloaded a server or workstation previous to this step to proceed. It is also a great idea to have made the preparations for your storage in the last step to match the OS you chose. We will install a server for ease of use. We will just use a Fedora server. For this, we will get you up to the actual installation process of the OS and leave you to your choices. Open Virt-manager and click on the plus symbol.
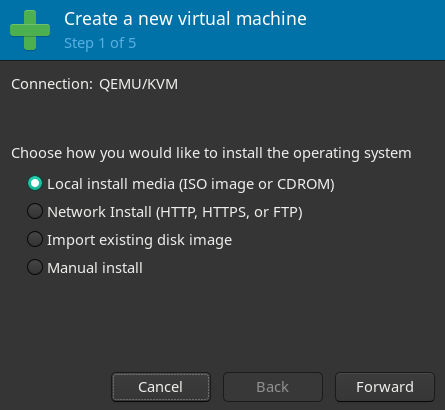
For the first of five choices you are presented with you can leave on the default, but you can see all the wonderful choices. Next you will want to go to the next screen and click on Browse to look in your file system for your downloaded image. We will select Fedora server installation ISO.
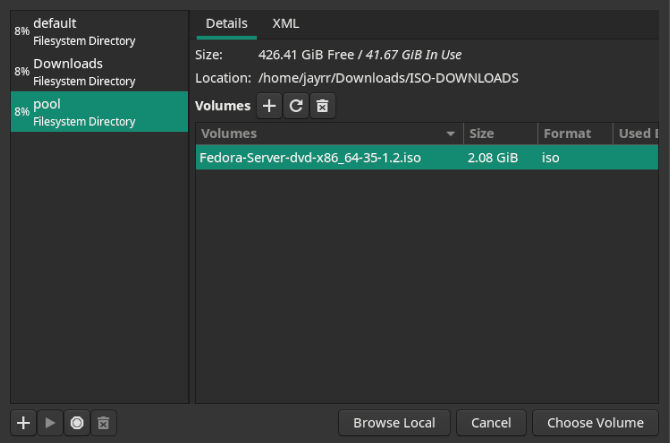
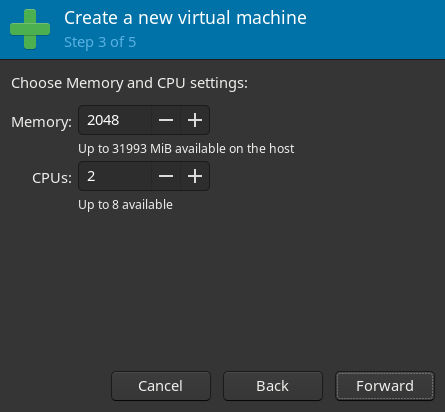
You can browse your local file system in there and add them to the installation pool. That way next time they will all be in there. Choose your distribution of choice here. Next you will have a choice for CPU cores and RAM allocation. You will need to know what your guest OS will need. For our server we will go with two for each. Even though this is about double what this distribution needs for the bare minimum.
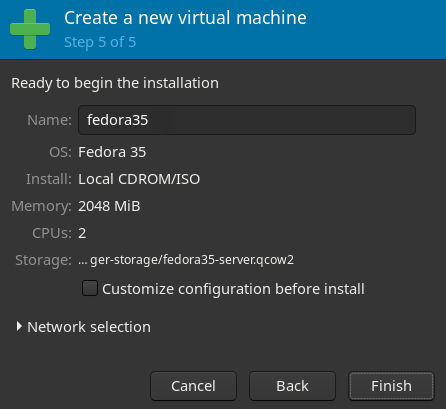
Next you will be asked about storage for disk space. We will choose the storage we already created in the last section. First click the custom storage option, then select the one we made earlier.
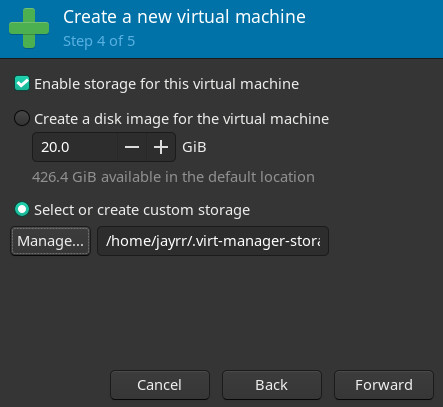
Then you can name it and click the finish button. There are more custom configurations than these. So play around in the future. Now all you need to do is start it in the panel.
After this point, a normal installation will come to pass. You can explore that part on your own, as many distributions install differently. Just remember to research the needed system specification before you start, this way you can allocate for them. We hope you find this blog useful. Thanks for reading.