
Drivers

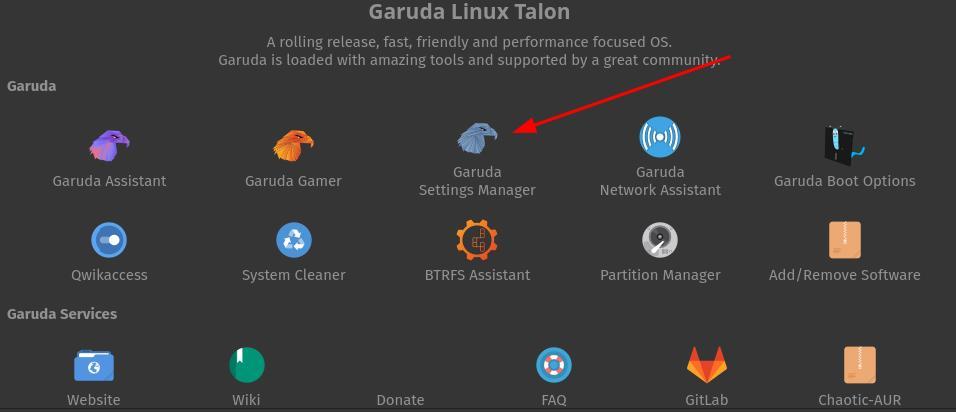
Next we need to select Garuda settings manager. Click on Garuda settings manager.
Now we will have to select hardware configuration.
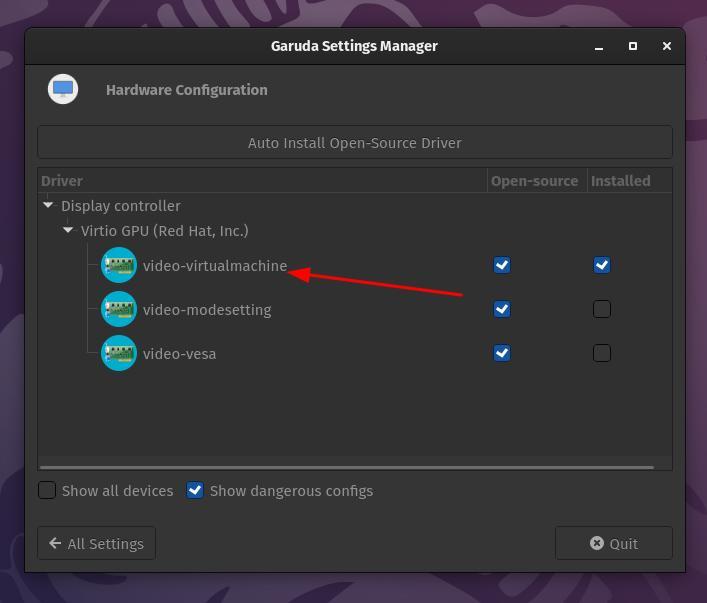
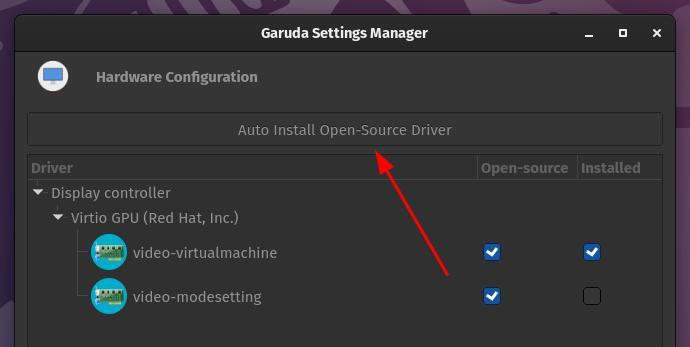
That should be it. You should now have working drivers. If it is not working in your current session go ahead and reboot to take full advantage.
Firewall
sudo pacman -S ufw
Now we can go ahead and enable UFW as the default settings are pretty good for a workstation. For a server, you would very much so need to allow services.
sudo systemctl enable ufw && sudo systemctl start ufw
Here we are using systemctl a systemd command to enable UFW. We also must start UFW for our current session. Now we can see our status like this.
sudo systemctl status ufw
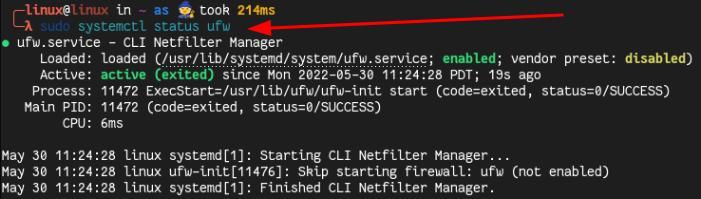
You should see a green light on your status, a triggered date. You are now blocking incoming traffic and allowing outgoing. It is important to make sure to have some sort of protection on your machine. UFW is a great tool that is available a many other distributions.
TRIM
TRIM is a service that can help you get rid of unused blocks on SSD (Solid-State Drives). The service should already be present, so we do not have to write one. All we have to do in enable the timer for this service to be able to run.
sudo systemctl enable fstrim.timer && sudo systemctl start fstrim.timer
Similar to the Firewall section we used systemctl to first enable the timer then start it. Now we will check out the status to confirm the timer is running and when it will run for the first time.
sudo systemctl status fstrim.timer

You should see a green light on your status, a triggered date, as well as execution date. This way you will know when the service will be triggered. You can now also rest assured that your SSD will be in better shape. perhaps last longer.
AUR
To speed up the AUR all we need to do is edit a configuration file. Normally, we would use our old friend Vim to edit configuration files. This time we are going to use Micro. This is the editor that they bundled in so let’s see how it works.
sudo micro /etc/pacman.d/chaotic-mirrorlist

You can see that Micro has the look of Vim that has been supped up and personalized. What we need to do to make our mirror the faster one is comment out every mirror that is not close to you. Also do not comment out the CDN mirror. In our case, we will be using the US mirror as it is closest.
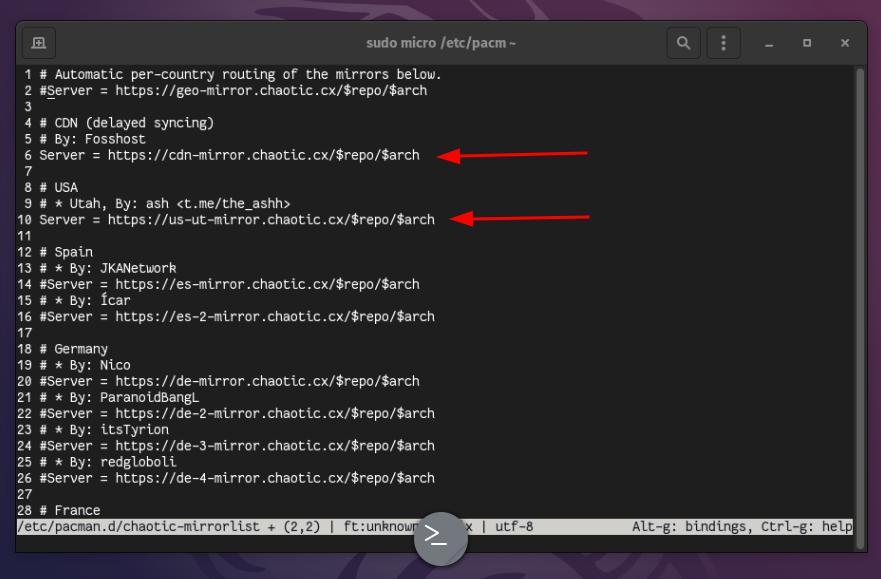
To save, we must type Ctrl-s, then to quit Micro we then need to type Ctrl-q. Now we can update, and our mirror download speed should be faster.
GRUB
Grub speed, it’s really up to you. If you are not booting any other
installations on your machine then you don’t really need to see it at all. We
are going to set it at zero. This way we should not see the Grub screen at
all. We will be speeding up our boot by about five seconds. Take them where
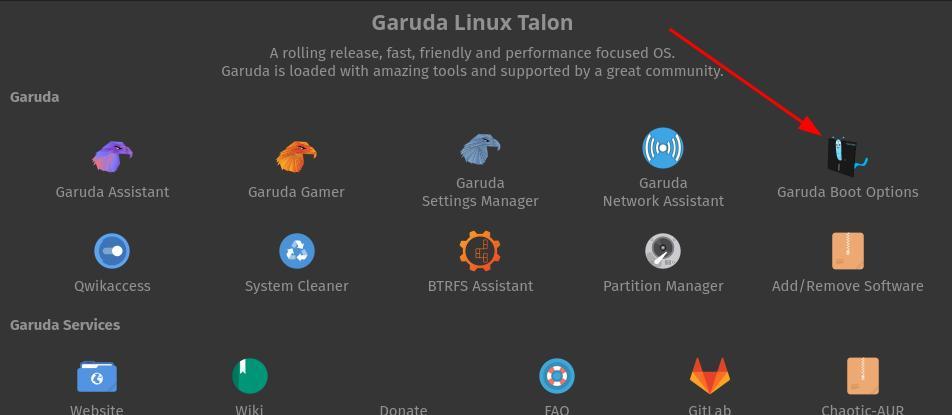
you can get them. To achieve this, we will need to select the Garuda welcome
screen.
We will then see Garuda boot options and select it.
Now we can go ahead and look for Menu timeout at the top of the panel.
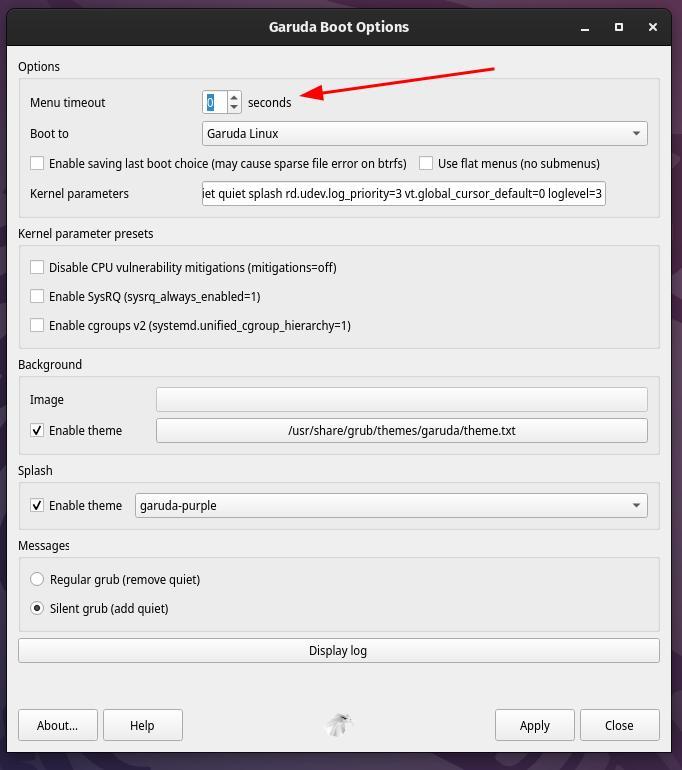
Then we will make it zero. This will disable seeing the menu all together. Speeding up our boot by at least five seconds. Now all you need to do is click apply and Garuda updates grub for you. Making this a very streamline process. No worries about a non-boot-able grub over a typo. You can also lengthen this. This is up to you. Whatever is more convenient for you. If you can think of anything you would like to tweak on any version of Garuda, please let us know in the comments. We did not include editing stuff like pacman since they already optimize it a bit for Garuda releases apposed to a stock Arch release. We ran all of our commands on the Gnome version of Garuda just in case you notice anything different from your copy. Thanks for reading.


