I’ll admit that I like the way that Windows 11 looks, so sue me! For the last couple of years now I’ve used i3 and its really a great window manager, but I’m kinda over the hot key centric nature of it and I’m just looking for something like—well, Windows! I’ve been using Windows for gaming and music production for years now and Linux for coding and productivity but I’ve never felt comfortable using window managers, and as of late I’ve been missing a full desktop environment.
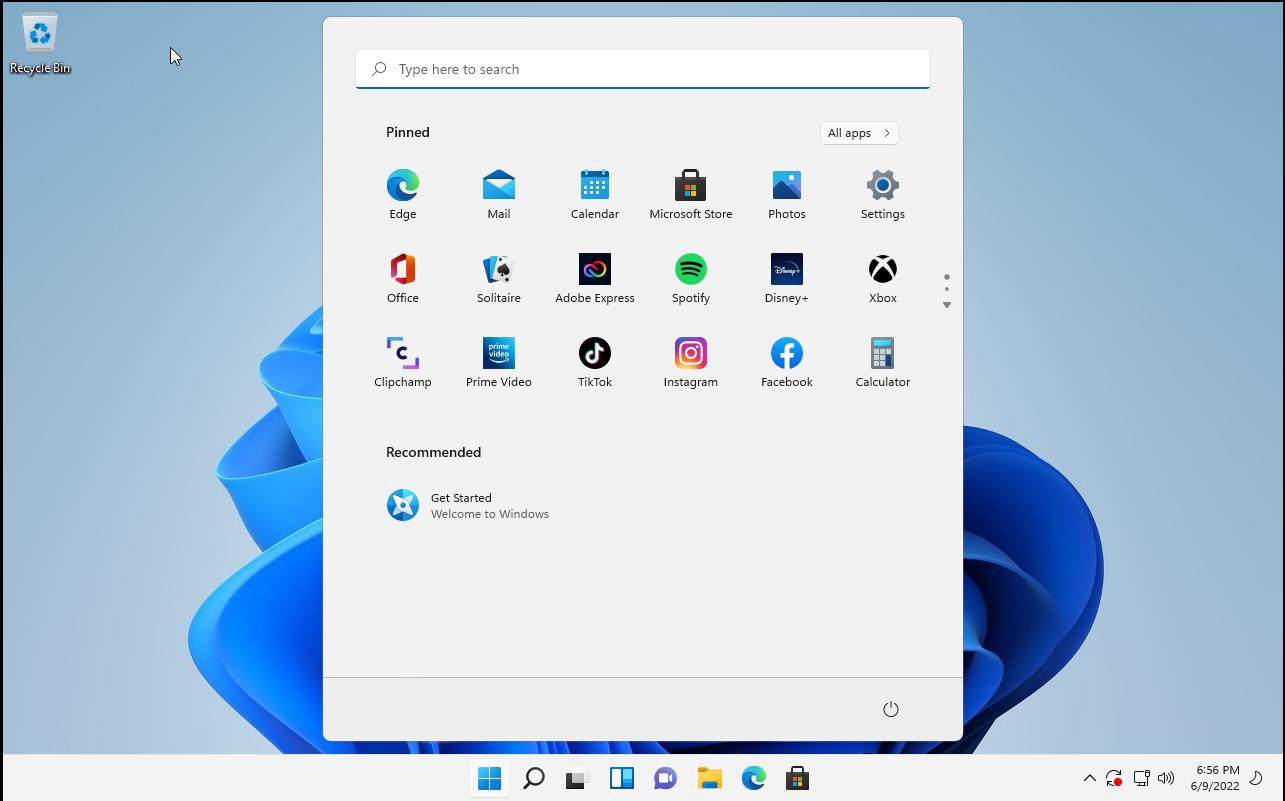
I like to keep my desktop pretty vanilla as I never really found customizing to be a fun task. I’m too much of a minimalist (read: lazy) to hassle with configs, widgets, Conkys or what have you. So if you are lazy like I am, like Windows, and are OK with being a dirty OS traitor (I’m kidding, no one cares what desktop you use), then read on because we are going to turn a fresh Arch system into a Windows 11-like experience.
The Setup
I’ll be using a freshly made Arch system in a virtual machine to ensure any system-breaking changes are contained to the VM—I advise you to do the same before you try it on an actual machine you care about. This article will focus on Arch but everything I show you here today can also be adapted to any other distro as thankfully the process is pretty similar. Without further delay lets jump right into installing a new front end onto our system.
Installing X
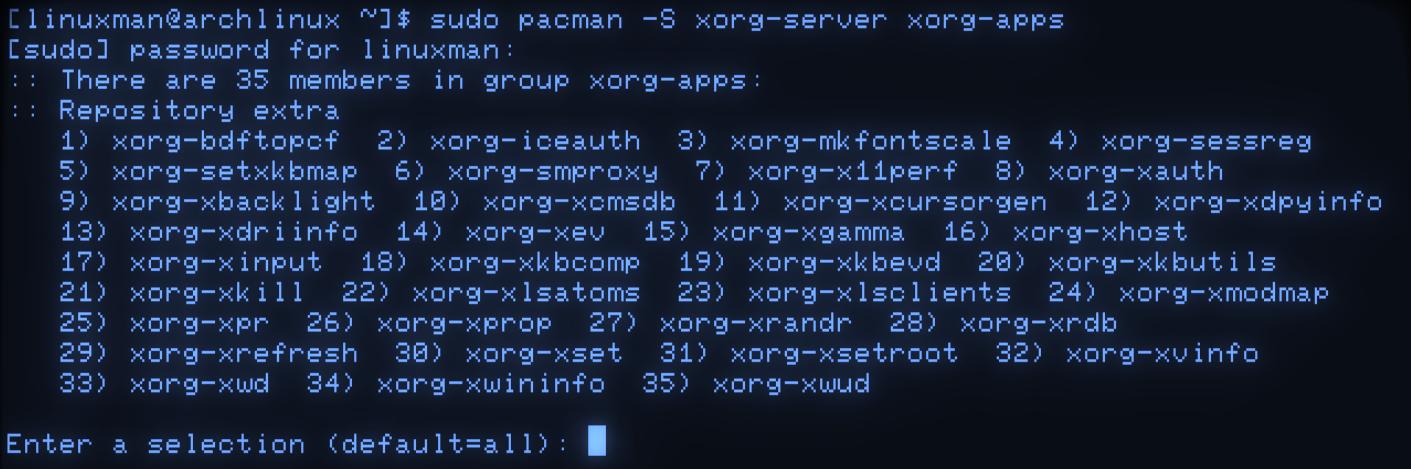
First we need to install the xorg-server and xorg-apps packages which will install x and provides the graphical back-end for the desktop environment we’ll be installing today, Budgie Desktop.
sudo pacman -S xorg-server xorg-apps
Installing a display manager
Then we’ll need to install a display manager. A display manager is basically a graphical login screen where you can login as any user and also choose from a list of installed desktop environments. In this case we will install lightdm and lightdm-gtk-greeter to cover our bases and avoid/reduce any potential issues we might face should we forgo installing it.
sudo pacman -S lightdm lightdm-gtk-greeter
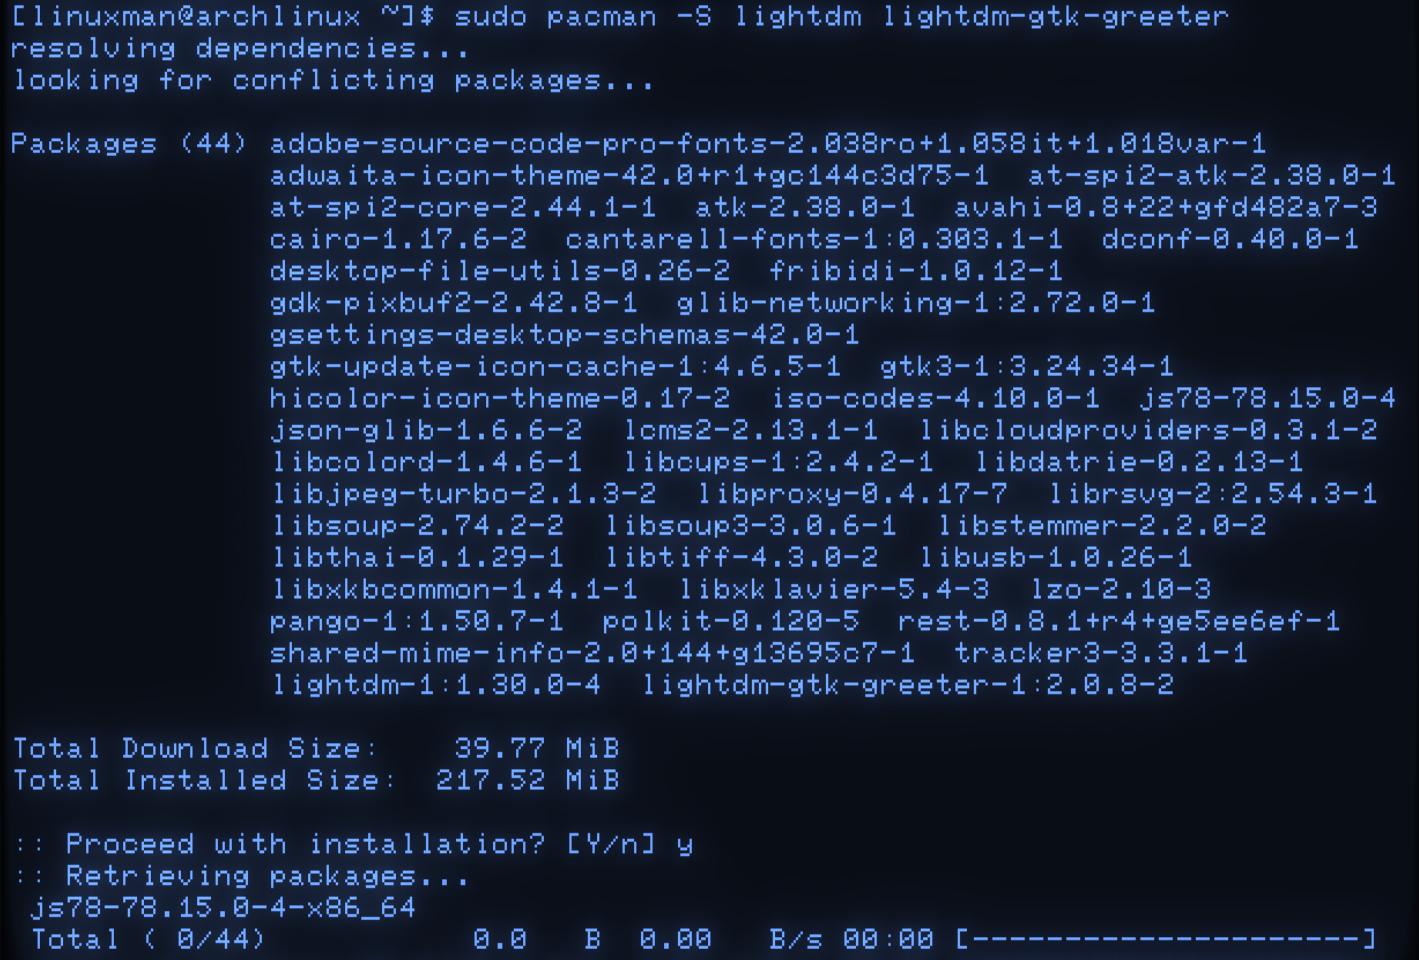
I picked lightdm because of its ease-of-use and customization, it’s also well documented which is always a bonus to have! After you install lightdm and its dependencies, enable it via systemctl so it can start at boot.
sudo systemctl enable lightdm
Don’t reboot quite yet, lest you be cursed with a failed session with no way to get back into your system:
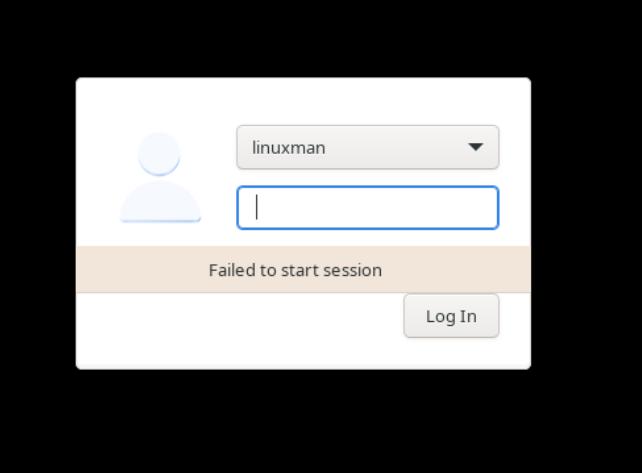
Well, no not really, if you made this mistake then you can remedy it by hitting Ctrl+Alt+F2 which will take you to a second tty session where you can install a DE and reboot like normal.
Why Budgie?
Next we’ll need to install a desktop environment. Here’s my reasoning: When comparing Windows 11 to some popular panel-oriented desktop environments like Xfce4, Plasma, Budgie Desktop. Budgie wins out. With enough tweaking Xfce4 could get Windows-y but the end result isn’t up to par for my tastes. Plasma was a close contender but its start menu is attached to the task bar and trying to center the application menu is wacky. When it comes right down to it, Budgie wins out due to its ease-of-use and that gap between its taskbar and application launcher.
On Budgie
Budgie was developed by Solus, with contributors from many other Linux communities (including Arch and Manjaro) and is GNOME and GTK3+ based. It aims for minimalism and simplicity which hits my buttons all around just right. Compared to KDE Plasma, Budgie requires a tiny bit more legwork (you have to build one package from GitHub, crazy I know) on the set up if you are on Arch but it’s well worth it, especially since yay is so useful.
Prep
On Arch, you’ll need to install yay, which is a AUR (Arch User Repository) package helper that builds and installs community packages from the AUR repositories. In order to install yay we require git and other development packages that are located in the base-devel package group. Assuming you have those dev packages installed we can then use some bash scripting to speed up the installation process. If you didn’t grab those packages during your Arch installation its OK as we can just run this command to install all the development tools in one go:
sudo pacman -S base-devel
Using yay in Bash
Bash scripting is incredibly useful in these situations because entering commands one at a time is dumb, that’s all there is to say. First open up your terminal and use the text editor of your choice to create a shell script named yay.sh. Create this file anywhere you like, so long as you can recall the file path. I’ll usually create scripts like this in a dedicated scripts folder in my home dir, but for the sake of simplicity, I’ll create the script in the root of my home directory. Once you’ve found a place for your script to live, copy and paste the following into your newly minted shell script and save it.
					#!/bin/bash
sudo pacman -S git
cd /opt
sudo git clone <https://aur.archlinux.org/yay-git.git>
sudo chown -R $USER:$USER ./yay-git
cd yay-git
makepkg -s
The top line in this script is called a shebang which tells your OS what interpreter to use to parse the file. In this case we are using the bash shell to interpret the commands in the file which will be executed in the terminal. In this script you can enter your username in place of $USER, but if executed as-is, then the script will use the $USER variable from your currently logged in terminal session to determine the user who will take ownership of the yay-git directory. After the shell script has been created you’ll need to mark it as executable with chmod and then run it.
					sudo chmod +x yay.sh
./yay.sh
The first time you run yay can be a bit confusing as it will prompt you to read the PKGBUILD files which are shell scripts that outline how to build the package, and you’ll be asked to confirm via prompts. If you want to read and vet that you aren’t installing some spooky crap, feel free to do so. Should you encounter any build errors during this step look closely at your terminal as oftentimes the answer to your troubles is somewhere in the sea of text output.
Installing Budgie
Now that yay is installed, we can properly install budgie desktop. As I covered in my EndeavourOS review, currently Budgie has an ongoing bug that makes the desktop settings not come up when you bring up the right click menu on your desktop. We’ll just nip that in the bud right here and install the working control center package and we’ll also skip all the interactive stuff by including --noconfirm.
yay -S budgie-desktop budgie-control-center-git --noconfirm
Once you run through the compilation and installation of Budgie it is safe to restart your system as You’ll have a desktop to start a session in.
sudo reboot
Post-installation
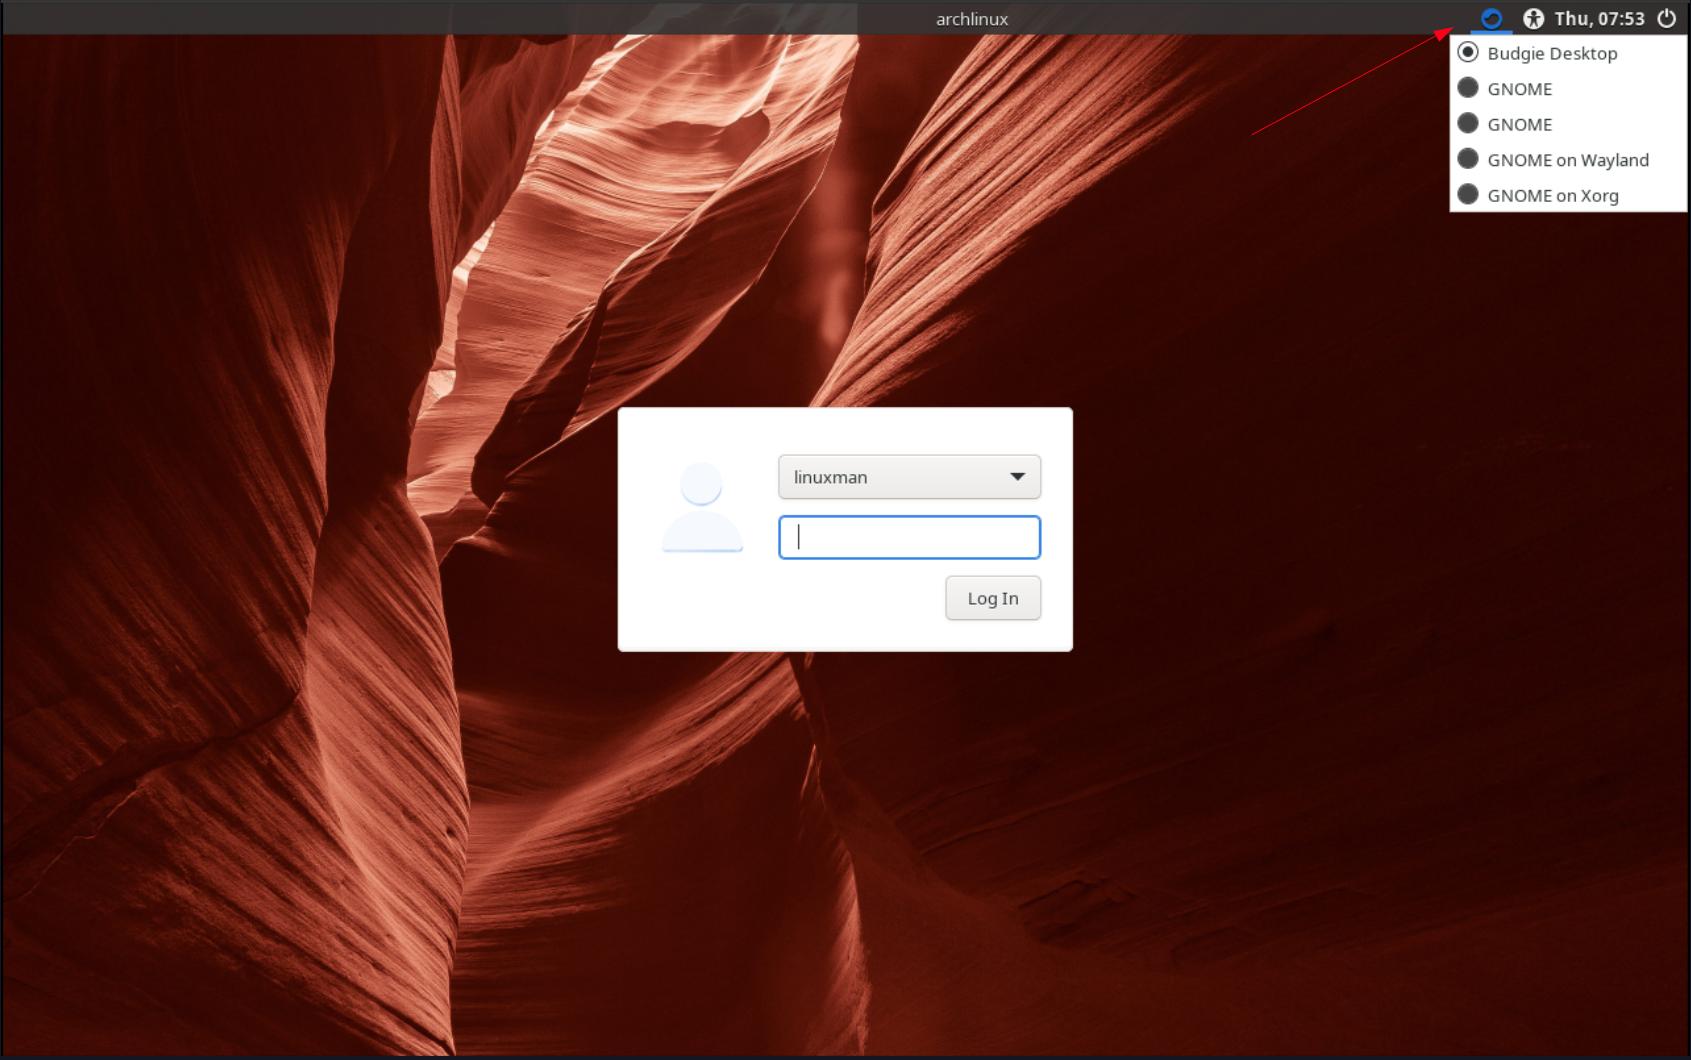
If all went well you’ll see a screen similar to this which will prompt you for a password and also has a dropdown menu that will be automatically populated by every desktop you currently have installed. Since Budgie is Gnome based, it also installs parts of the Gnome Desktop base however these versions are non-functional and won’t work unless you directly install the Gnome package group but why would you ever want to do that?
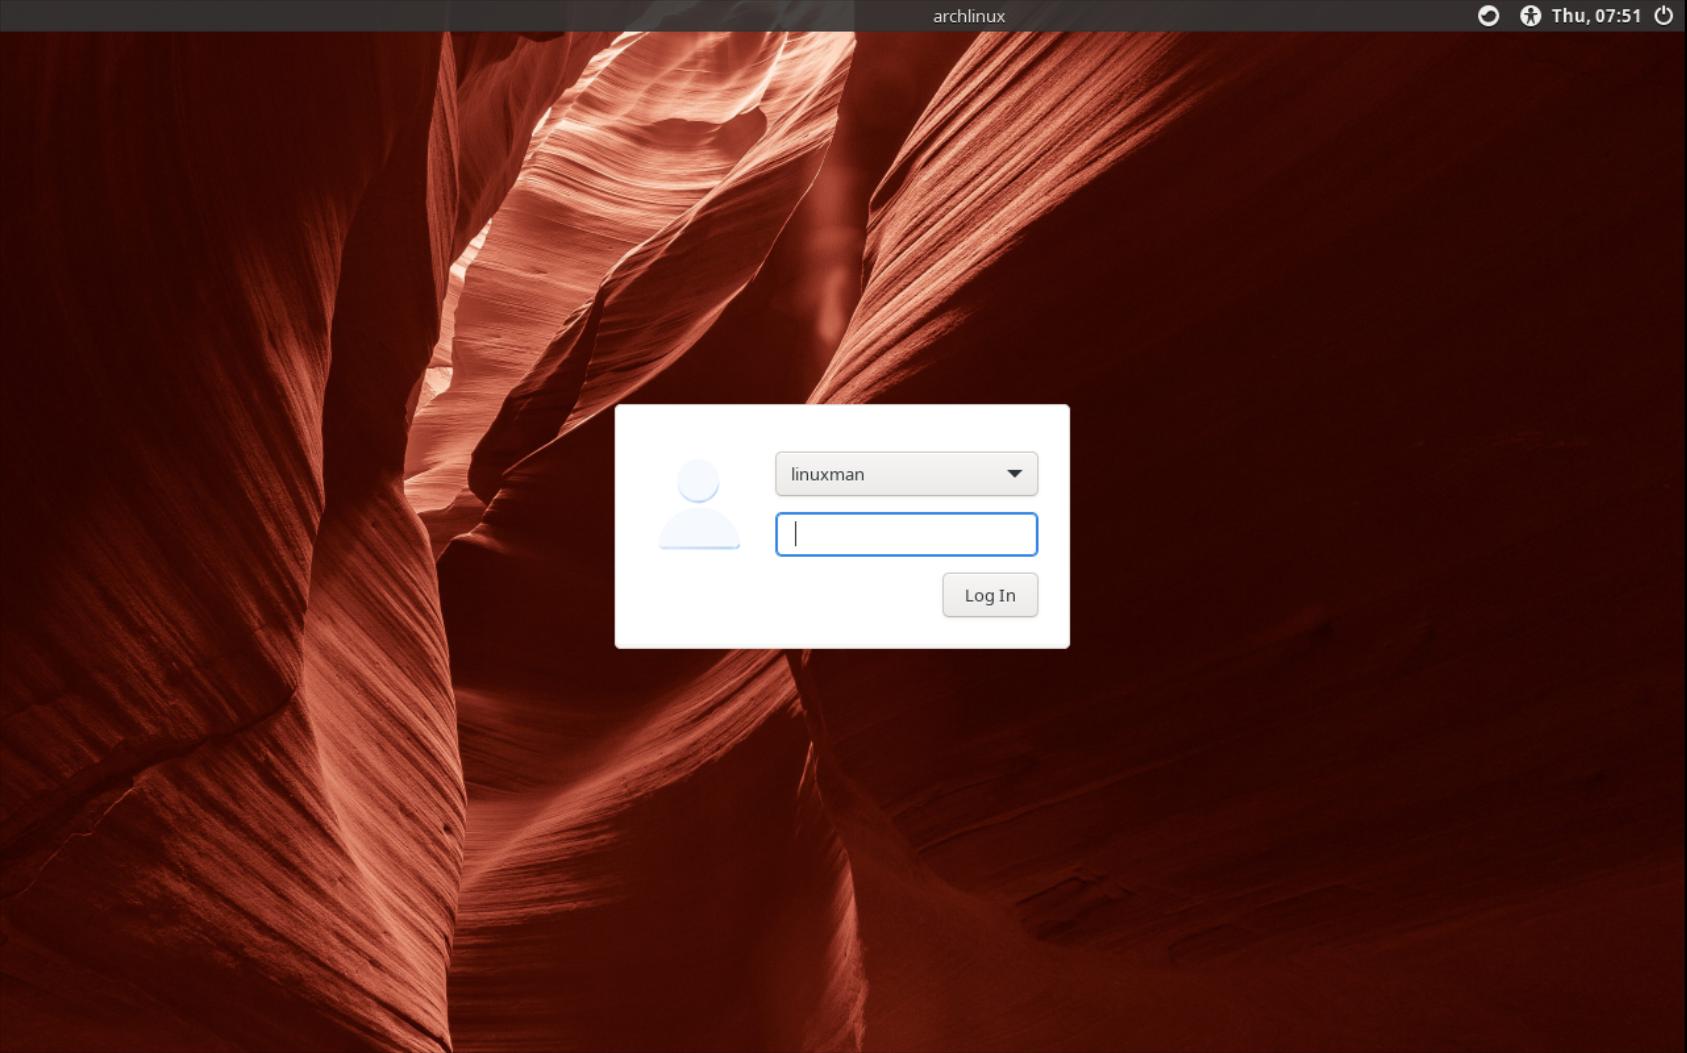
Once you are done exploring lightdm, you can login and be greeted by Budgie’s ultra out-of-the-way, sleek UI.
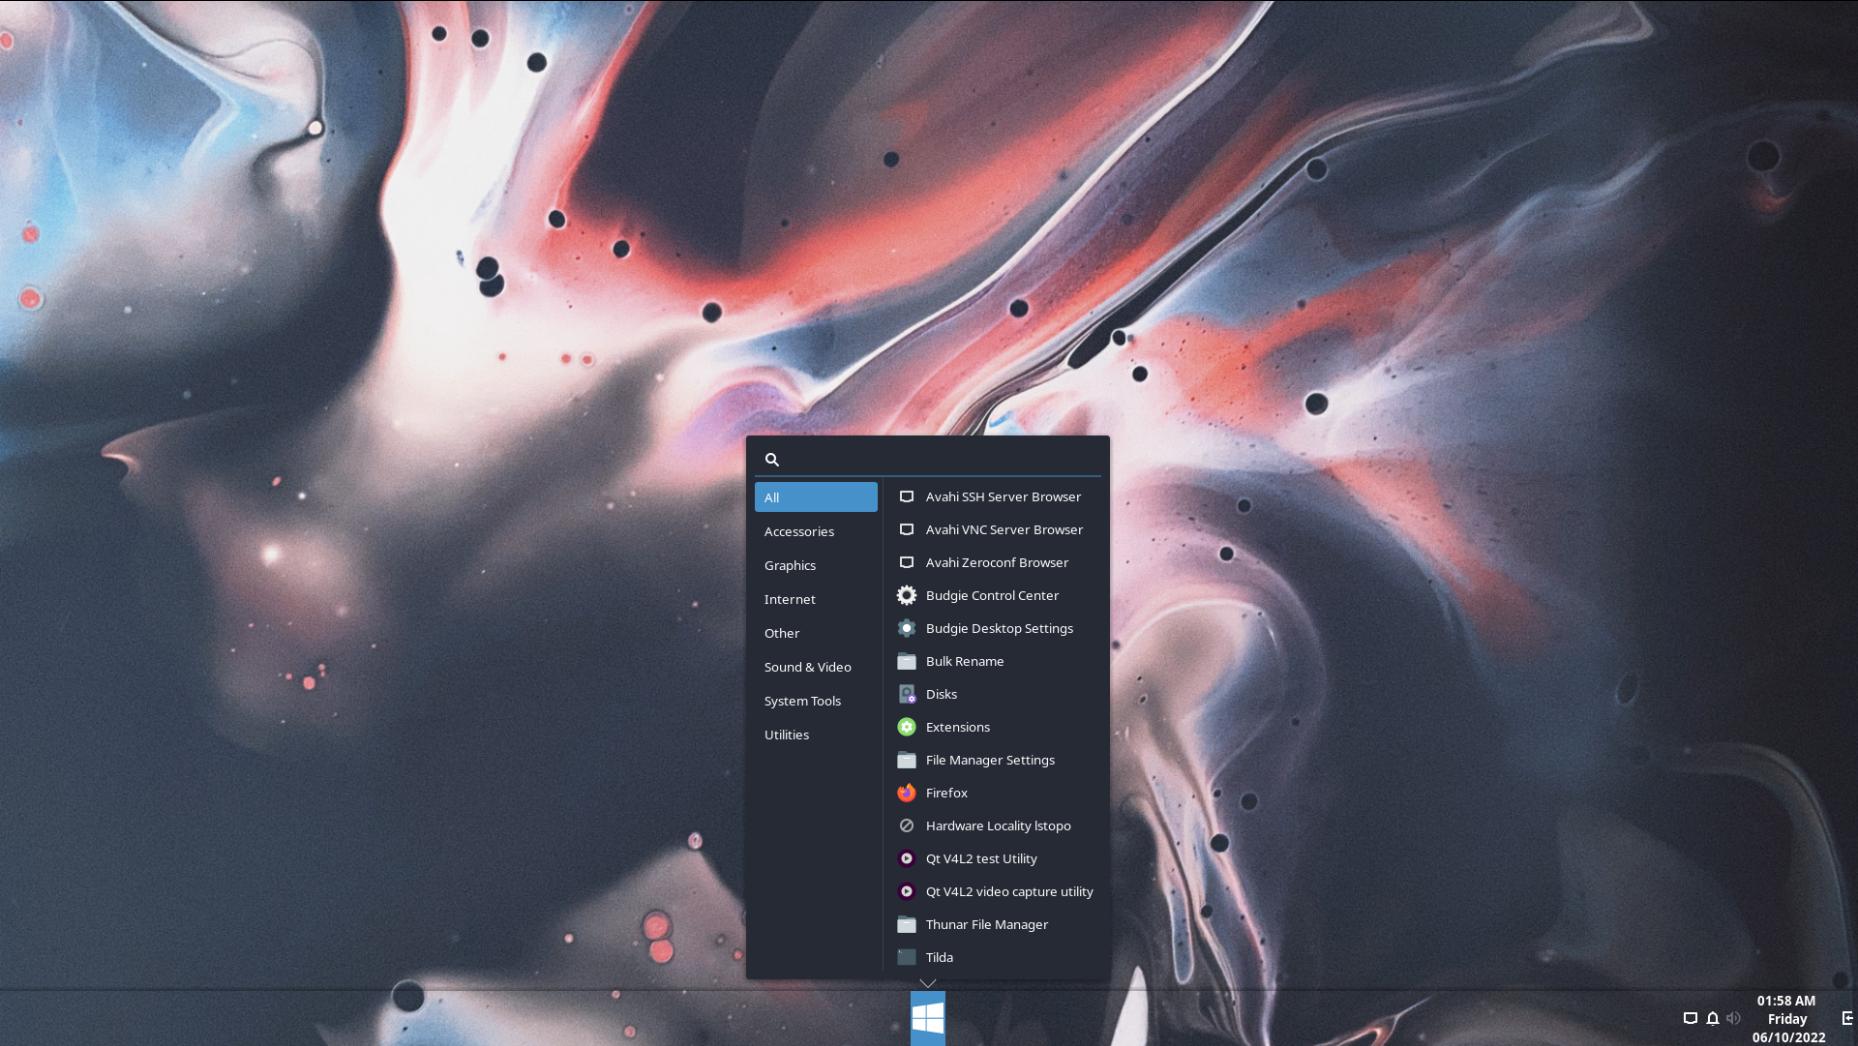
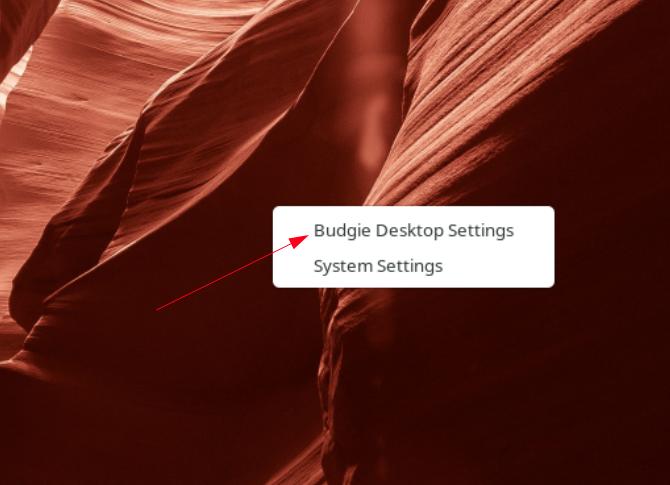
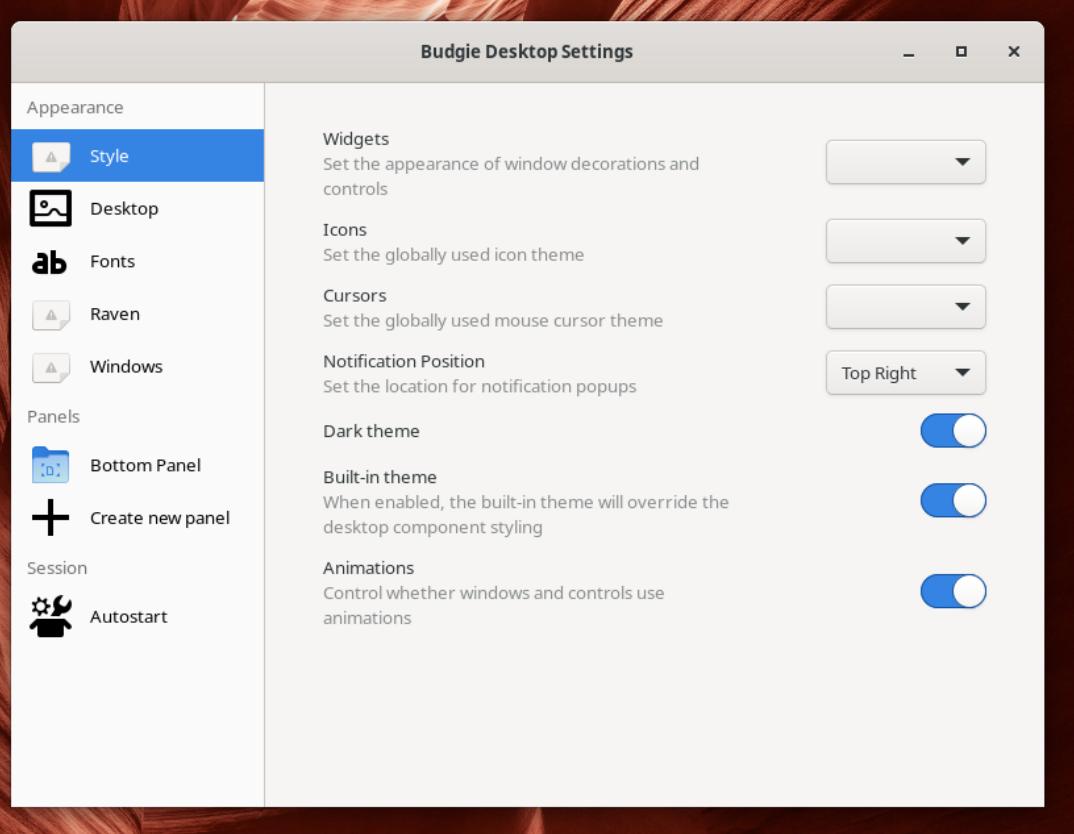
Now that we are here let’s get to customizing by right-clicking the desktop and going to ‘Budgie Desktop Settings’ which will bring up the main window where most of our tweaks are going to take place.
Installing a GTK theme and Icon set
If the blinding white of the this menu is getting to you the same way it got me then you can fix this by installing the following GTK3+ theme via terminal:
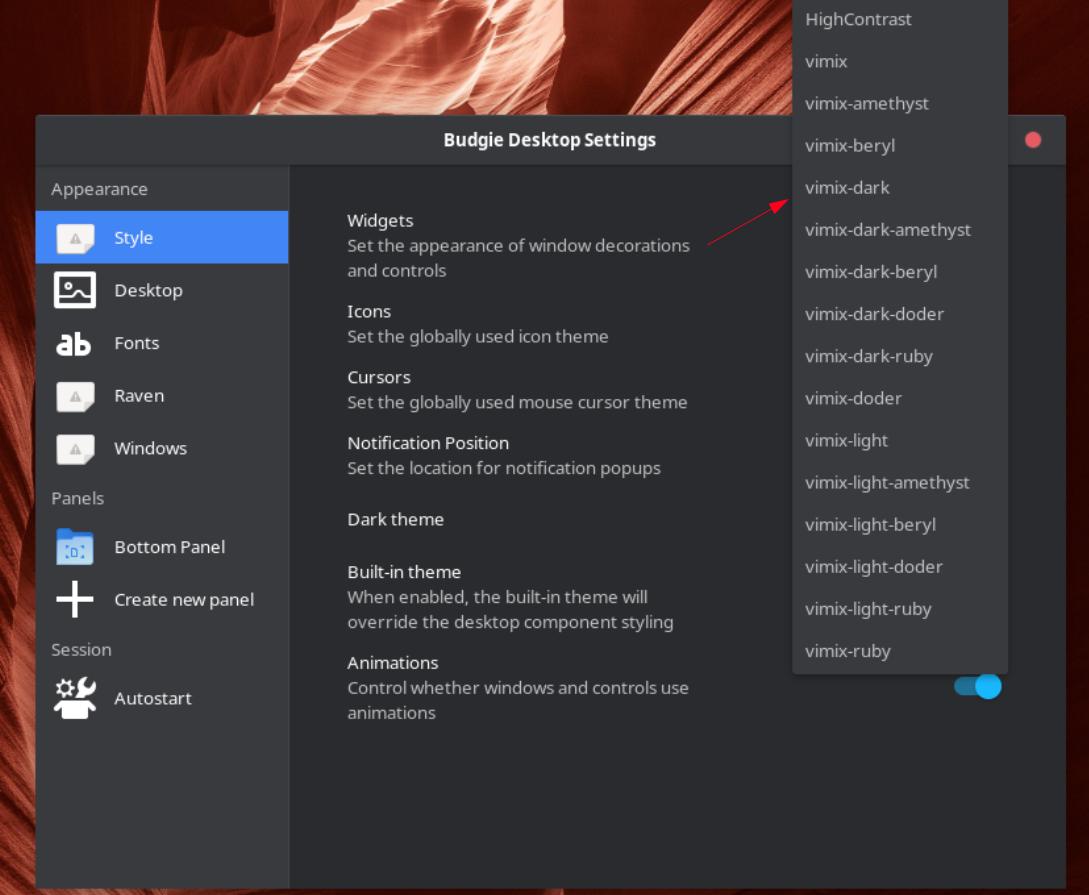
yay -S vimix-gtk-themes vimix-icon-theme
This will install a collection of dark themes along with the vimix icon set with various color accent options, I’ll be using vimix-dark across the board for my Widgets, Icons, and Cursors, but go ahead pick whatever strikes your fancy. You can also find more GTK themes in the AUR, linked here, as well as other icon sets, linked here, installable via yay. Note that any themes/icon sets you install wont show up unless you exit and reopen the Budgie Desktop Settings app.
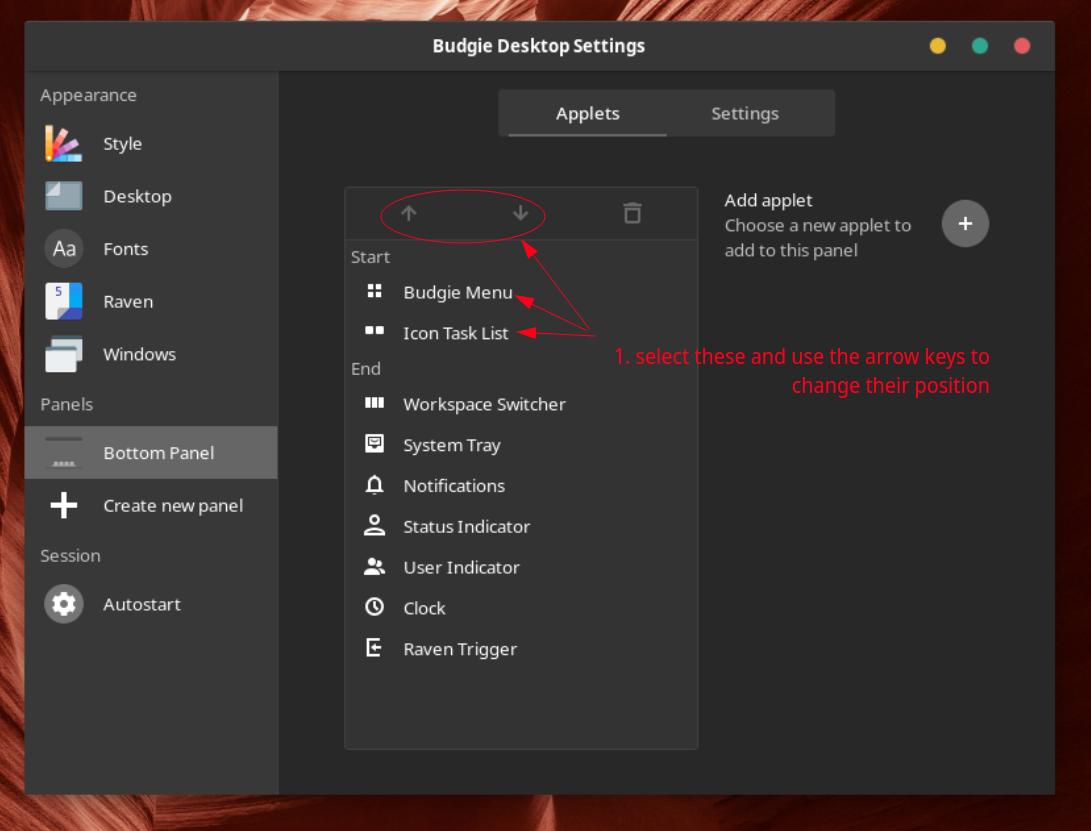
After you have you GTK theme and icon sets figured out, we’ll need to change the bottom panel to more closely resemble Windows 11’s taskbar. This very easy to do via Panel → Bottom Panel, once here all you need to do is select all the entries under the Start section and using the arrow buttons to change their position until ‘Center’ shows up over the entries.
At this stage you’ll want to make some tweaks like removing the Workspace Switcher (unless you use it) and adding the budgie-network-applet, to mimic Windows’ ever present network system tray icon. You can find the repo for this applet on GitHub, linked here. You can also install this package from the AUR like so:
yay -S budgie-network-applet
I had to reboot my system for the Network applet to show up in the list, after which I also adjusted the clock applet to more closely match the time and date display of Windows.
Adjusting the Clock Applet
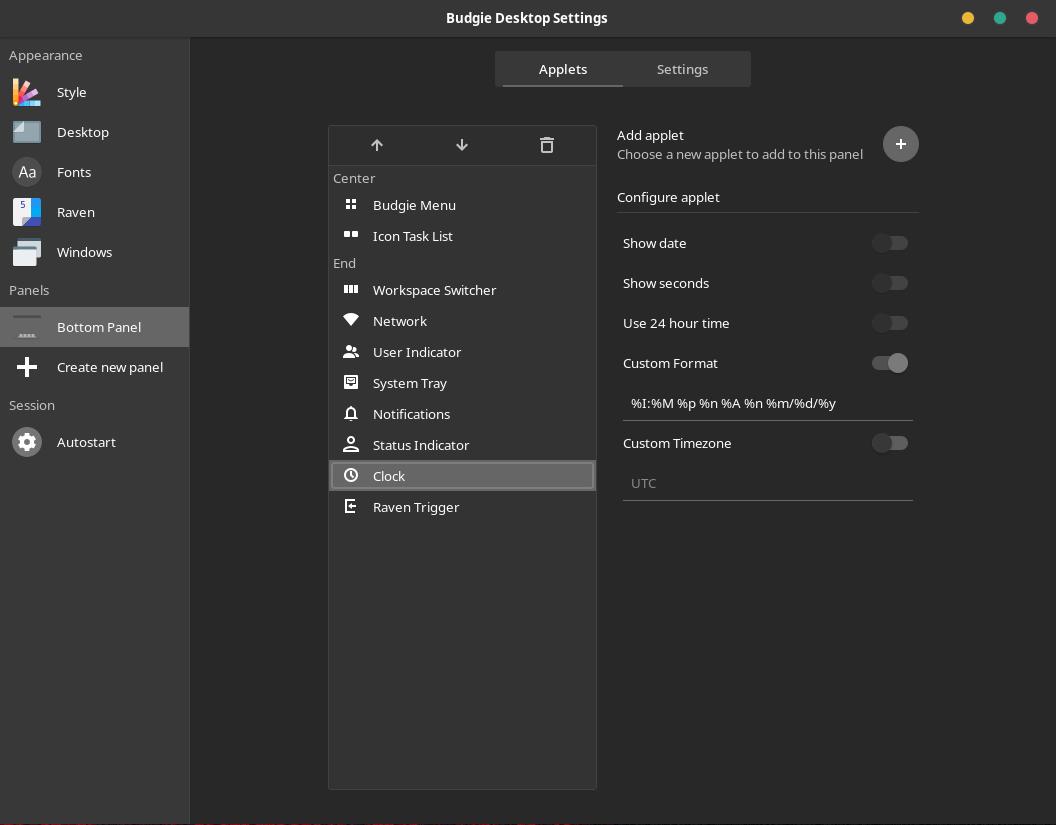
Budgie’s clock applet allows for a custom format that follows the date syntax, and after a quick internet search I was able to match Window’s clock perfectly. Below you’ll find a table that gives a brief overview of the date syntax, but if you just want to copy my format, here it is:
%I:%M %p %n %A %n %m/%d/%Y
The above results in a 12 hour format clock, followed by the day of the week, and the date below it.
| Value | Represents |
|---|---|
%n | New line |
%a | Abbreviated weekday name (Sun) |
%A | Full weekday name (Sunday) |
%B | Abbreviated month name (Jun) |
%I | 12-hour format |
%H | 24 hour format |
%M | Minutes (00-59) |
%S | Seconds (00-60) |
%p | Shows AM/PM |
%m | Month (01-12) |
%d | Day of the month (06) |
%Y | Full year (2022) |
%y | Abbreviated year (22) |
More Tweaks!
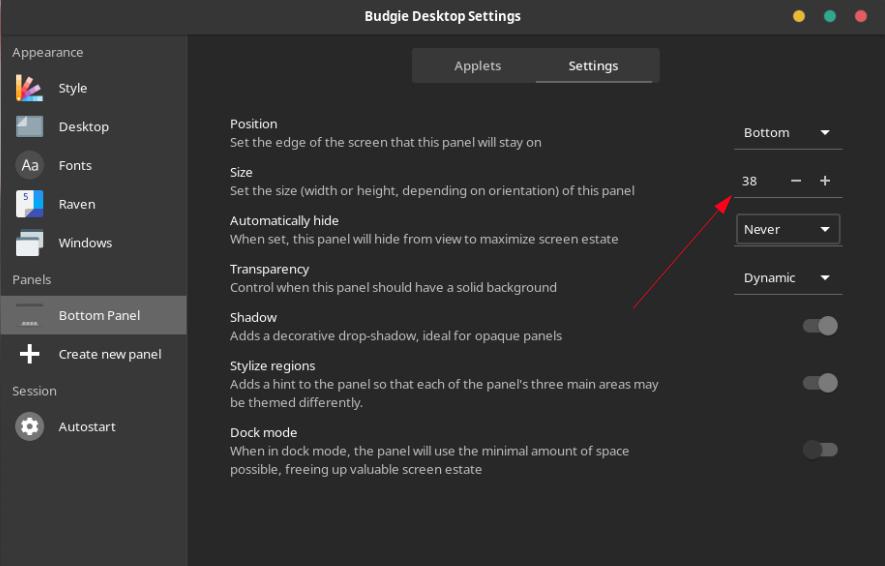
Panel Height
Some final adjustments come from the Settings menu within the panel menu that will let you increase the icon size which helps since following the Windows date format leads to a pretty tall bottom panel. I set mine around 38, but 40 also looks good.
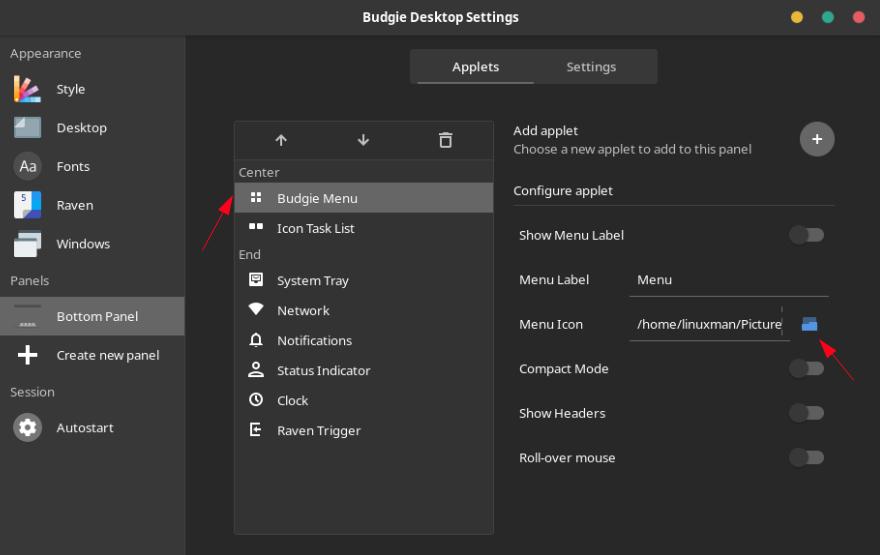
Custom start icon
This next one setting is entirely optional but if you really want to sell the look, Budgie allows you to supply your own start menu icon. The budgie menu supports .png and .svg files so I took the liberty of taking the Windows icon that I found off the net (Thanks flaticon.com!), and painted it white in GIMP.
Changing the Background Image
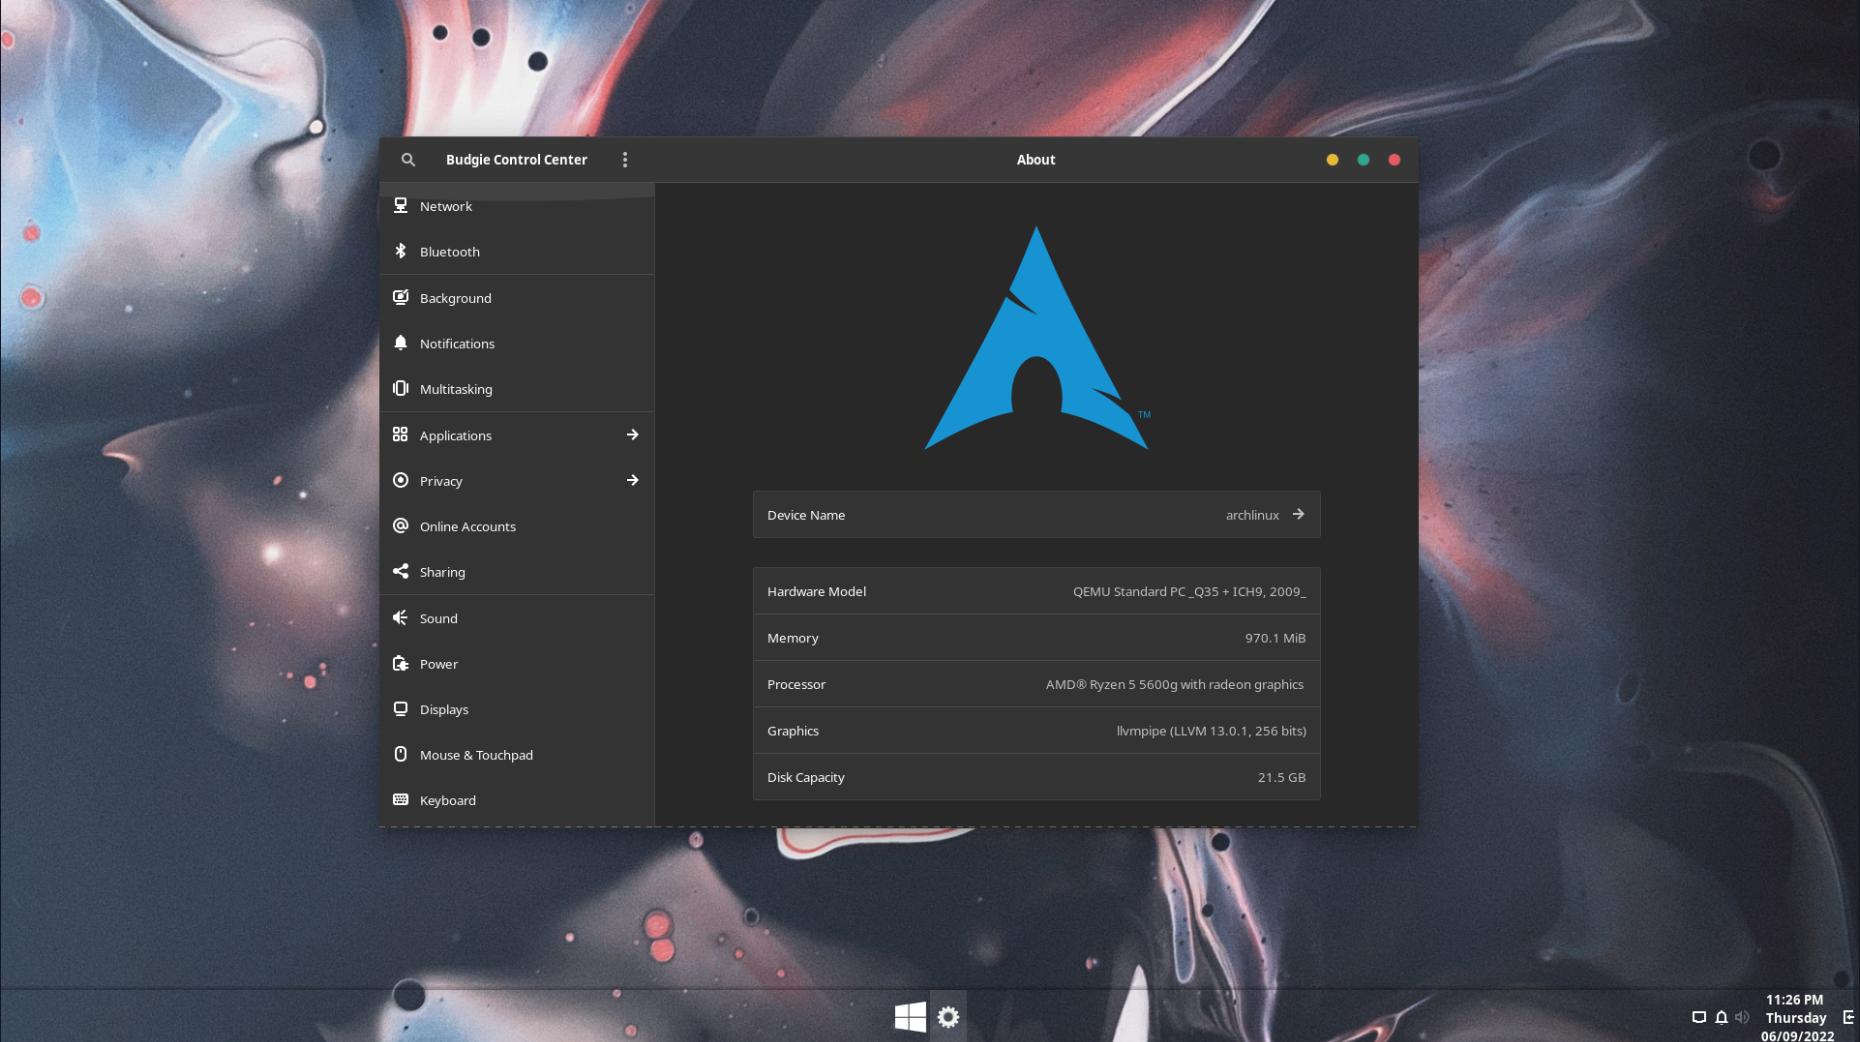
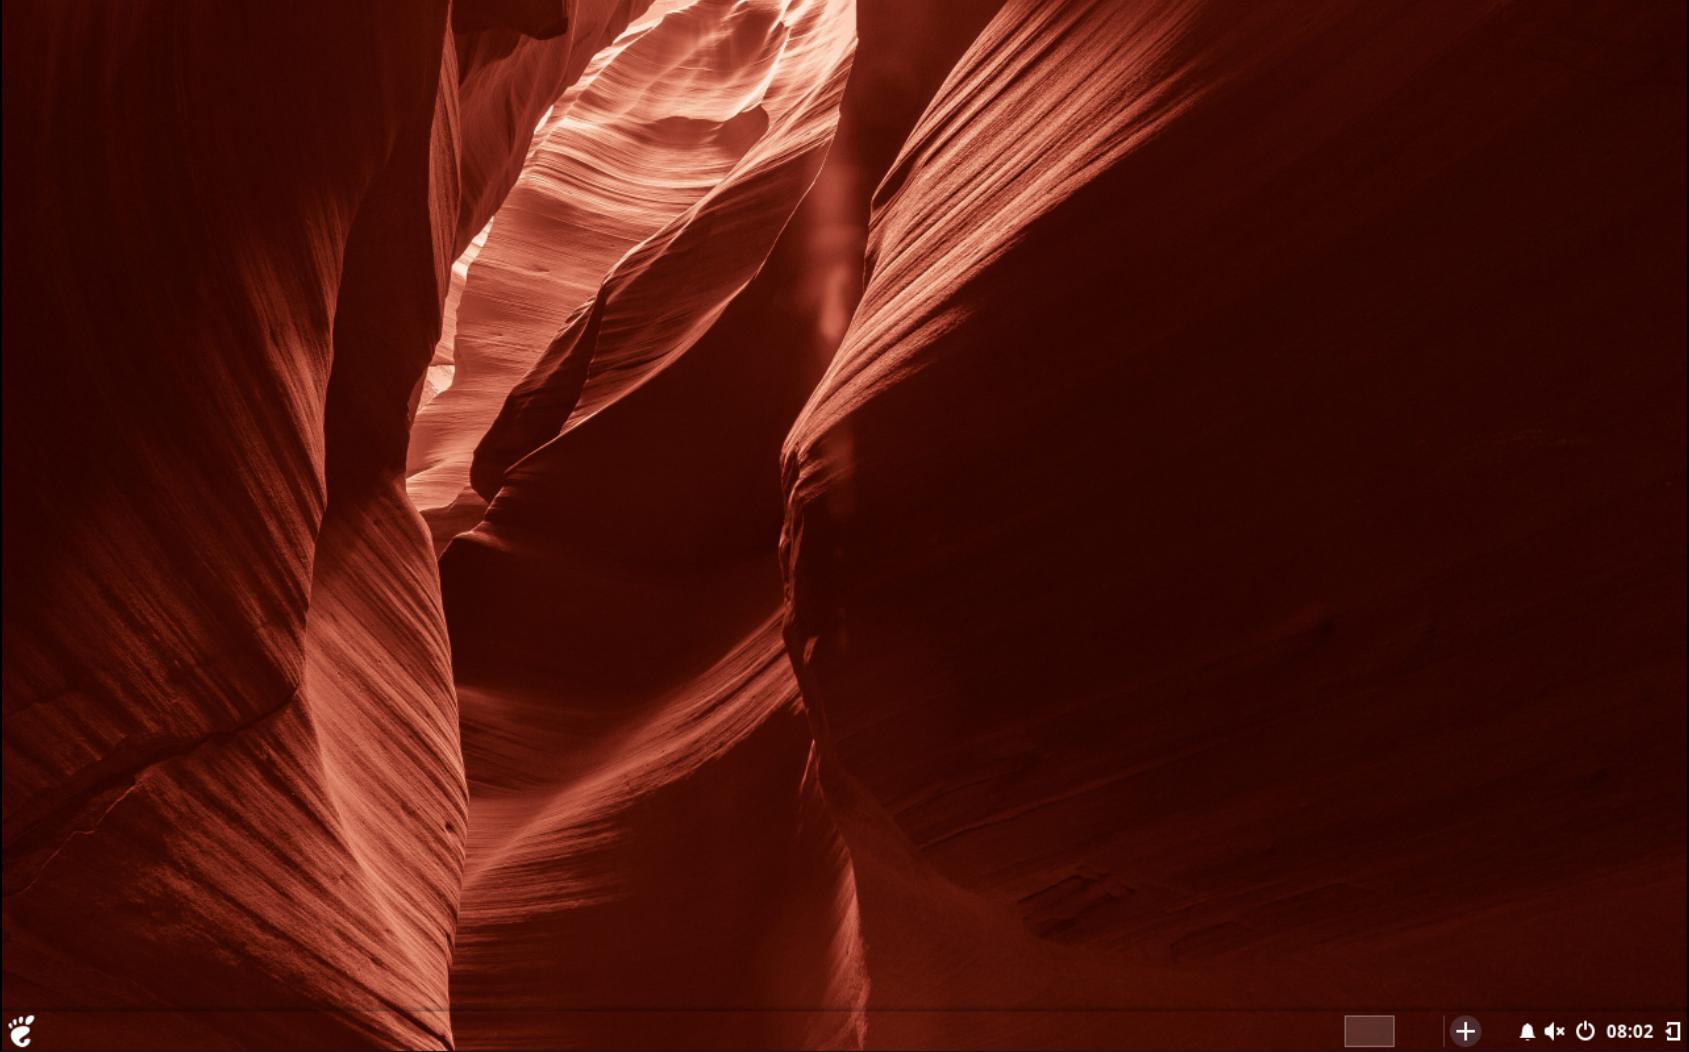
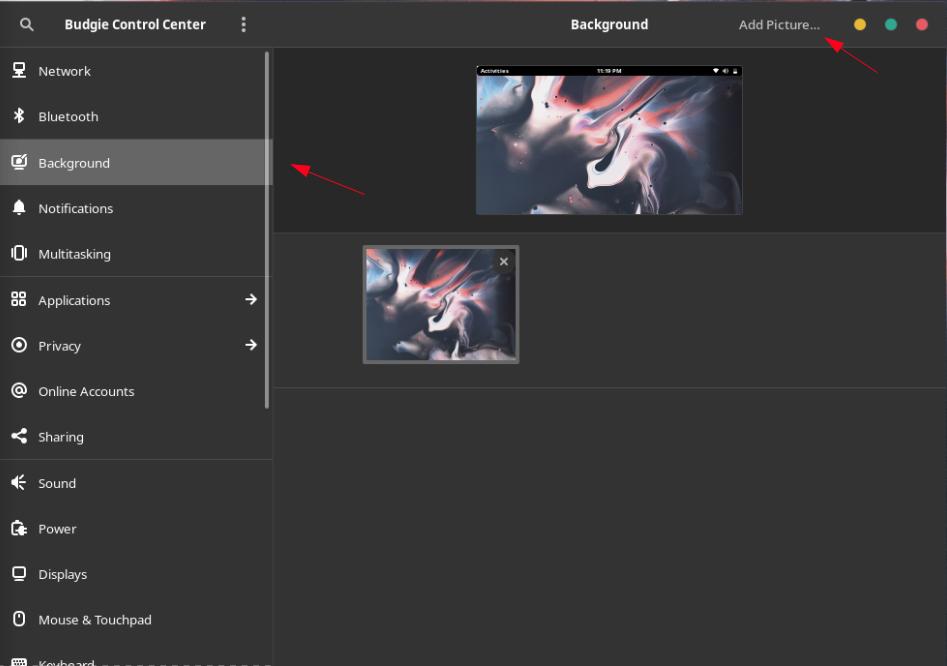
To change your desktop’s background image, you’ll have to open the Budgie Control Center app, accessible by right-clicking your desktop and select ‘system settings’ which will open the app and you can navigate to the Background Menu and add you wallpaper that way. I sourced this image from Unsplash and just ran an Invert effect over it in GIMP.
Finale
By the end of all this you should have a very Windows 11-like desktop that will make you the coolest kid on the block—or the most ridiculed, it depends on where you post your desktop. Either way I’m happy with the result, as it definitely passes as some sort of crazy Windows Linux hybrid that isn’t Zorin or Elementary, it also looks better IMO. Hopefully this scratches someone else’s itch as I feel more at home than ever and will definitely adopt this look on my actual workstation. Thanks for reading and enjoy Budgie!