Vim, the text editor of choice for so many. Why might you ask? Why would someone use technology that is nearly 30 years old? The reason is it does its job with no distraction. Vim is lightweight and runs on servers and workstations alike. You can use plugins to customize Vim to suit you. Be it coding with linters, terminals, and file tree, or just vanilla, Vim has got you covered. You might say, what about my Vs-code extensions extra? Do you want to send Microsoft your data as a Linux user? If not, you are in the right place.
Today we will cover installing Vim. Then we will show you how to use some very basic commands to get you started. Next we will show you some basic vimrc configurations to make your life a little easier. Finally, we will show you how to install plugins. Expanding Vim’s capabilities and usability. So let’s dive right into Vim, and bring down the complication for someone new.
Installation
To install Vim is pretty straight forward. For every distribution I have used to date, Vim has been available in the repositories. So we will show you the commands for Arch, Debian, and RHEL distributions. We will also show you how to install it from source.
Arch
sudo pacman -S vim
Debian
sudo apt install vim
RHEL
sudo dnf install vim
Source
					git clone https://github.com/vim/vim.git
cd vim/src
make
Now you can see that no matter your system you can get Vim. This is one thing that is very nice about Vim. Due to the fact that it is thirty plus years old, it is widely available!
Basics
Now that we have Vim installed we can go ahead and get started using it. We will go over how to edit, write and quit a file. We will also cover how to make vanilla Vim more usable. First thing to do is create a file and edit it.
vim vim_cheats.md
Here we are opening a new file named vim_cheats.md. Notice as a good practice we did not leave any spaces in the name. This is so we don’t have to write it like this, ‘vim cheats.md’. This is just an ease of use tip. Next we will want to edit.
					i
#In this case, i stand for insert.
Here we are opening a new file named vim_cheats.md. Notice as a good practice we did not leave any spaces in the name. This is so we don’t have to write it like this, ‘vim cheats.md’. This is just an ease of use tip. Next we will want to edit.
a
In this case, a stand for append. This allows you to edit the markdown file. Now we can add some quick cheats to save for later, in case you want to learn more commands.
# Vim Text Editor Cheats
## Spell check:
```
:set spell
```
## Numbers:
```
:set number
```
#
## Quitting:
#
#### Exit as long as there have been no changes:
```
:q
```
#### Exit and save changes if any changes have been made:
```
:wq
```
#### Exit and ignore any changes:
```
:q!
```
#
## Inserting Text:
#
#### Insert before cursor:
```
i
```
#### Insert before line:
```
I
```
#### Append after cursor:
```
a
```
#### Append after line:
```
A
```
#### Open a new line after current line:
```
o
```
#### Open a new line before current line:
```
O
```
#### Replace one character:
```
r
```
#### Replace many characters:
```
R
```
#
## Deleting Text:
#
#### Delete character to the right of cursor:
```
x
```
#### Delete character to the left of cursor:
```
X
```
#### Delete to the end of the line:
```
D
```
#### Delete current line:
```
dd
```
#
## Yanking Text:
#
#### Yank the current line:
```
y
```
#
## Changing Text:
#
#### Change to the end of the line:
```
C
```
#### Change the whole line:
```
cc
```
#
## Putting Text:
#
#### Put after the position or after the line:
```
p
```
#### Put before the position or before the line:
```
P
```
#
## Search for strings:
#
#### Search forward for string:
```
/string
```
#### Search back for string:
```
?string
```
#### Search for next instance of string:
```
n
```
#### Search for previous instance of string:
```
N
```
#
## Replace:
#
#### Replace pattern with string according to flags:
```
:s/pattern/string/flags
```
#### Flag - Replace all occurrences of pattern:
```
g
```
#### Flag - Confirm replaces:
```
c
```
#### Repeat last :s command:
```
&
```
#
## Motion:
#
#### Move left:
```
h
```
#### Move down:
```
j
```
#### Move up:
```
k
```
#### Move right:
```
l
```
#### Move to next word:
```
w
```
#### Move to next blank delimited word:
```
W
```
#### Move to the beginning of the word:
```
b
```
#### Move to the beginning of blank delimited word:
```
B
```
#### Move to the end of the word:
```
e
```
#### Move to the end of Blank delimited word:
```
E
```
#### Move a sentence back:
```
(
```
#### Move a sentence forward:
```
)
```
#### Move a paragraph back:
```
{
```
#### Move a paragraph forward:
```
}
```
#### Move to the beginning of the line:
```
0
```
#### Move to the end of the line:
```
$
```
#### Move to the first line of the file:
```
1G
```
#### Move to the last line of the file:
```
G
```
#### Move to nth line of the file:
```
nG
```
#### Move to nth line of the file:
```
:n
```
#### Move to top of screen:
```
H
```
#### Move to middle of screen:
```
M
```
#### Move to bottom of screen:
```
L
```
#### Move to associated ( ), { }, [ ]:
```
%
```
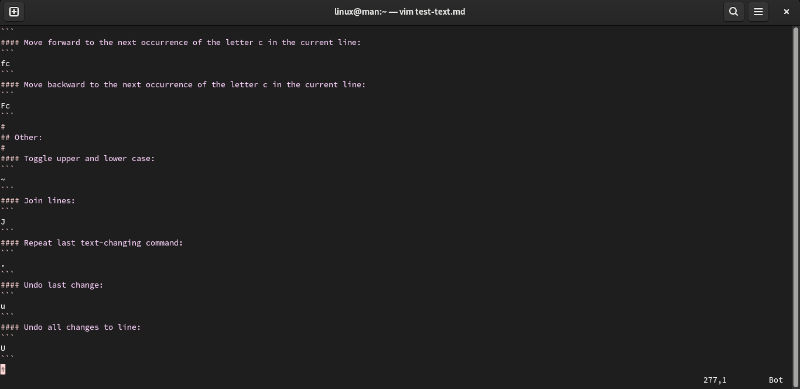
#### Move forward to the next occurrence of the letter c in the current line:
```
fc
```
#### Move backward to the next occurrence of the letter c in the current line:
```
Fc
```
#
## Other:
#
#### Toggle upper and lower case:
```
~
```
#### Join lines:
```
J
```
#### Repeat last text-changing command:
```
.
```
#### Undo last change:
```
u
```
#### Undo all changes to line:
```
U
```
Go ahead and exit edit mode by hitting Esc, and now we are free to write and quit the file.
:wq
It’s worth mentioning that you can also quit a file after editing, without saving.
q!
Configuration
Now we are getting to the point where you want to add some customization to Vim. To do this we will need to add a Vim script file named .vimrc. Vim will detect this file in your home directory and use it instead of the system file located /etc/vimrc. Let’s use Vim to create and edit this file.
vim ~/.vimrc
Now we can go ahead and just copy the following and paste it in.
					"			 _        _  ,__ __   , __   ___
"			(_|   |_/| |/|  |  | /|/  \ / (_)
"			  |   |  | | |  |  |  |___/|
"			  |   |_ |/  |  |  |  | \  |
" 			   \_/ \_/\/ |  |  |_/|  \_/\___/

" Disable compatibility with vi which can cause unexpected issues.
set nocompatible

" Enable type file detection. Vim will be able to try to detect the type of file is use.
filetype on

" Enable plugins and load plugin for the detected file type.
filetype plugin on

" Load an indent file for the detected file type.
filetype indent on

" Turn syntax highlighting on.
syntax on

" Add numbers to the file.
set number

" Add relative numbers.
set relativenumber

" Highlight cursor line underneath the cursor horizontally.
set cursorline

" Highlight cursor line underneath the cursor vertically.
set cursorcolumn

" Set shift width to 4 spaces.
set shiftwidth=4

" Set tab width to 4 columns.
set tabstop=4

" Use space characters instead of tabs.
set expandtab

" Save backup files.
set backup

" Do not let cursor scroll below or above N number of lines when scrolling.
set scrolloff=12

" Do not wrap lines. Allow long lines to extend as far as the line goes.
set nowrap

" While searching though a file incrementally highlight matching characters as you type.
set incsearch

" Ignore capital letters during search.
set ignorecase

" Override the ignorecase option if searching for capital letters.
" This will allow you to search specifically for capital letters.
set smartcase

" Show partial command you type in the last line of the screen.
set showcmd

" Show the mode you are on the last line.
set showmode

" Show matching words during a search.
set showmatch

" Use highlighting when doing a search.
set hlsearch

" Set the commands to save in history default number is 20.
set history=10000

" Enable auto completion menu after pressing TAB.
set wildmenu

" Make wildmenu behave like similar to Bash completion.
set wildmode=list:longest

" There are certain files that we would never want to edit with Vim.
" Wildmenu will ignore files with these extensions.
set wildignore=*.docx,*.jpg,*.png,*.gif,*.pdf,*.pyc,*.exe,*.flv,*.img,*.xlsx

set mouse=a
set ruler
set t_Co=256
We will now add MAPPINGS and VIMSCRIPT to help add more functionality.
" MAPPINGS --------------------------------------------------------------- {{{
" Set the backslash as the leader key.
let mapleader = "/"
" Press \\ to jump back to the last cursor position.
nnoremap <leader>\ ``
" Press \p to print the current file to the default printer from a Linux operating system.
" View available printers: lpstat -v
" Set default printer: lpoptions -d <printer_name>
" <silent> means do not display output.
nnoremap <silent> <leader>p :%w !lp<CR>
" Type jj to exit insert mode quickly.
inoremap jj <Esc>
" Press the space bar to type the : character in command mode.
nnoremap <space> :
" Pressing the letter o will open a new line below the current one.
" Exit insert mode after creating a new line above or below the current line.
nnoremap o o<esc>
nnoremap O O<esc>
" Center the cursor vertically when moving to the next word during a search.
nnoremap n nzz
nnoremap N Nzz
" Yank from cursor to the end of line.
nnoremap Y y$
" Map the F5 key to run a Python script inside Vim.
" We map F5 to a chain of commands here.
" :w saves the file.
" <CR> (carriage return) is like pressing the enter key.
" !clear runs the external clear screen command.
" !python3 % executes the current file with Python.
nnoremap <f5> :w <CR>:!clear <CR>:!python3 % <CR>
" You can split the window in Vim by typing :split or :vsplit.
" Navigate the split view easier by pressing CTRL+j, CTRL+k, CTRL+h, or CTRL+l.
nnoremap <c-j> <c-w>j
nnoremap <c-k> <c-w>k
nnoremap <c-h> <c-w>h
nnoremap <c-l> <c-w>l
" Resize split windows using arrow keys by pressing:
" CTRL+UP, CTRL+DOWN, CTRL+LEFT, or CTRL+RIGHT.
noremap <c-up> <c-w>+
noremap <c-down> <c-w>-
noremap <c-left> <c-w>>
noremap <c-right> <c-w><
" NERDTree specific mappings.
" Map the F3 key to toggle NERDTree open and close.
nnoremap <c-n> :NERDTreeToggle<cr>
"Opens Terminal
nnoremap <c-t> :term<c-down>
"These two clipboard functions only yank and put to primary X11 clipboard
"Yank too system clipboard
nnoremap <c-y> "*y
"Put from system clipboard
nnoremap <c-p> "*p
" Have nerdtree ignore certain files and directories.
let NERDTreeIgnore=['\.git$', '\.jpg$', '\.mp4$', '\.ogg$', '\.iso$', '\.pdf$', '\.pyc$', '\.odt$', '\.png$', '\.gif$', '\.db$']
" }}}
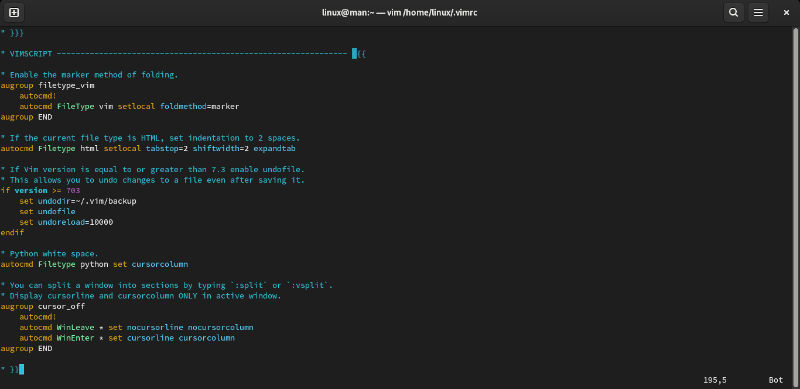
" VIMSCRIPT -------------------------------------------------------------- {{{
" Enable the marker method of folding.
augroup filetype_vim
autocmd!
autocmd FileType vim setlocal foldmethod=marker
augroup END
" If the current file type is HTML, set indentation to 2 spaces.
autocmd Filetype html setlocal tabstop=2 shiftwidth=2 expandtab
" If Vim version is equal to or greater than 7.3 enable undofile.
" This allows you to undo changes to a file even after saving it.
if version >= 703
set undodir=~/.vim/backup
set undofile
set undoreload=10000
endif
" Python white space.
autocmd Filetype python set cursorcolumn
" You can split a window into sections by typing `:split` or `:vsplit`.
" Display cursorline and cursorcolumn ONLY in active window.
augroup cursor_off
autocmd!
autocmd WinLeave * set nocursorline nocursorcolumn
autocmd WinEnter * set cursorline cursorcolumn
augroup END
" }}}
These are a copy of some setting that I like to use, as they have been very helpful. We can go ahead and type :wq to write and quit the file. Once you use Vim again, you will notice some pretty significant differences. We encourage you to play with all the settings. They are copious, so the comments that accompany each line of code will tell you what they all do. You can even reduce the file size by taking out anything you don’t think you will miss or need.
Plugins
This is where we add functionality or style to our Vim. Now we will add a few different plugins. First let’s improve the functionality. There are two plugins that are particularly useful, Ale and Nerdtree. Ale will help you with language syntax highlighting, whereas, Nerdtree provides you with a file tree that you can use to enter new files without ever leaving Vim. We will first need to create a .vim directory, complete with subdirectories.
mkdir .vim && cd .vim && mkdir autoload backup plugged && cd autoload && wget https://raw.githubusercontent.com/junegunn/vim-plug/master/plug.vim && cd ~/.vim/plugged && git clone https://github.com/dense-analysis/ale.git && git clone https://github.com/preservim/nerdtree.git
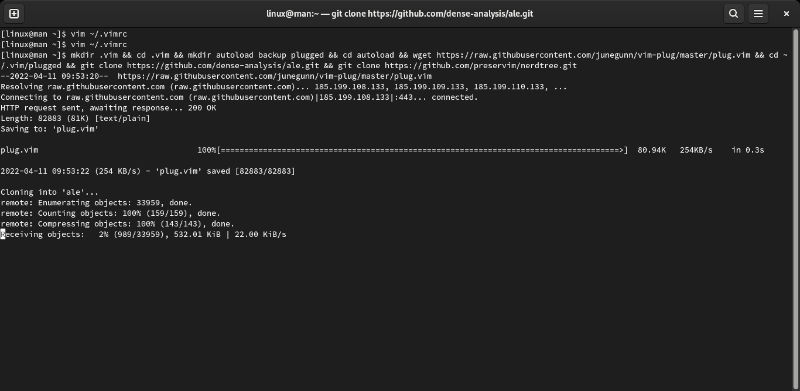
You have got to love open-source. I would like to thank every repository author for their contributions today. From the maintainers of Vim to the talent that bring us all of these wonderful Vim plugins. We added plug.vim to help us handle plugins. Then we installed the packages for Ale and Nerdtree. The next thing to do is add them to our configuration file.
vim ~/.vimrc
Now we can go ahead and just copy the following and paste it in the above MAPPINGS in your .vimrc file.
					" PLUGINS ---------------------------------------------------------------- {{{

call plug#begin('~/.vim/plugged')

  Plug 'dense-analysis/ale'

  Plug 'preservim/nerdtree'

call plug#end()

" }}}

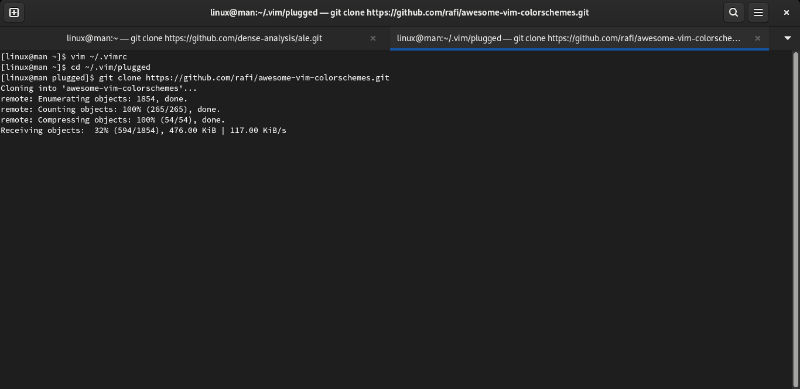
Note, there are a few directories that people like to use for their plugins, as the path is referenced in this piece “call plug#begin(‘~/.vim/plugged’)”. If you use a different directory for a plugin, you will need to make a section referenced similarly. Personally, I make sure they are all in the same place for ease of use. Now we can go ahead and type :wq to write and quit the file. Notice that every configuration update will change Vim every time you reopen it. Now let’s give the theme a makeover. We should still be in ~/.vim/plugged, if not cd into the right directory like so.
cd ~/.vim/plugged
Then we can add another plugin.
git clone https://github.com/rafi/awesome-vim-colorschemes.git
As you may have guessed we need to add some more to our
.vimrc file.
vim ~/.vimrc
We want our plugin section to look like this now.
					" PLUGINS ---------------------------------------------------------------- {{{

call plug#begin('~/.vim/plugged')

  Plug 'dense-analysis/ale'

  Plug 'preservim/nerdtree'

  Plug 'rafi/awesome-vim-colorschemes'

call plug#end()

" }}}

Now we need to add some code to help you use the theme inside the bottom of the VIMSCRIPT section.
					set background=dark
colorscheme happy_hacking

Once that is done, let’s go ahead and style our status bar at the bottom by adding this section at the bottom.
					" STATUS LINE ------------------------------------------------------------ {{{

" Clear status line when vimrc is reloaded.
set statusline=

" Status line left side.
set statusline+=\ %F\ %M\ %Y\ %R

" Use a divider to separate the left side from the right side.
set statusline+=%=

" Status line right side.
set statusline+=\ ascii:\ %b\ hex:\ 0x%B\ row:\ %l\ col:\ %c\ percent:\ %p%%

" Show the status on the second to last line.
set laststatus=2

" }}}

The results of our collective efforts.

Now we can go ahead and type :wq to write and quit the file. Next thing to do is open your Vim editor and edit a file to see the changes. You can look inside ~/.vim/plugged/awesome-vim-colorschemes/colors to see what other options there are. There are so many configurations you could go for, it is meant to be hacked and made your own.