Ever since YouTube put the axe to my favorite music-playing discord bot RhythmBot in 2021. I’ve been going without which sucks and makes me a sad camper. With some research and experimentation, I found a fun solution that uses a radio management suite called Azuracast + a discord bot called Azuri. Here’s the rundown on both programs: Azuracast is an opensource internet radio service that can play music from your server/VPS/etc, and Azuri is an awesome bot that provides music playback in Discord via Azuracast’s API. It gets ever better when I mention the fact that both of these programs are Dockerized which makes this setup incredibly portable!
Briefing
In this first part I’ll be covering basic Docker setup and some must-know commands you’ll need, as well as the configuration and setup of Azuracast. I’ll be providing instructions for installation on Arch and Debian in this article but Docker is distro agnostic, so whatever OS you do this on doesn’t matter as much. If your system can build and install Docker than you’ll be good to go on whatever you chose to host Azuracast on.
Docker
Before we do any of the cool stuff we need to have Docker installed on our system, we’ll also need docker-compose, if you are on Ubuntu then I recommend putting all the commands into a bash script and installing docker this way over doing it one command at a time.
For Debian/Ubuntu
The following command is an all-in-one approach, installing some needed dependencies, the docker keyring, updating system repos and installing docker and docker-compose.
					#Installing Docker

sudo apt-get update
sudo apt-get install ca-certificates curl gnupg lsb-release

sudo mkdir -p /etc/apt/keyrings

curl -fsSL <https://download.docker.com/linux/ubuntu/gpg> | sudo gpg --dearmor -o /etc/apt/keyrings/docker.gpg
echo \\
  "deb [arch=$(dpkg --print-architecture) signed-by=/etc/apt/keyrings/docker.gpg] <https://download.docker.com/linux/ubuntu> \\
  $(lsb_release -cs) stable" | sudo tee /etc/apt/sources.list.d/docker.list > /dev/null

sudo apt-get update
sudo apt-get install docker-ce docker-ce-cli containerd.io docker-compose-plugin
For Arch
Ironically its easier to get docker and docker-compose on Arch.
sudo pacman -S docker docker-compose
AzuraCast
The following code block will download the install script from GitHub which will check for docker and docker-compose and prompt you to install them if not detected, since we took care of that already it will skip that step and build out Azuracast and its dependency containers. Once complete Azuracast will start on the server with a web portal available on your machine’s IP. Typically something like http://192.168.XX.XX. It’s important to note that before you run the following code block, switch to root otherwise you’ll get permissions errors all over the place.
Installing Azuracast
Use sudo -i to switch to root:
					#Installing AzuraCast
mkdir -p /var/azuracast
cd /var/azuracast
curl -fsSL <https://raw.githubusercontent.com/AzuraCast/AzuraCast/main/docker.sh> > docker.sh
chmod a+x docker.sh
yes 'Y' | ./docker.sh setup-release
yes '' | ./docker.sh install
I recommend scripting out this set of commands too, just remember to make it executable with chmod +x. At the end of this process you’ll be in the /var/azuracast/ directory which will contain a few key files: the shell script used by Azuracast, a pair of docker-compose files, and two .env files. At this point we can hop on a browser and run through the first time set up.
Web Panel
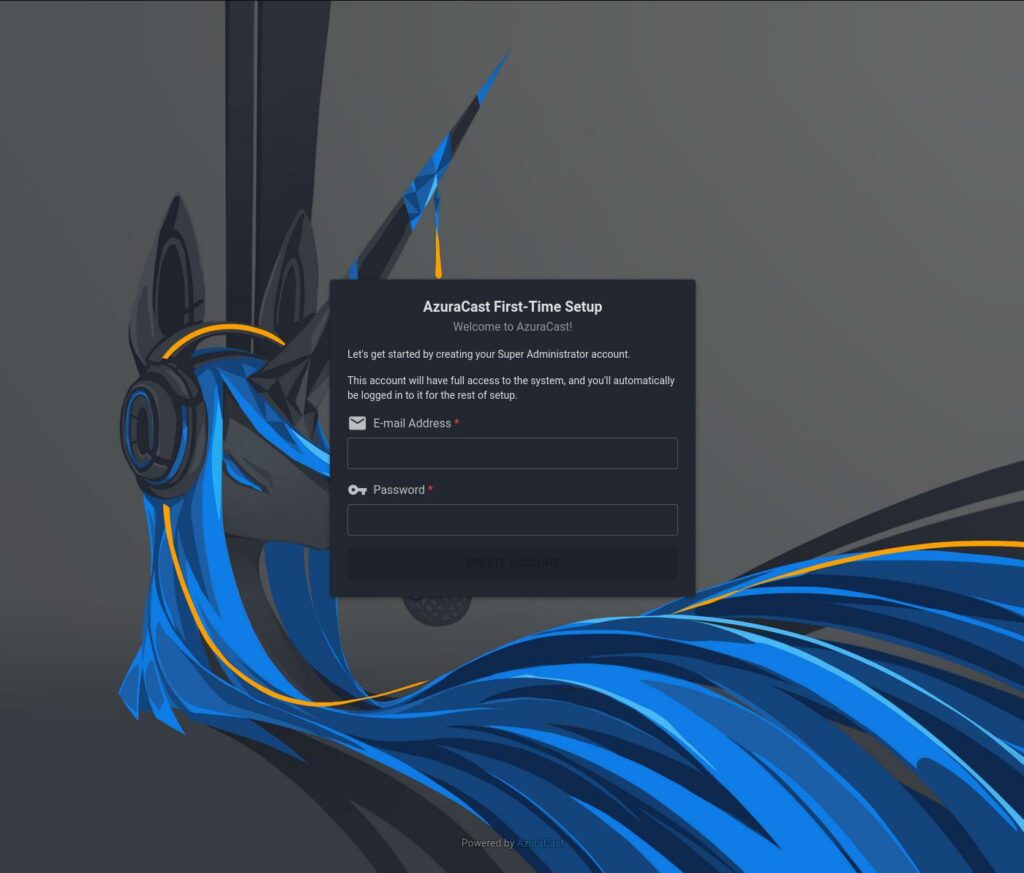
On first time login you must create an administrator account with your email. Now I’ve ranted and raved about this in the past, but in this case I can see the reason why there should be one here. Unlike Volumio, Azuracast is broadcasting music across the net (or to anyone with your Radio URL) so you can access it remotely which necessitates having a web panel; So Azuracast gets a pass on this one from me.
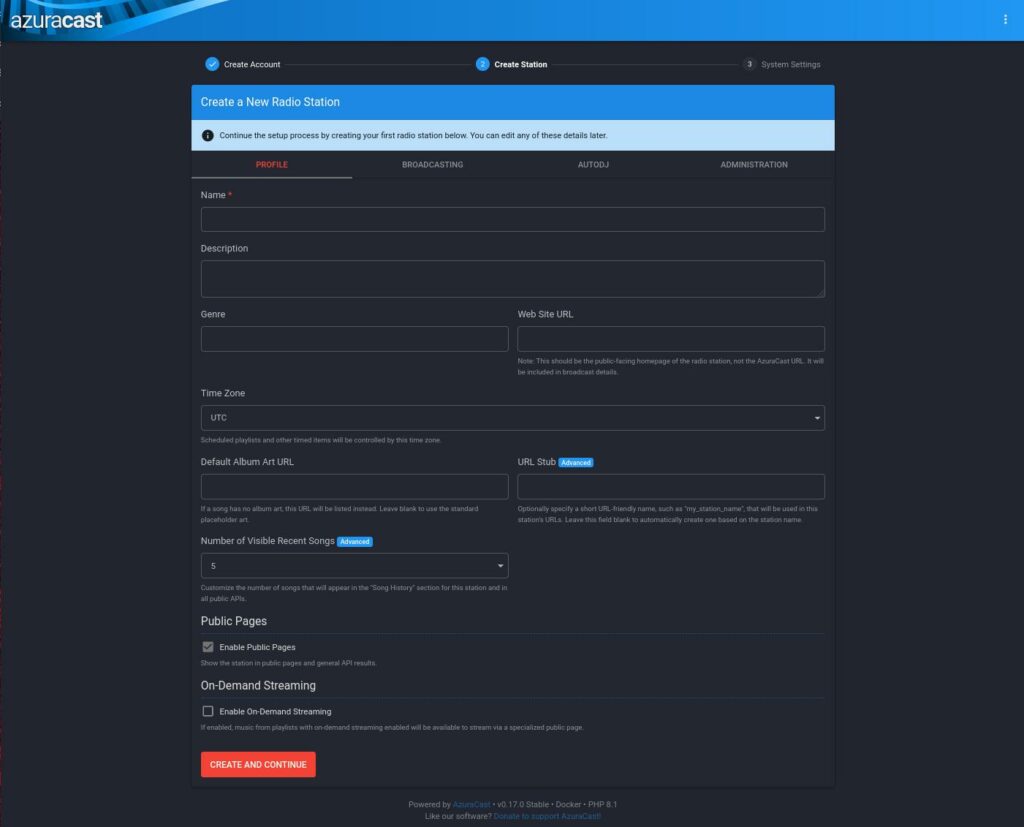
After you create your admin account, you’ll be asked to create your first radio station, the only required bit of information you’ll need to enter is the name, I went with Test.FM, and left all the other settings at there defaults.
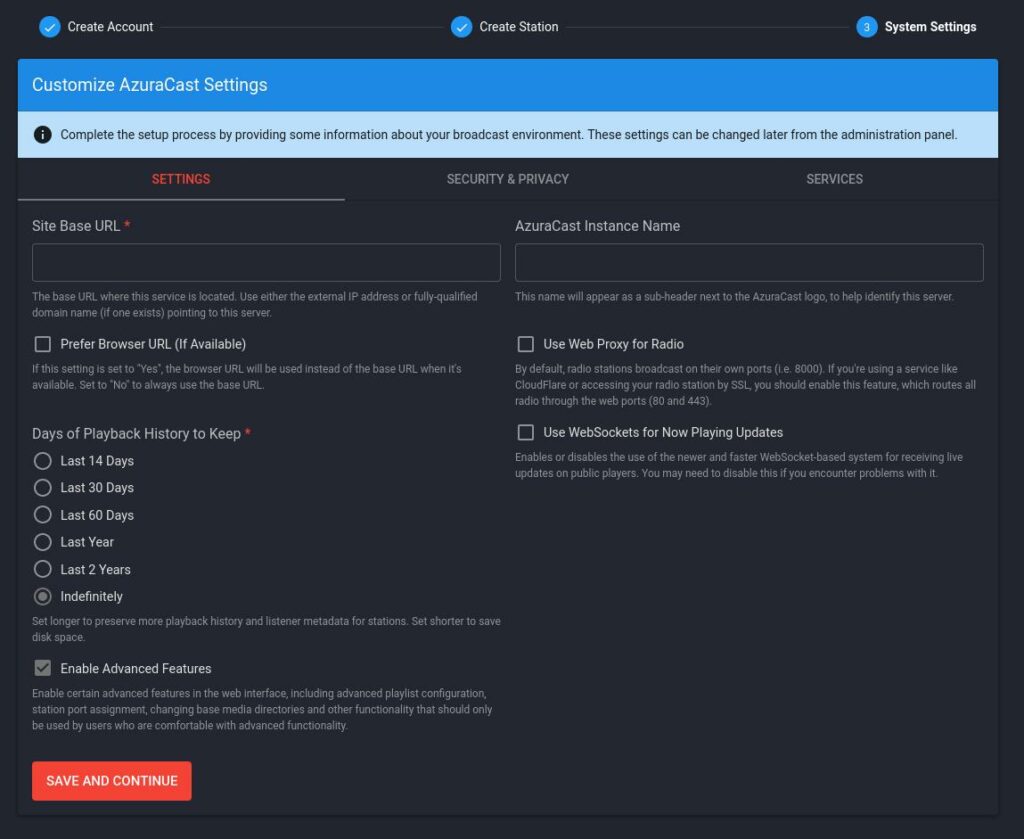
The last screen in this set is where we will set the Site Base URL in the format of http://192.168.XX.XX/, if you are hosting Azuracast in the cloud and have a domain name point at it, you may enter that here, otherwise use the external IPv4 that you can get by running ip addr or curl ip.me . Make sure you also check off “Use Web Proxy for Radio” and use your external IP if you plan on broadcasting over the internet. Another one to check ON is “Prefer Browser URL” which helps out if you are going to be accessing the Web panel from a different URL than the Site URL.
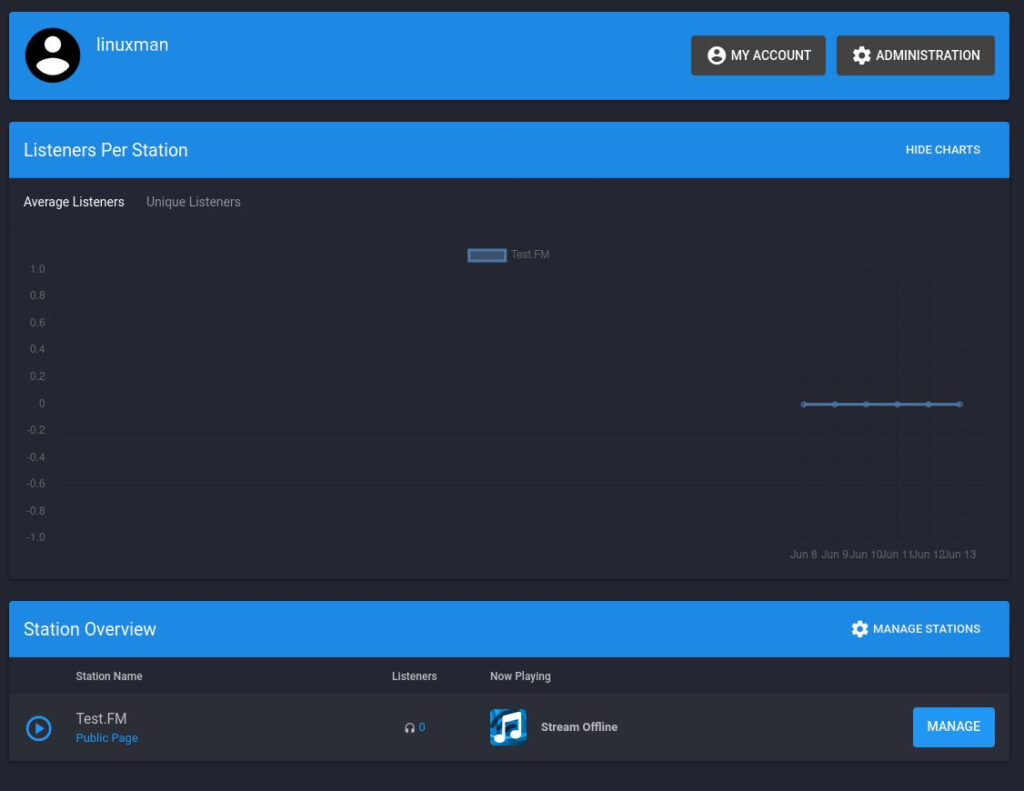
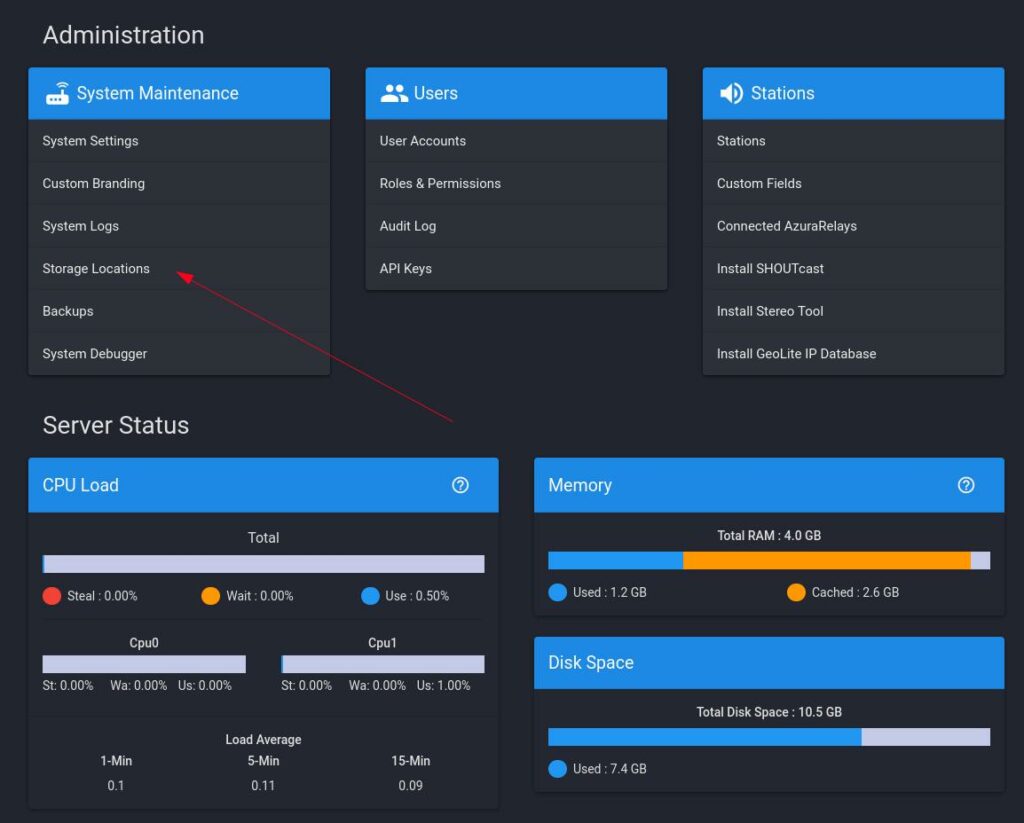
By default Azuracast will allocate a small (~10.5GB) local file system that you can upload audio files to via a web interface, which is cool If you are just trying the program out, but this will quickly fill up with a couple or even one large radio playlist. You can see the current storage locations by clicking on Administration → Storage Locations.
In this panel you’ll see a summary of your servers hardware and resource usage. There are also a multitude of other settings to tinker with, but we won’t be focusing on that now.
Azuracast supports SFTP, S3, Dropbox, and local file systems. I’ll be covering giving Azuracast a volume via docker-compose and mounting it as a local file system. A word of advice: If you want to use any of the other storage options consult the Azuracast Docs, linked here, but in my experience the docs are sparse where it matters (like configuring a storage location), but they’ll at least point you in a direction which, along with some Google-fu will get you an answer.
Using Volumes in Docker
Volumes are the best way to give your docker containers persistent data, as they are more flexible (easier to back-up/migrate, share among multiple containers). than the older bind-mount format. This section is for those of us who want to mount a host directory into Azuracast, feel free to skip this next part if you are going to opt for the other storage options.
Using docker ps
Before we can create a volume for Azurcast, we must stop the container from running using a couple of docker commands. First we will need to run docker ps to get ID of the Azuracast container.
docker ps
Unfortunately due to the way that docker ps lists out its containers you’ll likely end up with a terminal output that resembles my screenshot. When you use docker ps by itself, it will list a lot of information about the Container, typically Container Name, ID, Size, and as you can see—all the container port mappings.
Azuracast works like this: a radio station runs off a port and the first 50 stations are port mapped for you in the docker-compose file, hence your terminal output will be flooded with the container’s port mapping. To get around this we can pass the format option to docker ps and customize the information that gets outputted, use --format which uses a GO template syntax, see the example below:
sudo docker ps --format "table {{.ID}}\\t{{.Names}}\\t{{.RunningFor}}\\t{{.Status}}\\t{{.Size}}\\t{{.Image}}\\t{{.CreatedAt}}"
Using the above you’ll have a much more readable output:
Using this output we can see that the container’s ID is 89bb901593ae your container will have a different ID. Using this ID we can issue a docker stop command that will stop the Azuracast container completely.
sudo docker stop 89bb901593ae
Once stopped we can proceed with adding a volume.
Editing docker-compose.yml
Navigating to /var/azuracast directory from earlier, we will need to create a copy of the docker-compose.yml file and then edit the file with your preferred text editor, I’ll be using vim here. First make a copy of the file, like so:
sudo cp docker-compose.yml docker-compose.override.yml
Next we will edit the file using vim.
sudo vim docker-compose.override.yml
If you are using vim we can use the forward slash key to enter search mode. Look for the volumes section then press enter/esc to exit search mode then press a or i to enter edit mode. Then save and exit by pressing semicolon : and wq!.
					#/var/azuracast/docker-compose.overide.ml - abbr
...
volumes:
      - letsencrypt:/etc/nginx/certs
			...
      - /host/path/to/Music:/music/
    restart: unless-stopped
...
At the end of the volumes section before ‘restart’ line, add the path you’ll want to manage with Azuracast on the left and then give a name that will be mounted inside of the container on the right (remember this path as you’ll need it later). You’ll want to give ownership over to Azuracast to manage the directory, otherwise you’ll get permission errors in the Web UI.
Changing permissions
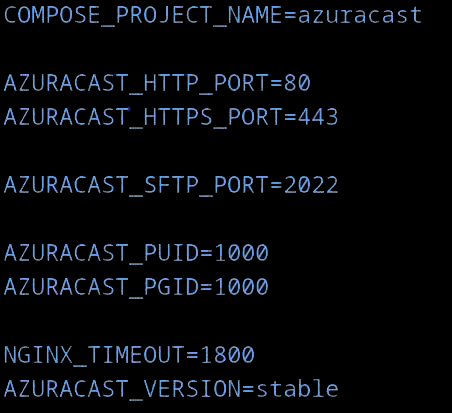
By design, any volumes you setup for use with docker will retain their hosts’s permissions. Inside of /var/azuracast/ you’ll find a .env file that contains Azuracasts’s environment variables that you can change depending on your configuration. The important ones here are the HTTP traffic ports, SFTP Port, and of course the UID and GUID. I’ll be keeping these values at their defaults and only take note of the UID and GUID that we’ll use to grant ownership of the files in the volume. cat .env to view these:
sudo chown 1000:1000 /path/to/music
This works because your host machine’s file system doesn’t care if a user or group currently ‘exists’ on your system at that present time. Only the UID matters and as long as that UID is present when those files are access its all copacetic. Once you are done with the edits, you can spin up the Azuracast container up again using the following docker-compose command:
sudo docker-compose -f docker-compose.override.yml up -d
-f specifies the file location, up starts up the container and -d tells docker to run the container in detached mode (in the background).
Mounting the volume in Azuracast
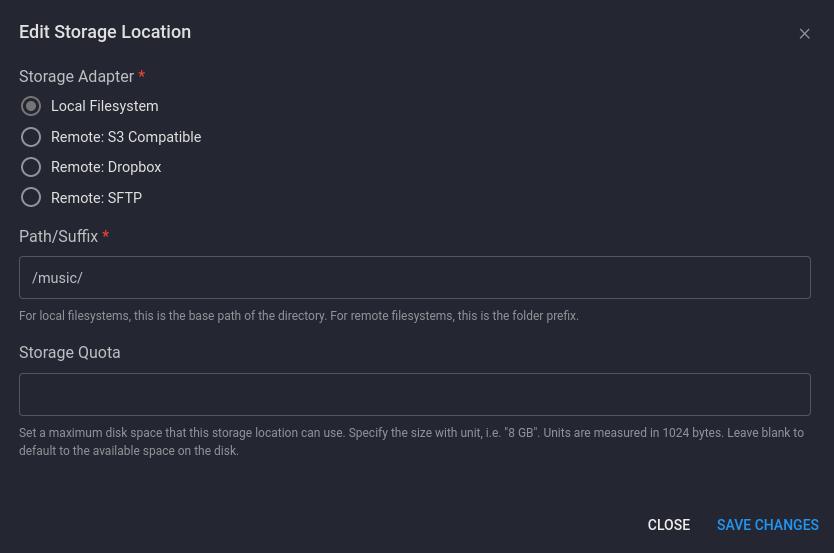
Mounting the file system is easy, simply navigate to the Storage Locations section from the Administration menu by clicking the 3 dots in the top right and add a new storage location which will bring up the menu below. Enter the path you entered in the docker-compose file and save changes.
After a while (depending on your hard drive and system specs) your volume will be processed and reported accurately in this menu.
Changing the default storage location
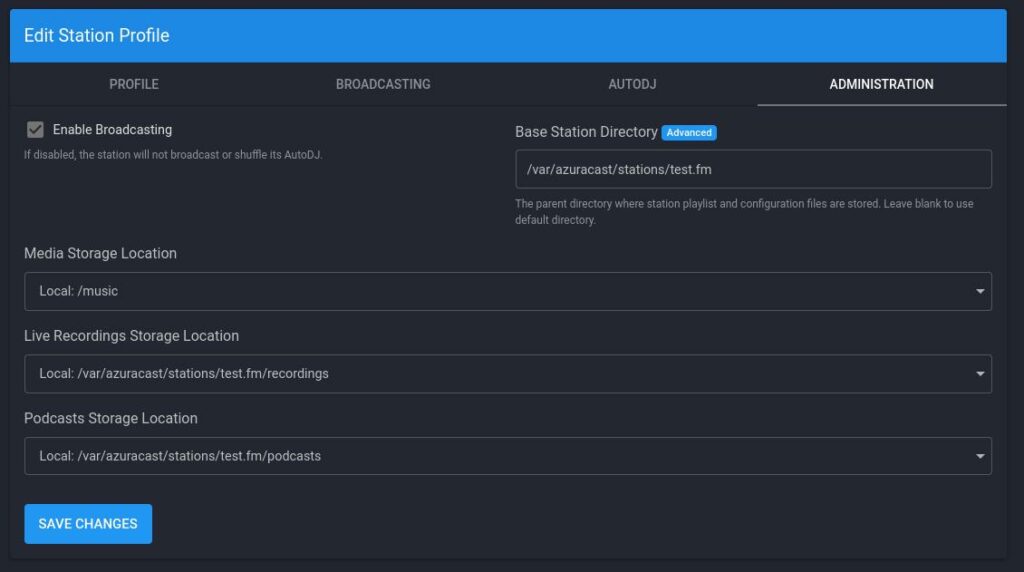
Once you load you volume into Azuracast, to change a stations default storage location you must go back to the Station management page and click Edit Station Profile → Administration and change the media storage location away from the tiny local storage allotment.
Azuracast Station Setup
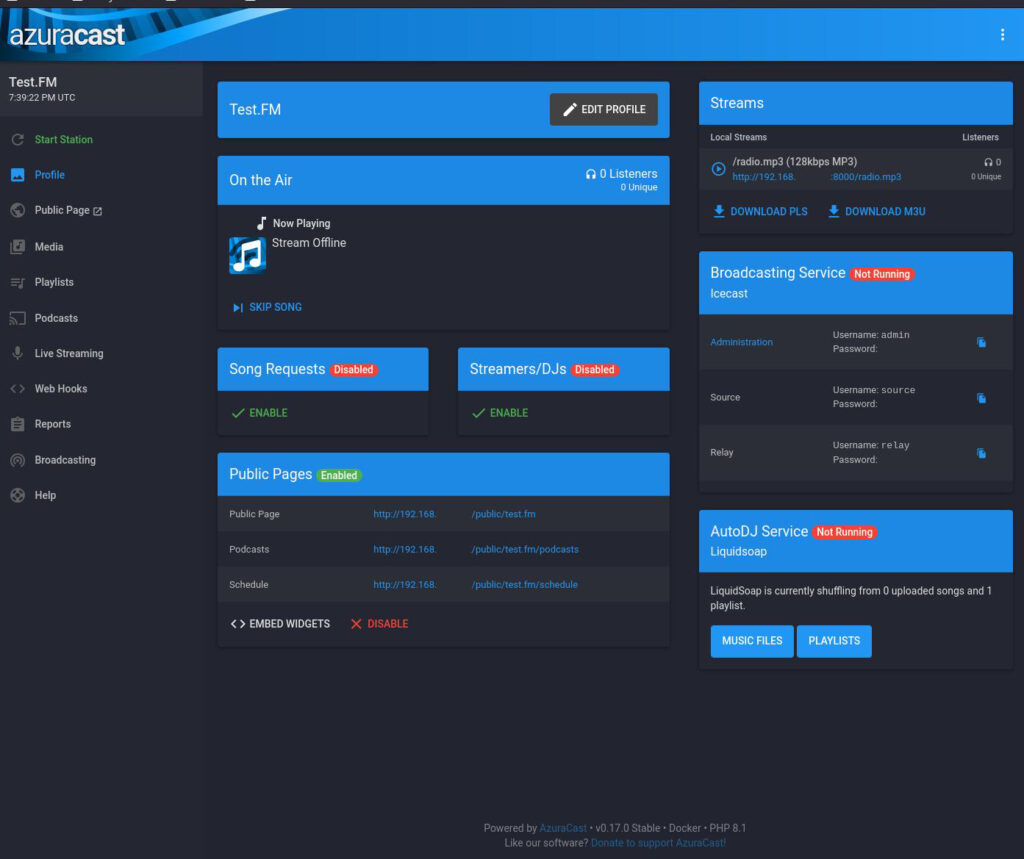
Now that we have a proper music pool, let’s get to the fun part and upload some music and start making some playlists! Head over to the main page by clicking on the Azuracast logo in the top left then click on the manage button on the station we created during the initial install.
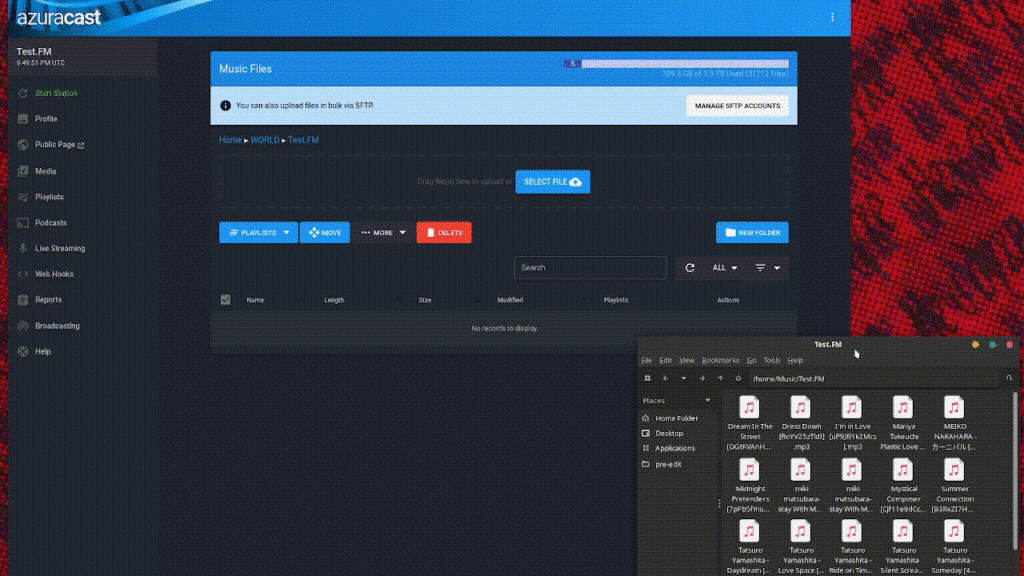
Once you are in the station management screen you’ll want to add some files via the web uploader which can be found via the left hand menu under Media→Music Files. Simply drag and drop your music files into the marked area.
Files you upload this way will appear in the list just under the upload area as well as any files that are already present in the volume. Note that it will take a while for Azuracast to process all of the files in this path (if there are any), more so for larger music libraries. A really neat quality-of-life feature here is that Azuracast will skip duplicates on initial upload, and it also has a duplicate finder, under Media → Duplicate Files.
Creating a Playlist
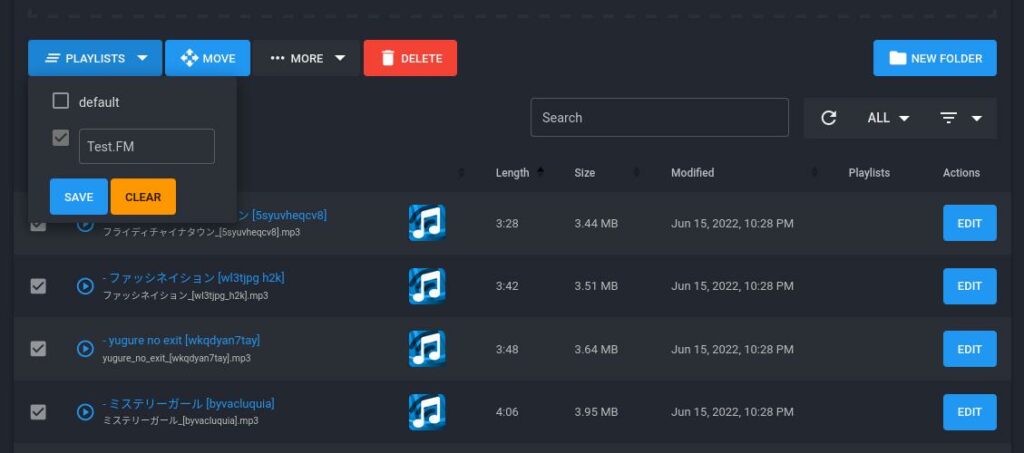
Stations work off of playlists, so in order to get your broadcast started you’ll need to add songs to a playlist. Just check off the songs you want to add (directories work too but take some time especially if they are holding tons of songs) then Click on Playlists, select an existing playlist or make a new one and click save.
You’ll get a success message unless something somewhere went horribly wrong. You can then visit your playlist to modify its behavior by using the left hand menu and clicking “Playlists”. In this menu you’ll find a bevy of settings to modify the AutoDJ playback settings.
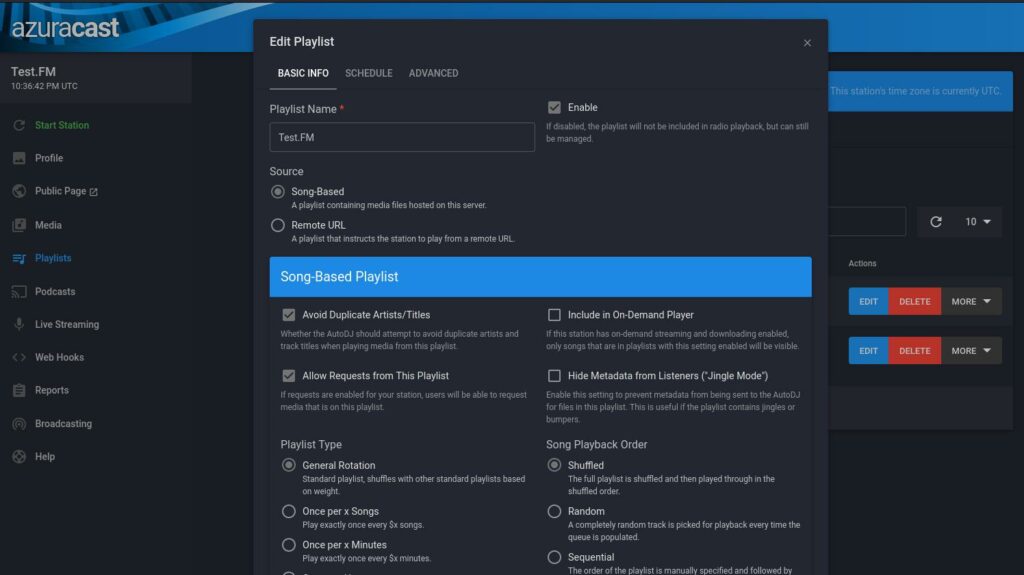
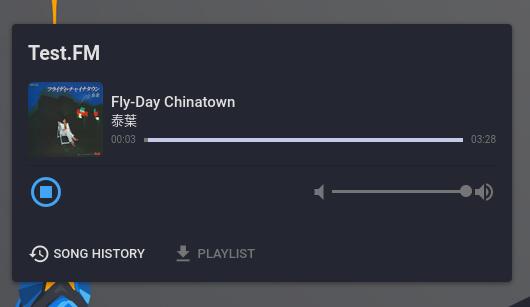
Thankfully Azuracast itself does a great job of explaining what all the settings do, so feel free to tweak these to your heart’s content. Now that our playlist is in place, click ‘Start Station’ and you’ll be able to hear your station at its web page at http://192.168.XX.XX/public/STATION. Or simply click on the “Public Page” link on the left hand menu.
If you have properly tagged music files, the album art cover will also be displayed. I recommend MusicBrainz Picard mp3 tagger for that, available on Arch and Debian systems, link here. Now that the station has been started, it will shuffle through the playlist nonstop according to whatever parameters you set.
Troubleshooting
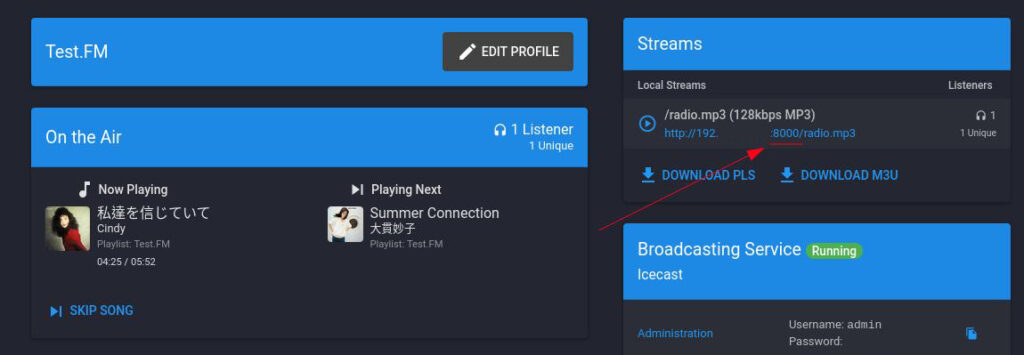
If you don’t hear anything, its more than likely you are experiencing a blocked port issue that can be resolved by adding a port (starting at 8000) through your firewall. To find your current stations’ port, go to your stations main management page and look for the “Streams” section.
Allow this port via ufw like so:
sudo ufw allow 8000
As an addendum to this make sure that you also have web traffic allowed on 80, and 443, to be able to access the web panel outside your network and is a must if you enabled “Web Proxy” earlier.
To be Continued…
That’s it for the first part of this setup, we covered installing docker, using volumes, and installing and configuring Azuracast. Tune in next time when we cover installing Azuri, getting a Discord bot token and configuring Azuri to work in your Discord server. Thanks for reading and I’ll see you in the next part!






2 Responses
I need help with azura cast audio issues
What you need help with?