Would you like to know information about your system? Maybe you want a widget on your desktop for easy access? Let’s say you run a regular desktop or something a little more custom like i3WM. Conky is what you need. Conky is mostly written in C++. The earliest commit I could find was from 2010 on GitHub. The most interesting thing about conky is the customization that you can build on top of. In fact, in some distributions they have many preset conky themes to choose from. You can have one nice informative system monitor or many, all tuned to listen to different things.
Installation
Installing conky is pretty straightforward, as conky has been around for a while. You can likely just use your package manager to download conky. I will give you the commands for Arch, Debian, and RHEL distributions here.
Arch
sudo pacman -S conky
Debian
sudo apt install conky
RHEL
sudo dnf install conky
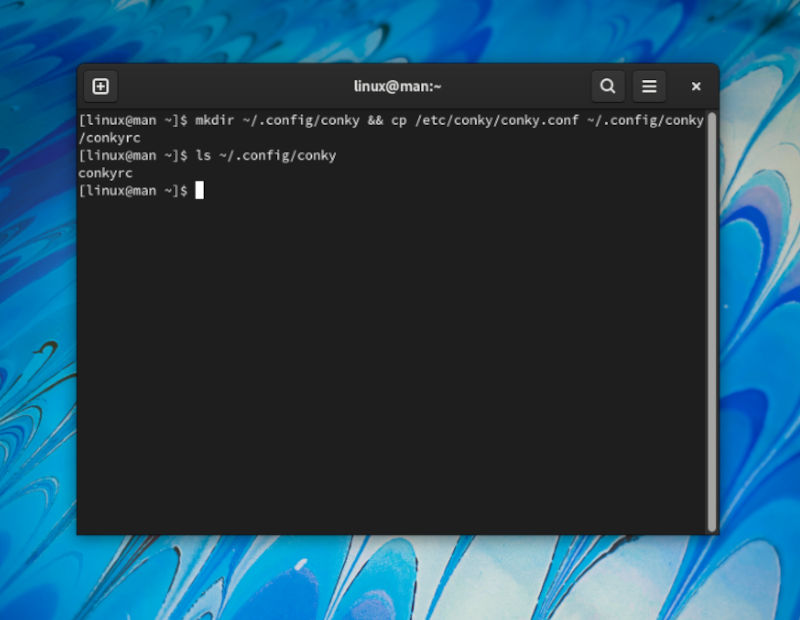
Now you should have a default conky file located at /etc/conky/conky.conf. We will copy the contents into a similar location in our .config file in our home directory.
mkdir ~/.config/conky && cp /etc/conky/conky.conf ~/.config/conky/conkyrc
You can also just leave it in your home directory named .conkyrc. We can check to see if we were successful like this.
ls ~/.config/conky
conky -c ~/.config/conky/conkyrc
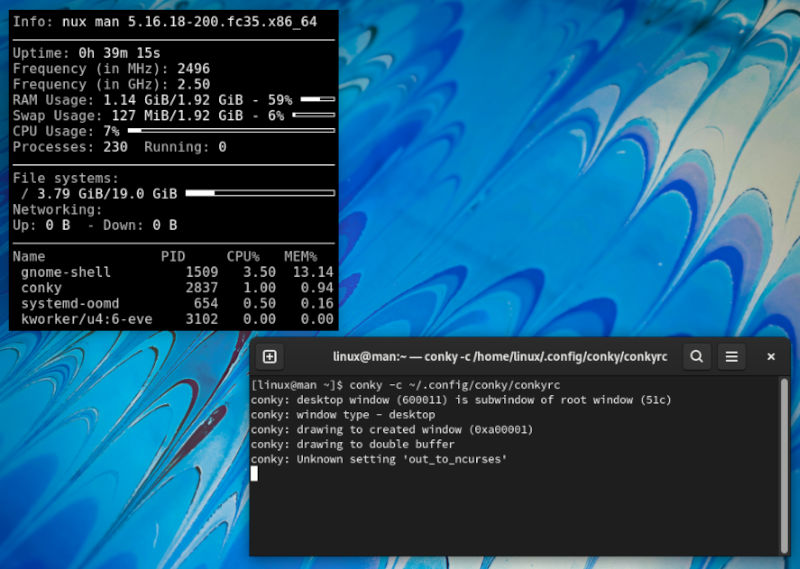
Here we are calling conky from terminal with the -c for configuration option. Then we point to the file we just copied to. This file will give you the default conky. It is rather uninteresting and does not seem to match the system, as it is black and white. In addition, you will want to avoid having to call it all the time in terminal. Fear not as we will get those problems solved, one by one.
Objects
cat ~/.config/conky/conkyrc
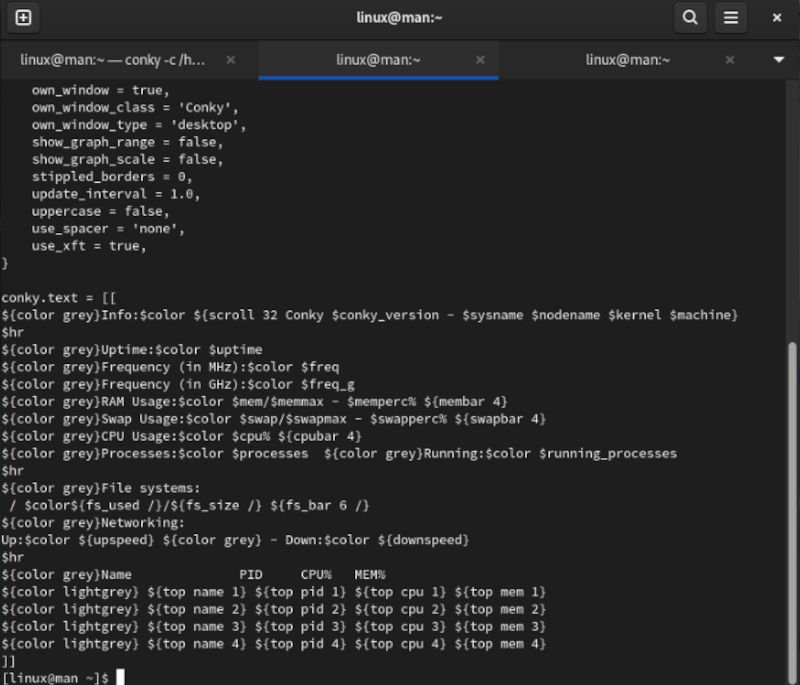
Now you can see in the comments at the top, our configuration file is written in Lua. Don’t worry about it being a different language just focus on having fun. We will work with a few pieces to create a single conky.
vim ~/.config/conky/conkyrc
We can go ahead and delete between these brackets by typing dd on the lines we wish to delete. To edit, we can type a.
					conky.text = [[

]]
Now we will add the nameplate code at the bottom, right where we just deleted the code in our file. We will need to install figlet for this to work. So let’s go ahead and do that.
Arch
sudo pacman -S figlet
Debian
sudo apt install figlet
RHEL
sudo dnf install figlet
					${execi 1000 figlet -f shadow "Words Here"}
${font bold:size=10}Your-SPIN ${hr 3}
${time %l:%M:%S} $alignr ${time %m-%d-%y}${font}
We will need to save the file by first hitting Esc, then we will type :wq, to write and quit. Now you can go ahead and call it again in terminal to see what you think.
conky -c ~/.config/conky/conkyrc
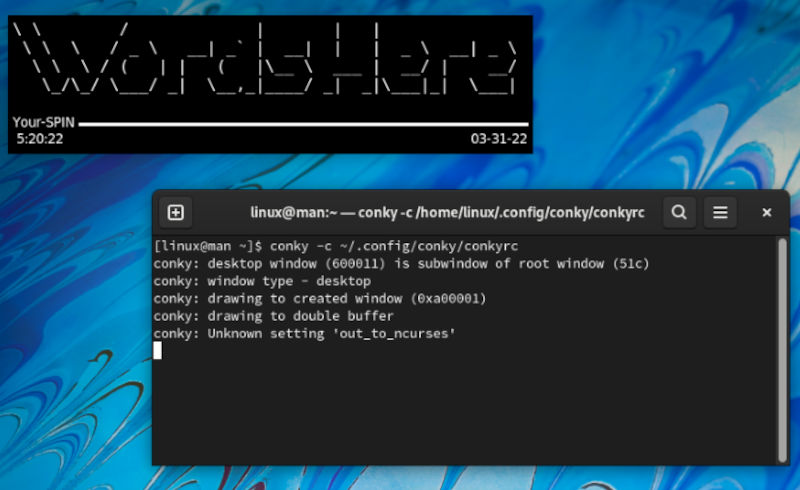
Be sure to edit the code where it says, “Words Here”. As this the section where we are calling figlet inside of conky to draw ASCII characters into words. Also make sure to remember you can run scripts in conky by first using “execi 1000” in front of it. For other font options in figlet try this.
showfigfonts
vim ~/.config/conky/conkyrc
To edit, we can type a. Now we will add the system code at the bottom under the code we just added.
					${font bold:size=10}SYSTEM ${hr 3}${font}
$sysname $alignc $kernel $alignr $machine
Uptime $alignr $uptime
Processes $alignr ${color}$processes / Running:${color}$running_processes
Freq $alignr $freq_g GHz
${font bold:size=10}BATTERY ${hr 3} ${font}
STATUS $alignr ${battery BAT1}
${battery_bar BAT1}
${font bold:size=10}MEMORY ${hr 3}${font}
RAM  $alignc $mem / $memmax $alignr $memperc%
$membar
${font bold:size=10}DISK USAGE ${hr 3}${font}
/    $alignc ${fs_used /} / ${fs_size /} $alignr ${fs_used_perc /}%
${fs_bar /}
/home $alignc ${fs_used /home} / ${fs_size /home} $alignr ${fs_used_perc /home}%
${fs_bar /home}
We will need to save the file by first hitting Esc, then we will type :wq, to write and quit. Now we should see a larger conky.
conky -c ~/.config/conky/conkyrc

Numerous
Now we are going to make many conky configuration files and leave them in the directory we made earlier. Go ahead and just download it from my GitHub. My settings are for display on i3WM. So change the own_window_type to desktop if you are not using i3WM. Make sure to play with the color as well, you can add HEX values in default_color or any of the other color fields. Just have fun. Remember, conky starts out as an ugly duckling, but you can make it yours with some tweaking.
git clone https://github.com/PyOfile/Conky-Learn.git && cd Conky-Learn && cp -r conky ~/.config
This will give you every conky in the repository, right in the directory we created before. This is what it looks like in i3WM with just three of them active.

Now you can see the nameplate conky on the bottom left. My system’s conky on the top right and the CPU conky on the bottom right. I turned off my network conky, as I have it set to display network IPs. If you don’t need something like this, then you can see that you don’t need to add it. In i3WM you can just add this to your I3 config file like so.
					# Conky
exec --no-startup-id conky -d --config ~/.config/conky/config-nameplate.conf
exec --no-startup-id conky -d --config ~/.config/conky/config-calender.conf
exec --no-startup-id conky -d --config ~/.config/conky/config-network.conf
exec --no-startup-id conky -d --config ~/.config/conky/config-system.conf
To run conky on a regular distribution, you can click the icon. You can also check out some of the bundle packs that have a GUI. With those you can adjust the X/Y settings to move them into place. Hey, why not play with all the settings little by little, so you can test and fix any breakage. It is best to start them in terminal until you like their placement and design. GitHub is also a great place to find conky themes there are a million and one themes on there . They are full of very cool and much more graphic setups. Thanks for reading.