Sometimes you just need to use Samba, be it on Windows or Linux. We all need to get our work done securely, with good permission practices and authentication to boot. Created in 1992, Samba has provided to be a secure, stable, print services for all clients using the SMB/CIFS protocol, such as all versions of DOS and Windows, OS/2, macOS and Linux. Keeping offices and remote workers alike in the same file system, no matter your choice of operating system. After all, you should not have to give up your digital freedom to go to work.
We will not only focus on improving your existing Samba on a VPS, but create permissions that will limit things like read and write rights. So if you are a small business needing to secure Samba, this is the blog for you. Thew cool thing is you could even build such a server on a Raspberry Pi for home uses. So get comfortable, log into your VPS running Samba on Debian 11. Let’s get right into it!
Configuration
We will get right into configuration by taking a look at smb.conf to change a setting. We will also add a public share, private share and a configuration you can use on your home server.
sudo vim /etc/samba/smb.conf
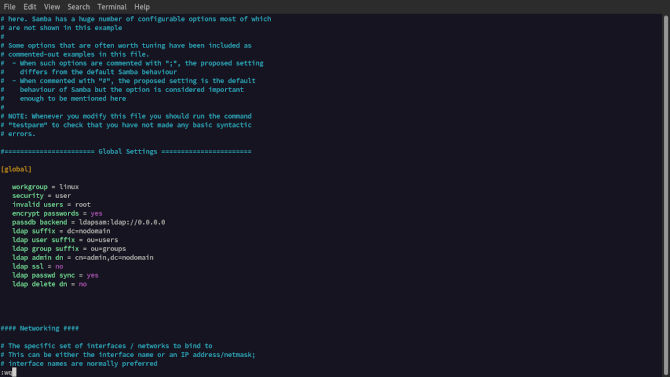
This file is very populated with pre-configurations. We are going to leave most of them alone. One configuration we can change is the default workgroup value under [global]. You can make it whatever you like, just make sure to take note of it for later use. Later when connecting to the shared directory we will be prompted to share the workgroup name.
					[global]

       workgroup = linux
       security = user
       invalid users = root
       encrypt passwords = yes
       passdb backend = ldapsam:ldap://0.0.0.0
       ldap suffix = dc=nodomain
       ldap user suffix = ou=users
       ldap group suffix = ou=groups
       ldap admin dn = cn=admin,dc=nodomain
       ldap ssl = no
       ldap passwd sync = yes
       ldap delete dn = no
The reason is changing the default workgroup is can get you one more defining
factor to log in that is not just defaulted to a known name. Next you may want
to make sure only a user can log in. We also may not want root privilege
escalation. So we will make that invalid. We will also want to make sure the
passwords are encrypted. Following this we will set the LDAP configuration we
will talk about more in the authentication section. Now we will create the
needed directories.
					mkdir /home/linux/public
mkdir /home/linux/private
Next, we will want to add a few pieces at the bottom to set our configurations for a VPS.
					[public]

   comment = Public Folder
   path = /home/linux/public
   writable = yes
   guest ok = yes
   guest only = yes
   force create mode = 775
   force directory mode = 775


[private]

   comment = Private Folder
   path = /home/linux/private
   writable = yes
   guest ok = no
   valid users = @linux
   force create mode = 770
   force directory mode = 770
   inherit permissions = yes
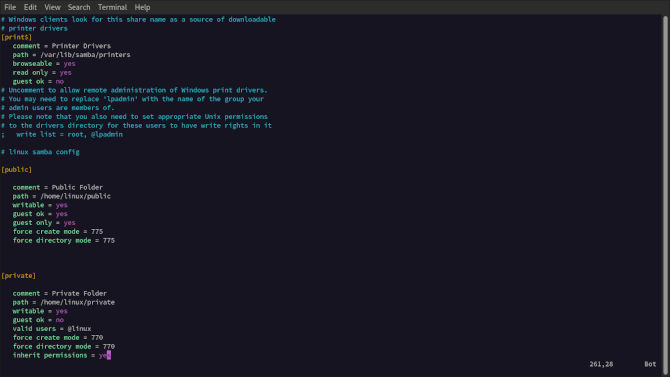
Here you will notice a few different options we chose in the configuration file. We started by added a comment to name each configuration, both public and private. Next, we defined the path for each directory. We decided to use a home directory for our user linux. Next, we made them both writable, as what use is a file system you cannot write to. Next we defined if guest are ok. They are different answers for private and public, for the reason that is in their names.
Now we have some differences, so we will explain public then finish up private. In public since guest are ok we will also add guest only. So, it will be a more accessible share. Next we have the permissions for both create and directory modes respectively. Giving 775 is in this case because we are less worried about a public share. Now for the final configurations in the private, after denying guest, we added the valid users as @linux. After that, like the public configuration, we added permissions to create and directory modes. But this time we added 770 because we want a higher level of access to this share.
Permissions
Next thing we will want to do is add the user group linux.
sudo groupadd linux
Now we will need to give the correct permissions to the share group named linux.
					sudo chgrp -R linux /home/linux/private
sudo chgrp -R linux /home/linux/public
Now we will handle the permissions for the directories themselves. The value 2 at the beginning, stands for the SGID bit. This allows newly created files to inherit the parent group.
					sudo chmod 2770 /home/linux/private
sudo chmod 2775 /home/linux/public
Authentication
Now we will make a no login user for the linux group.
sudo useradd -M -s /sbin/nologin linux
Now we can add linux to the Samba share group.
sudo usermod -aG smbshare linux
Next thing to do is create a Samba password to secure the user linux.
sudo smbpasswd -a linux
Finally, we can enable the user linux.
sudo smbpasswd -e linux
Now we will be adding LDAP (Lightweight Directory Access Protocol) on Debian. The package is called libpam-ldapd. In addition, you can add something like ACL’s, like we wrote about in How to use ACL in Linux. First things first, we should install the needed package. We are using Debian 11, so we will be using aptitude to download these packages. First we will update, then we will pull down the package we require.
					sudo apt update && sudo apt upgrade -y
sudo apt install libpam-ldapd
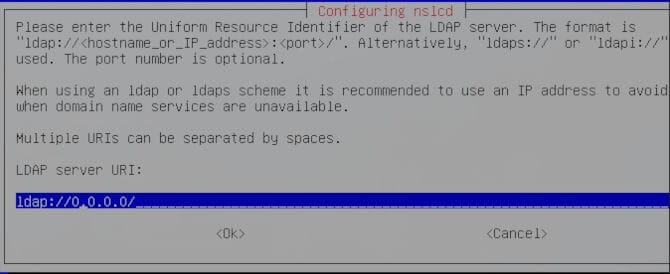
Now you will be greeted with a few choices. You will need to add your IP in place of “ldap://0.0.0.0/”.
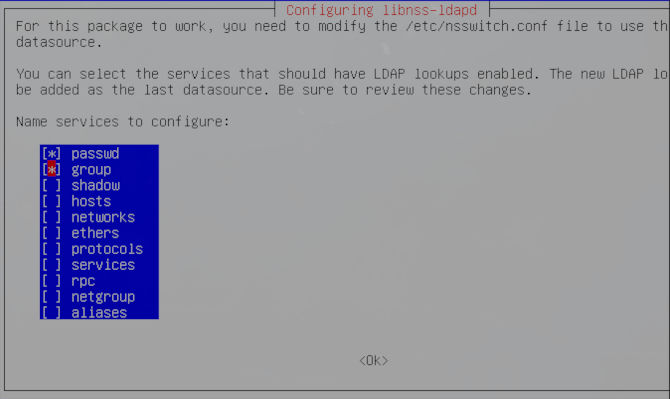
Now you will be prompted to choose some services. We will just select password and group like we added to our globals, located in the smb.conf file.
Now we will need to edit /etc/nsswitch.conf to make further configuration changes. Without over elaborating you can change the same properties from before in this configuration file and add some values to improve how tight you run your ship.
sudo vim /etc/nsswitch.conf
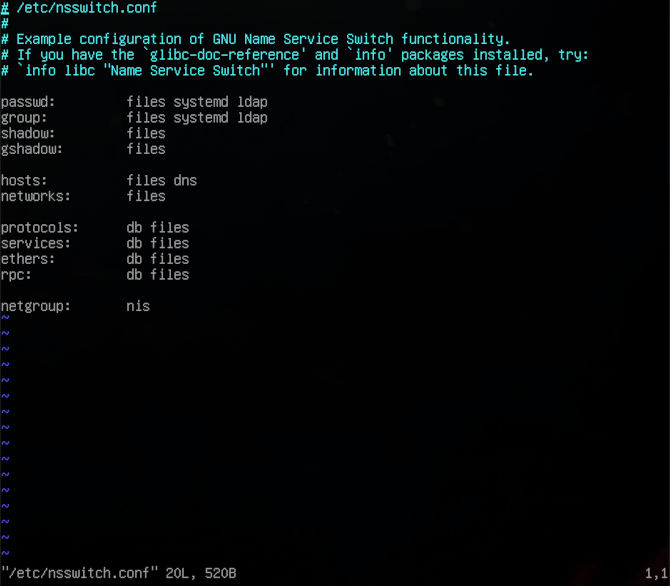
So, you can see with just an extra package you can add some additional authentication. Now we have to be sure to restart Samba to make use of our new configuration.
sudo systemctl restart smbd
Accessing Samba
Now we can go ahead and get access to our shared system with a tried a true application included by default on Gnome, Nautilus. So if you are not running Gnome, we will start by installing Nautilus on a few distributions to help you out.
Arch
sudo pacman -S nautilus
Debian
sudo apt install nautilus
RHEL
sudo dnf install nautilus
Now we can go ahead and open up Nautilus and get started with our connection.
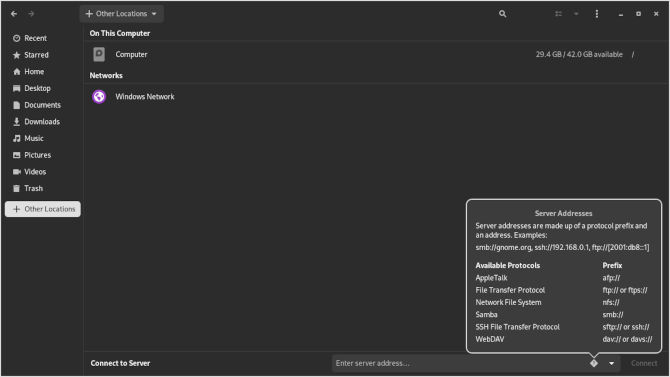
Now we will want to put our attention to the left side at the bottom, looking for “+ other places”. We will see our computer directory at the top. We will look to the bottom where is says “connect server”. You can see that Nautilus comes with some nice directions if you click on the question mark.
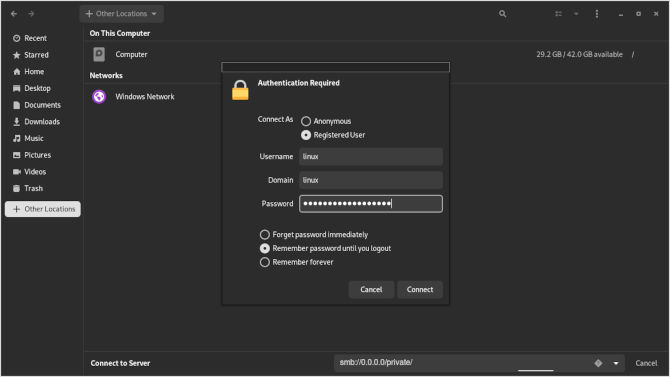
smb://0.0.0.0/private/
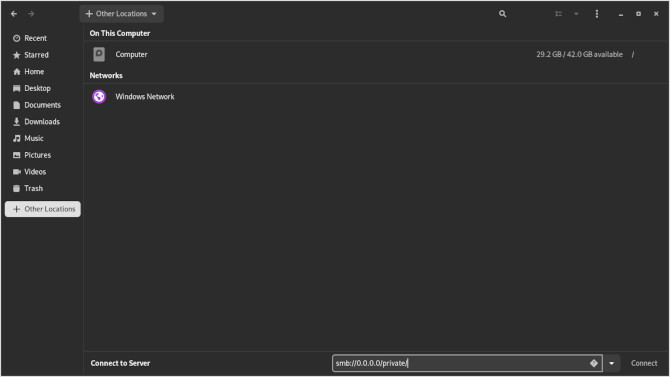
This includes the user linux, the workgroup linux and the super secret password we created for the user. Giving you three points of authentication, while also maintaining a strong password. Now that we have a connection, you should see our text file from before displayed in Nautilus.
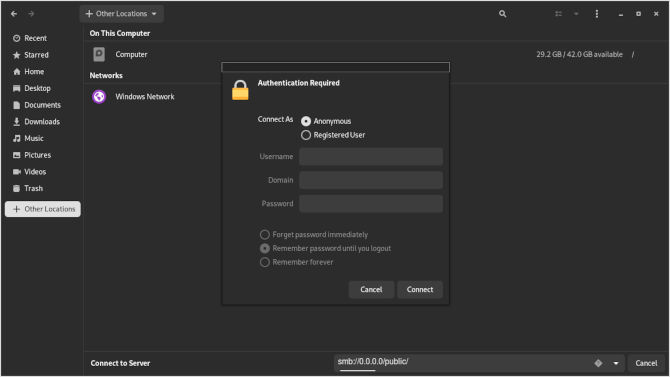
Now we can repeat the process, but for the public share.
smb://0.0.0.0/public/

When using the public directory, you can just use the Anonymous sign in.
Bonus
Now that we have our new Samba shared directory, we may want to fill it with files. This is great, but wouldn’t be great to be able to find these files without snooping around. For this, we can be on the server inside the shared directory, or we can open a terminal from the shared directory in Nautilus and write a new find.sh file from gedit to make finding stuff way easier.
vim find.sh
Now we will write in the follow script to help us find stuff.
					#!/bin/bash

read -p "What file are you looking for? " f

find / -iname "$f" 2> /dev/null

echo "Happy file hunting!"

Now we can hit Esc key and type :wq to write and quit the file. Now we can try out our file hunter by pointing it at our test.txt file.
./find.sh
Now you are all set to read, write, and execute scripts on your Samba shares as you choose to permit. This Can be a real game changer for a small business or just the home office. So set up your Samba installation on your VPS and put it to use. Till next time, thanks for reading.