For years Compton has been the go-to compositor for those that want to control panel opacity or smooth window animations. Turns out a few years ago they transitioned over and remained legacy friendly. Well, currently they are issuing a warning that they will be getting rid of legacy compatibility very soon. There is nothing to worry about, as the transition was smooth, and they are issuing a warning in the terminal. The question is, “Are you seeing them?” If you are like me, you may have been running Compton with a configuration file automatically in i3WM. So, this author right here would have totally missed it. Could have ended in one of those situations where you wonder why everything just got so ugly. What broke on my system?
We will cover the transition from Compton to Picom. We will go over how to edit your configuration files and change any naming conventions to be future compatible, so we don’t run into any issues. If you want to install Picom, then we have got you covered with installation. Next we will cover using a Picom configuration file. Then we will go over how to use it to achieve some effects.
Transition
For the last few years this author has been using the old naming convention from the Compton days, when my fellow author noticed the error. I had to see it for myself since Compton was running in the background. Turned out they had made Compton into Picom. This is backwards compatible as of the time this blog was published. So, that gave me the idea to not only update my dot files, but tell everyone in Tile Land that backwards compatibility will be coming to an end. You cannot blame them as they will be able to lighten the code.
This compositor has been renamed to "picom", the "compton" binary will not be installed in the future.

So if you have and existing file we will help you change the naming convention and get you back on track. You don’t want to one day become very surprised at the state of your tiling manager looks. Furthermore, what is the point of modding if not to have all your transitions and opacity how you want it. So stick around, and we will get you back on track.
Future Proofing
To get your current configuration back up to speed we will help you rename your files and set you up with a directory system that works. So, first we will create the new needed directory.
mkdir ~/.config/picom
Now that we have the new directory to place our configuration files we can go ahead and move over the configuration file and rename it using one of the following command strings. As it depends on what you named your file and where you stored it.
mv ~/.config/compton/config ~/.config/picom/config
If you used the ~/.config/compton.conf location and naming convention, try this.
mv ~/.config/compton.conf ~/.config/picom/config
Notice we are trying to get the configuration and directory to look similar to a i3WM configuration. It’s just well-organized and Picom looks for them there. You are welcome to play around with this and make it work for your configuration convention. Following this, you can make sure everything work by refreshing your desktop. You can just install Picom going further, though installing Compton still installs Picom for the mean time. Your configuration should still work just fine the way it is. Stick around for a nice sample to soup up your configuration.
Installation
We will cover installing Picom on Arch, Debian, and RHEL distributions and their descendants.
Arch
sudo pacman -S picom
Debian/Ubuntu
sudo apt install picom
RHEL/Fedora
sudo dnf install picom
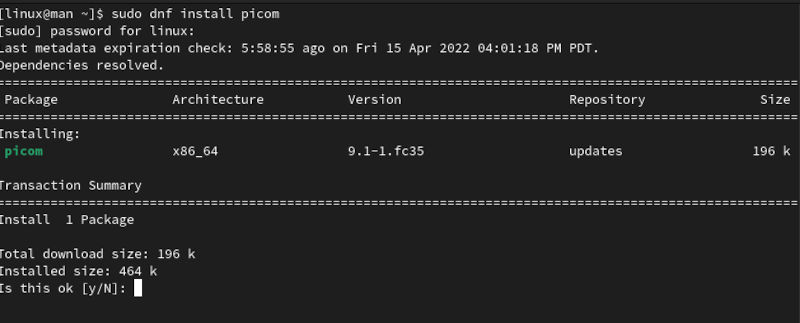
You can see that Picom is rather easy to install. It is available in most repositories. All we need to do is write a configuration file to use Picom productively.
Picom Config
Now that we have Picom installed let’s create the appropriate directory and configuration file.
mkdir ~/.config/picom && touch ~/.config/picom/config
Once we have the file ready to write to, let’s go ahead and do that in Vim.
vim ~/.config/picom/config
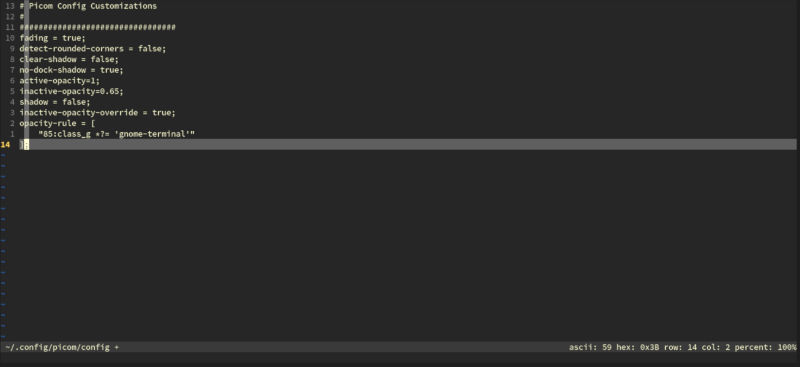
Go ahead and add a basic configuration to start. This way you can understand just how simple it is.
					# Picom Config Customizations
#
#################################
fading = true;
detect-rounded-corners = false;
clear-shadow = false;
no-dock-shadow = true;
active-opacity=1;
inactive-opacity=0.65;
shadow = false;
inactive-opacity-override = true;
opacity-rule = [
	"85:class_g *?= 'gnome-terminal'"
];
This is just a really basic configuration that can make a big difference if you are running a conky or anything you want to control the opacity of. This was more of a “hello world” type of Picom configuration. For something a little more functional, let’s see a little more complicated configuration. Do not run them both at the same time.
This is just a really basic configuration that can make a big difference if you are running a conky or anything you want to control the opacity of. This was more of a “hello world” type of Picom configuration. For something a little more functional, let’s see a little more complicated configuration. Do not run them both at the same time.
					# Shadows
#
#################################
shadow = true;
# no-dnd-shadow = true;
# no-dock-shadow = true;
# clear-shadow = true; # Now on by default
shadow-radius = 5;
# shadow-radius = 0;
shadow-offset-x = -5;
# shadow-offset-x = 0;
shadow-offset-y = -5;
# shadow-offset-y = 0;
# shadow-opacity = 0.5;
shadow-opacity = 0.8;
shadow-exclude = [
    "! name~=''",
    "name *= 'picom'",
    "name *= 'Firefox'",
    "class_g = 'Conky'",
];
shadow-ignore-shaped = false;
#
# Opacity
#
#################################
# menu-opacity = 1;
inactive-opacity = 1;
active-opacity = 1;
frame-opacity = 1;
inactive-opacity-override = false;
# alpha-step = 0.06;
detect-client-opacity = true;

opacity-rule = [
"85:class_g *?= 'gnome-terminal'"
];
active-opacity=1;
inactive-opacity=0.65;
# inactive-dim-fixed = true;
# blur-background = true;
# blur-background-frame = true;
blur-background-fixed = false;
blur-background-exclude = [
    "window_type = 'desktop'"
];
#
# Fading
#
#################################
fading = true;
fade-delta = 4;
fade-in-step = 0.03;
# Opacity change between steps while fading out. (default 0.03).
fade-out-step = 0.03;
# no-fading-openclose = true;

fade-exclude = [ ];
#
# Other
#
#################################
focus-exclude = "x = 0 && y = 0 && override_redirect = true";
detect-transient = true;
detect-client-leader = true;
detect-rounded-corners = false;
#
# Window type settings
#
#################################

wintypes:
{
    tooltip =
    {
        # fade: Fade the particular type of windows.
        fade = true;
        # shadow: Give those windows shadow
        shadow = false;
        # opacity: Default opacity for the type of windows.
        opacity = 0.85;
        # focus: Whether to always consider windows of this type focused.
        focus = true;
    };
    dropdown_menu = { shadow = false; };
    popup_menu    = { shadow = false; opacity = true; };
    utility       = { shadow = false; };
};

Here you can see we added numerous new effects to different parts of your GUI. The way to add this to your i3WM configuration is to call it like this.
exec_always picom --config ~/.config/picom/config
You can call it in a similar fashion in other WM (Window Managers). We added _always to the exec command so that whenever you reload i3WM, you will see the results of your configuration changes. The best part is you can really play with your shadow, and opacity, per application and globally. Without these things, you will certainly have a minimal OS with no bells and whistles. Your imagination is really what your limits are here. We hope you found this informative, thanks for reading.