Apache is part of the classic LAMP stack and aims to be an efficient and extensible HTTP server. Apache was launched in 1995 and has been going strong to this day. If you are serving up a PHP project, static website, web app, or pretty much anything, Apache should be your go to web server. Before we install Apache, we need a target machine to work on, this can be either a VPS or a virtual machine or whatever. We also will need a understanding of DNS. If you already know all this, feel free to skip to installing Apache.
A word on DNS
The simplest explanation of DNS would be like using a phone book to look up a service. When we hit up a website at http://www.example.com we are making a request to a name server that then directs your request to a web server (like Apache) which can handle HTTP requests and forward our request to the right destination. But how does the browser know where to go? This is done through the use of ‘A’ or address records which point a domain name like www.example.com to an IP address. once it hits the web server, its Apache’s job to display whatever it needs once the user gets there.
Setting up a nameservers
Here’s an example DNS setup using NameCheap as the domain name registrar and Digital Ocean as DNS manager. No matter who you purchase your domain from, you’ll have some kind of domain management panel where you can point your domain to external name servers. here’s what NameCheap’s panel looks like. If using other registrars look for an option that says ‘Name Servers” or something like ‘Custom DNS’ and you’ll be able to point your domain to an external name server service.

In Digital Ocean’s admin panel, under networking you’ll be able to add your domain which will automatically be populated with Digital Ocean’s NS (name server) records and you’ll be able to add ‘A’ records that you can point at an IP.

A records aren’t too complex and a standard one will typically look like his:
| Hostname | Type | Value | TTL |
|---|---|---|---|
example.com |
A |
your_ip |
3600 |
www.example.com |
A |
your_ip |
3600 |
In the above example we have two A records setup, one for the root domain, and one for the optional “www.” subdomain which just functions as general symbol for a web resource. The TTL (time-to-live) specifies in seconds how long it will take to update the A record if it gets changed after the fact, in this case 3600 = 1 hour.

Subdomains are kick ass because you can have as many as you want or are able to host. If you are going to use a VPS, you can name your test subdomains whatever you want for example:
| Hostname | Type | Value | TTL |
|---|---|---|---|
w1.example.com |
A |
your_ip |
3600 |
w2.example.com |
A |
your_ip |
3600 |
Installing Apache
As always make sure you’ve updated your system before you install anything for a smooth experience. Here I’ll be using the latest Ubuntu LTS.
					# all in one command on Ubuntu/Debian:
sudo apt update && sudo apt upgrade -y

# install apache
sudo apt install apache2
If you are running this on a VPS or going to be publicly exposing ports to the internet, please use a firewall. It takes almost no time to set up a firewall and you’ll be blocking unauthorized traffic with the best of them. Note that UFW is not enabled by default, so you’ll want to add your SSH port and allow Apache through your firewall before you start it. The default ports for web traffic are 80/443 for HTTP and HTTPS, respectively. Instead of adding them separately we can just use UFW’s software profile and we’ll be able to add both under one rule.
#to see available profiles
sudo ufw app list

# allows web traffic through ports 80 & 443
sudo ufw allow "Apache Full"

#to check whats being allowed/denied
sudo ufw status

# start ufw
sudo ufw enable
After you allow Apache through, you should be able to visit your server at http://<YOUR_SERVER_IP>/.
Setting up a website in Apache
Virtual hosts are what Apache calls its website configuration files. By default Apache will serve files out of /var/www/html. This is fine, but personally I just don’t like having that extra /html/ in my file path. Instead of using the typical path we will serve just out of /var/www/.
Creating assets to host
Let’s create a couple of static website examples to work with.
sudo mkdir /var/www/w1.com /var/www/w2.com
Next lets create some sample HTML documents to serve up.
sudo touch /var/www/w1.com/index.html /var/www/w2.com/index.html
To skip having to vim into both of these files and edit them manually, we will use cat to append the following HTML content into the files. First we need to switch to the root account as sudo permissions alone won’t suffice.
					#switch to root
sudo -i
Then using cat with an arrow direction operator (>) we enter a text entering mode where you can copy and paste text into the terminal and when you are done, simply use CTRL+D to exit this mode.
					#depending on what file you edit first
cat > /var/www/w1.com/index.html
# or
cat > /var/www/w2.com/index.html
Hit Ctrl + D to exit.
Do this for both HTML files.

Now we will do the same for the 2nd HTML file.

Next you’ll want to verify that the files have content in them by running the following:
					cat /var/www/w1.com/index.html
cat /var/www/w2.com/index.html
Then you’ll need to give ownership of the files to the www-data user/group
					sudo chown -R www-data:www-data /var/www/w1.com/
sudo chown -R www-data:www-data /var/www/w2.com/
Once that is done, we can create a pair of virtual host files. Apache stores its virtual hosts in: /etc/apache2/sites-available/ . Using the text editor of your choice create the following file, for w1, then edit the values of the files to match w2.
#for web2 edit the values
sudo vim /etc/apache2/sites-available/w1.conf
#/etc/apache2/sites-available/w1.conf
<VirtualHost *:80>
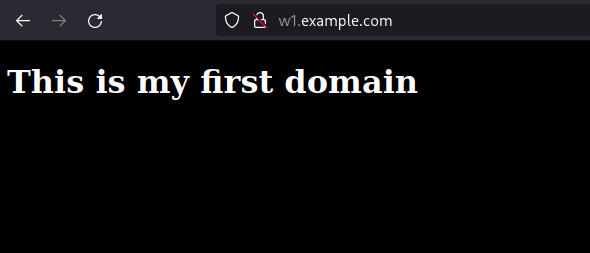
ServerName w1.example.com
ServerAlias www.w1.example.com
DocumentRoot /var/www/w1.com
DirectoryIndex index.html
ErrorLog ${APACHE_LOG_DIR}/error.log
CustomLog ${APACHE_LOG_DIR}/access.log
</VirtualHost>
A virtual host is made up of many directives, that define how the page acts when someone accesses it. ServerName and ServerAlias define the base domain and matching aliases, DocumentRoot tells Apache where to look for the files. DirectoryIndex allows you to specify the default page to show when a user requests it. The ErrorLog & CustomLog directives are where errors are logged and where all requests that are processed by the server are logged, respectively.
Enabling a virtual host
Once you’ve created the host files, you must then move then to /etc/apache2/sites-enabled/ using an Apache utility, a2ensite to make them available for hosting.
					sudo a2ensite w1.conf
sudo a2ensite w2.conf
If you are using a fresh instance of Apache then you’ll want to disable the default Apache landing page. To disable the landing page use this command:
sudo a2dissite 000-default
After you run those commands Apache will prompt you to restart, but before we do that, let’s check for errors using apache2ctl.
sudo apache2ctl configtest
You should see the following:
					Output
Syntax OK
But if you get output that looks like this:
					AH00558: apache2: Could not reliably determine the server's fully qualified domain name, using 127.0.1.1. Set the 'ServerName' directive globally to suppress this message
Syntax OK
Don’t fret, so long as you get a ‘Syntax OK’ message, you are in the clear. If you don’t get that message then something went sideways while making your conf files and you’ll need to backtrack to fix them.
Clearing an error (optional)
If you have a mighty need to clear the error message you may add a ServerName directive in the global Apache config file located here: /etc/apache2/apache2.conf. This can be the server’s domain or IP. Look for the line that says “Global configuragion” around line 57 and place it there. Following that restart Apache using this command:
sudo systemctl restart apache2
If you are on a VPS with DNS configured you’ll be able to visit your example sites using whatever subdomain you assigned to them. If you did this on a VM or you don’t have a domain assigned to your machine, you’ll have to edit the hosts file of the machine you are currently on to see your domains.
Using /etc/hosts
Edit the host file of the machine you are on, not the server’s host file, and add the following entries to the file in order for your browser to direct your requests locally instead of through A DNS server.
sudo vim /etc/hosts
Inside your host files you’ll find your local address, and in here we’ll need to add lines for our test subdomains. All you need to add is the IP of your Apache server and the domain name we specified earlier in the conf files.
					192.168.133.53 w1.example.com
192.168.133.53 w2.example.com

Conclusion
Our websites won’t be winning any awards in the looks department but we are now hosting multiple domains using Apache. Hopefully you’ve found this guide helpful and are ready to use Apache to its fullest and get your ideas out there!